How to Replace Light Bulbs with LEDs
High Brightness LEDs
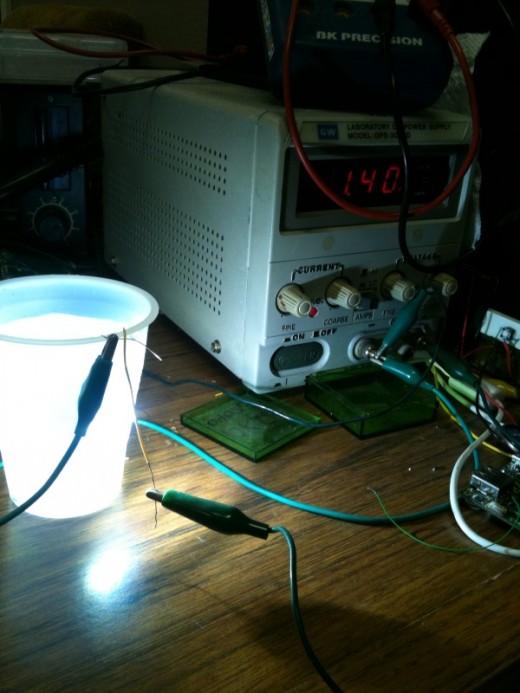
LEDs, such as this one pictured above, can become very hot. This particular one is being fed 4.5 watts, most of which is being converted to heat. For this reason, my prototype solution was to run the light under water.
High brightness LEDs are very sensitive to current variation, and should never be run with a simple current limiting series resistor alone. The extreme heats and easy thermal run away of high brightness LEDs demand a precision current regulator to maintain constant current. My laboratory power supply, visible in the picture, is set to supply a constant 1.4 amps of current regardless of supply voltage and internal resistance of the LED. This is the max rating of this particular LED.
Amazingly, the LED was so bright, that the rest of the room looks dim due to the cameras brightness compensation. In actually the room was well lighted already, and the LED was many times brighter than the apparent brightness of the sun (when viewed from Earth!).
Low Brightness LEDs
Low brightness LEDs can afford a simple circuit solution. Often, the only values needed are the current requirements of the LED, usually about 20mA and the supply voltage, which is often application dependent. When running off two AA batteries, the combined total voltage being 3 volts, the 20mA LED requires a 150 ohm resistor attached in series to prevent excessive current draw from the LED. I obtained this value simply by dividing voltage by current (in amps). The 20mA must first be converted to amps, which is 0.020 amps. So, then, 3 volts divided by 0.020 amps = 150 ohms. Pretty easy.
Then, we decided on the proper wattage rating for the resistor, just to be safe. A popular formula, based on ohm's law, is power = current squared times resistance. Power is measured in watts, so solving this formula for our 150 ohm resistor, will tell us the necessary watt rating. P = 0.020amps^2 * 150 ohms = 0.06 watts. This is the amount of power the resistor will dissipate away as heat. The reason the resistor is added in the first place is to protect the LED from too much power. This is very wasteful, but will suffice for low power LEDs. A RadioShack brand regular axial resistor is 1/4 watt (0.25 watts) so that will provide plenty of overhead.
Finally, an efficiency calculation. Since we already know the resistor is burning up 0.06 watts, we need to find out what the total circuit is using to calculate the efficiency. This part is a little more complicated. The LED doesn't have a resistance in the conventional sense, which is why it needed the limiting resistor. While the circuit is running, attach a set of volt meter probes across the LED terminals with the multimeter set to measure volts. The current through the LED is already known to be 0.020 amps. Since another formula for power is volts times amps, all we need to know is the voltage across the LED. Let's suppose that the particular LED you measured was 1.8 volts, then the power consumption of the LED, in this example, would be a total of 0.036 watts. The total power consumption of the entire circuit is 0.036 watts + 0.06 watts = 0.096 watts. The efficiency is power out / power in, which is 0.036 watts / 0.096 watts = 0.375. Multiplying by 100 gives percentage for a final answer of 37.5% efficiency. So, most of the energy is lost as heat, but it gets the job done, and uses nothing but a single resistor.

