How to replace headlight and passing lights on Indian Motorcycle Chieftain
Updated on March 29, 2019
STEP 1: Remove Headlight
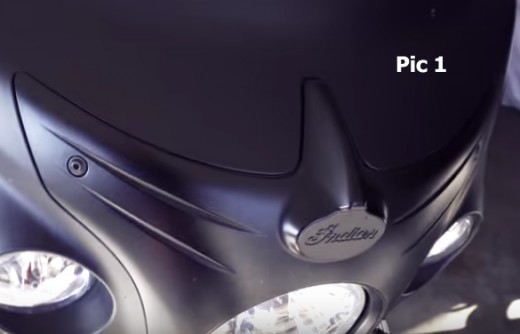
- Remove the 2 allen bolts on the front fairing. (see pic 1) (M6 x 1.0)
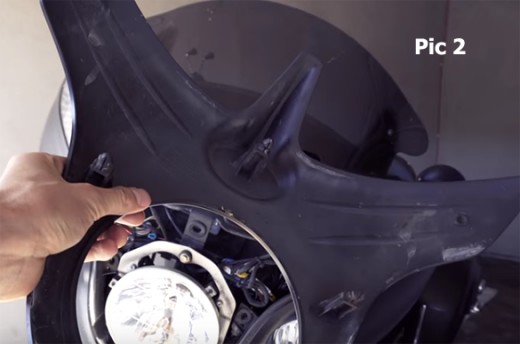
- Once the 2 allen bolts are removed, pry the front piece off with a non-marring tool. There will be rubber grommets holding it in also, similar to the side panels. 3 grommets. 1 upper middle and 2 on each side of headlight, above the center of light. (see pic 2)
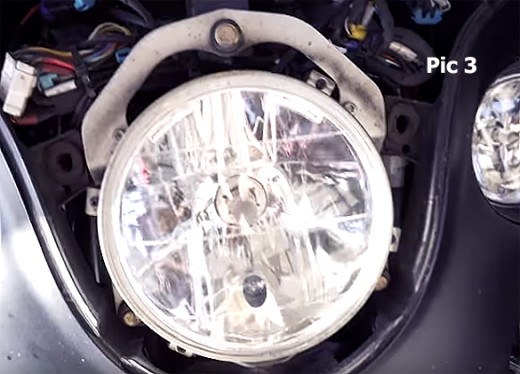
- With the headlight assembly more showing, remove the 4 Philips screws. Make sure you have something covering the front fender just in case something drops on it. (see pic 3)
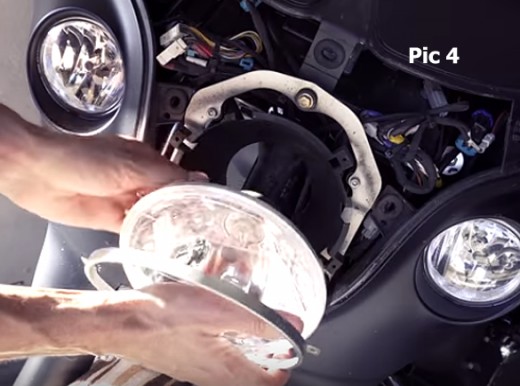
- As you remove the 4 Philips, remove the retaining ring around the light. (see pic 4)
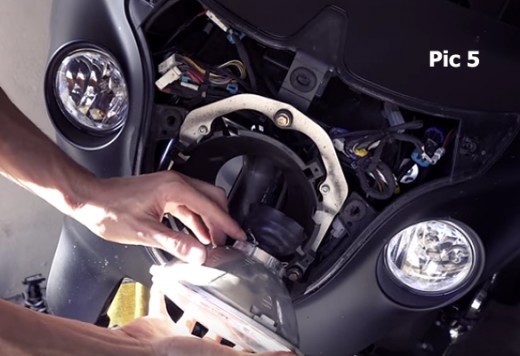
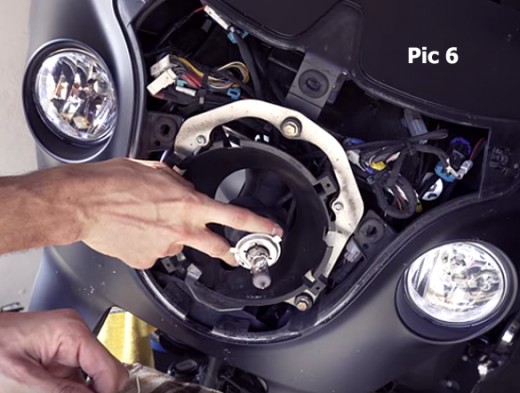
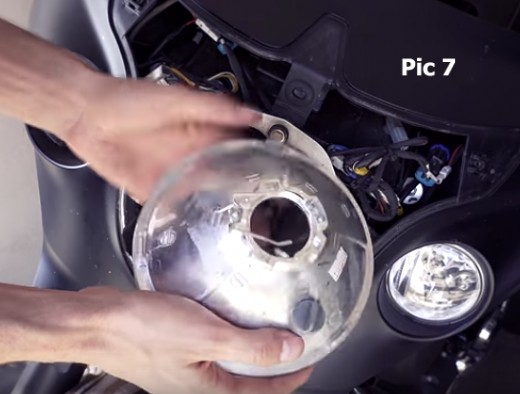
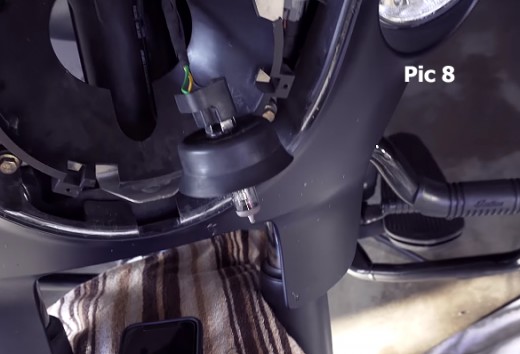
- Now with the headlight in your hand and still attached by the wiring harness, pull back on the rubber protection boot that is covering the plug into the headlight and flip the wired locking clamp that is holding the bulb and plug. (see pic 5, pic 6, pic 7 and pic 8)
- The actual headlight glass casing and internal bulb with plug attached will be separate pieces.
- Now you will have to remove the actual bulb from the plug/harness. You may have to use something to slowly pry the plug from the bulb.
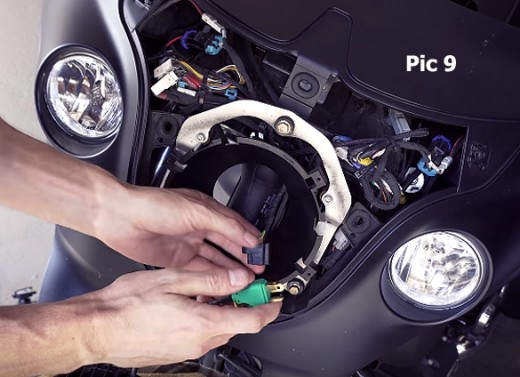
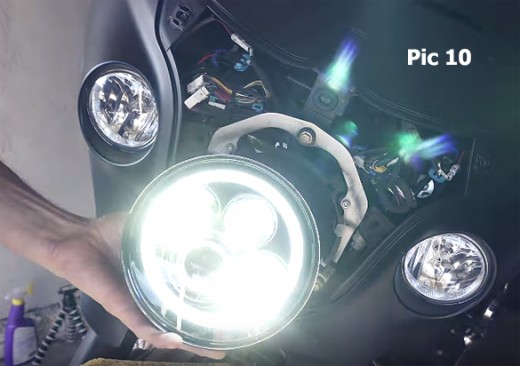
- Now get you new LED headlight, and connect the wire from the new LED to the plug in the headlight casing (see pic 9). Now test the light while everything is still off the bike. (see pic 10)
- After a successful test, remove the headlight and continue to Step II, replacing the passing lamps, which involves removing the front fairing.
STEP II: Replacing Passing Lamps (Removal of front fairing)
- You will have to remove the front-fairing.
- There are 3 screws in the inner side of the fairing that will need to be removed. (M6 x 1.0 x 40)
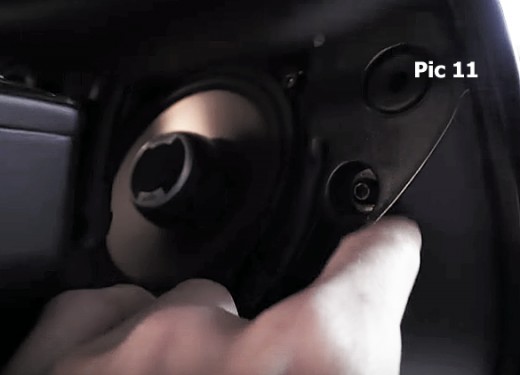
- Remove the speaker grills, by just gently prying them with a non-marring tool to pry them from the fairing. They will pop off.
- There is now another screw under the speaker grill to remove. (see pic 11) (4 screws total)
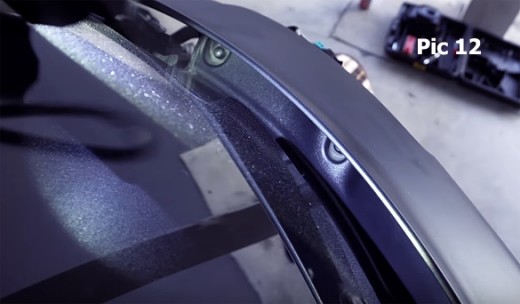
- There are also 4 screws between the shield and fairing. (see pic 12)
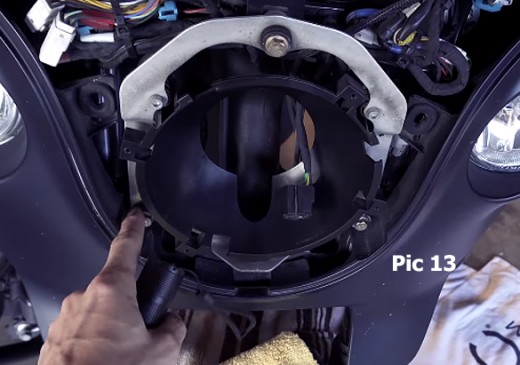
- Remove the bolts holding the piece for the headlight. (see pic 13)
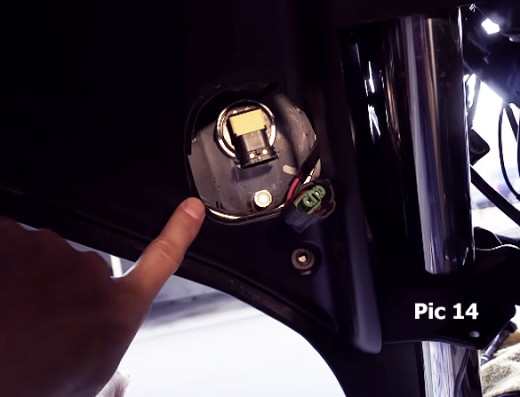
- Unplug the wiring harness from the back of the passing lights. (see pic 14)
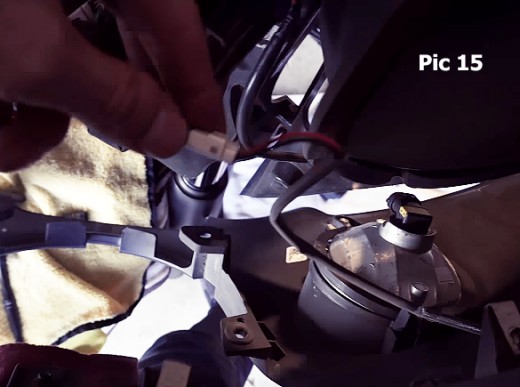
- Once you start to remove the fairing there are a couple of wires still connecting, preventing the complete removal. Just unplug them (see pic 15). One on each side, and then remove the fairing.
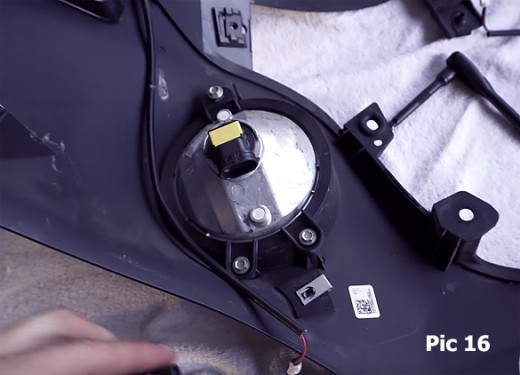
- With the fairing removed and flipped over on a soft surface, remove the 3 bolts holding the passing lamps in. (see pic 16) with a 7mm socket.
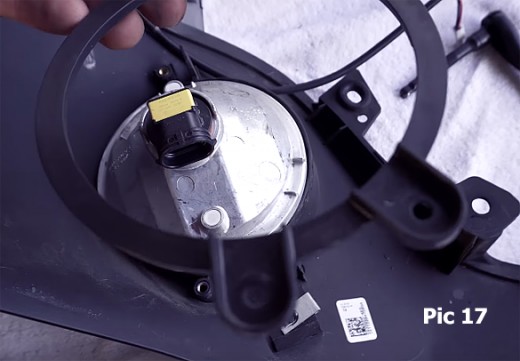
- With all the bolts removed, remove the plastic ring retainer that is holding the passing lamp to the fairing and remove the passing lamps. (see pic 17)
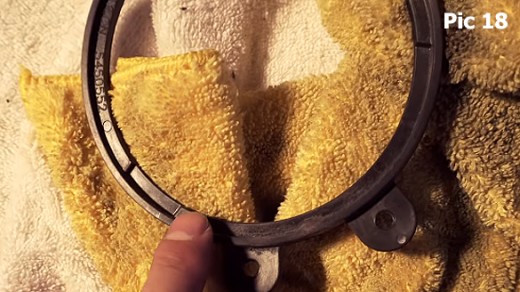
- Install the new passing lamps by reversing the procedure. Make sure you put the plastic retaining ring with the slots facing down (see pic 18). If you leave face up, the new passing lamps will not secure properly. There will be some wiggle/play.
- Now its time to install the fairing back. Make sure before all bolts are in, to connect the 2 small white connectors.
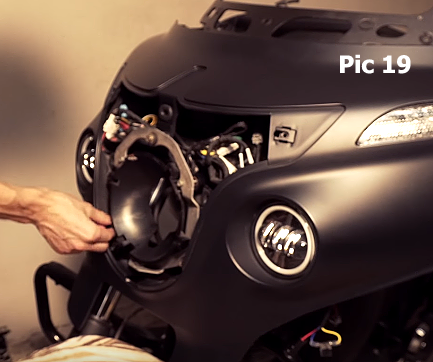
- Now reverse procedures. Bolt the main metal bracket that is around the headlight first to ensure the fairing is secure. (see pic 19), then gradually start replacing all the screws and bolts before installing the headlight.
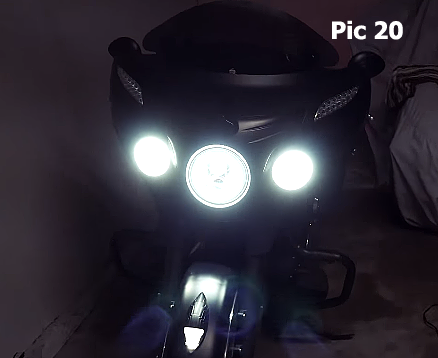
- Finally, the test (see pic 20)
- What a difference in brightness
- Indian Motorcycle Online Portal - GeorgiaBagger.com
Indian Motorcycle Portal for Product Reviews, Motorcycle Events, Indian Motorcycle Forum,Indian motorcycle classifieds, Indian Motorcycle Service Manuals, Indian motorcycle history, Indian Motorcycle Riders Group Registry,Indian Motorcycle News


")

")
