Oil Change Tune-Up-Tips: Vacuum Pump Oil Changes

I've played "captain obvious" before – stressing the importance of regular oil changes. They're something you practice if you want a working car, not a ton-and-a-half paperweight.
Depending on how you get it done though, it's a tedious or time-consuming exercise for most.
If you delegate your oil-change to professionals, you need to fit it into your schedule. Changing it yourself means also making time, and a messy chore for all but oil-in-veins enthusiasts (I made oil-angels myself – until hair started falling out).
This Hub focuses on an oil-change technique that reduces the mess (eliminating it on some cars) and reviewing one of the many inexpensive tools for the job.
Combining both can make one-person Jiffy Lubes out of formerly reluctant do-it-yourselfers – saving you folding-money.
Oil Change By Vacuum Pump/Fluid Extractor:
Typically, most people expect to get beneath a car to change its engine oil. Regardless of where engineers mercifully put the oil-filter, draining used-oil was regularly done at the oil-pan drain plug. Unscrew it, have something ready to catch the stuff, and accept that plenty of it was going on you.
The alternative is using a hand-operated or motorized device that extracts the used-oil (typically through the dipstick-tube of the engine).
Unfortunately, not all cars lend themselves to this technique. Engine's with circuitous dipstick-tubes make it difficult (or impossible) to fully immerse a hose in the pan. A flimsy/flexible dipstick can mean you're stuck changing oil the old-fashioned way.
You may hear disagreements over the efficacy of this pumping technique (also known as "top-down" oil changes). Chief among them is whether siphoning the used-stuff removes enough of it so as to not have "half-used/half-fresh" oil.
Top-down oil changes are regularly done in the service-departments of brands like Mercedes Benz and BMW. They work on a variety of models, as auto-consumer-advice giant Edmunds illustrated in this feature by Senior Editor Phillip Reed.
He and Associate Editor Mark Takahashi sucked the oil-pans nearly dry on both Reed's Honda Fit and Takahashi's Lotus Elise with a $63, 5-quart-capacity Fluid Extractor from Moeller. Oil changes would cost the Edmunds editor $170 each for his Lotus, and when finished, there was less than three tablespoons of oil left in Reed's Honda.
That's a helluva combo-punch for Top-Down oil changing:
- Money saved in labor from henceforth (often the most expensive part of garage-bills)
- Reduced effort (if your oil-filter is mounted on top of your engine, there's no getting under the car)
- Removes used-oil effectively (all but disasterously-large metal wear and other contaminants are suspended in the used-oil – if it's warm)
I've enjoyed the reduced brow-furrowing of the top-down method several times now. Luckily, it's always gone something like this:
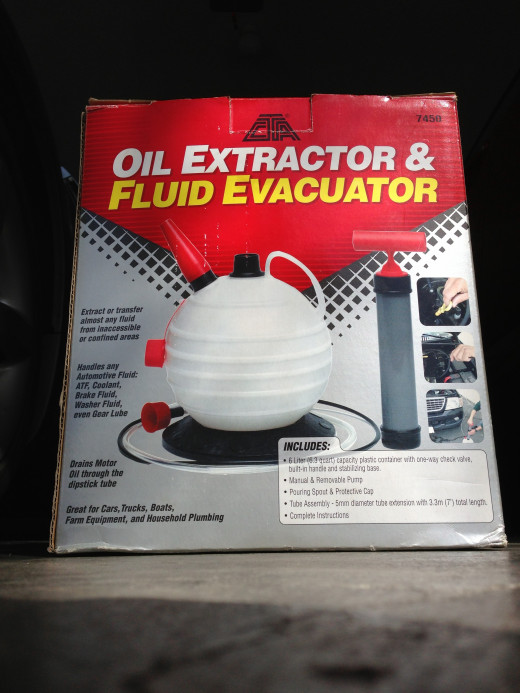
"Top-Down" Oil Change with CTA's Oil Extractor/Fluid Evacuator:

I picked up the CTA pump from my local Pep Boys (in-store and online prices vary from $60-to-$90 dollars).
I had planned to try top-down oil changes as a solution to a persistent, gypsy-cursed drain plug leak: one of my former oil change trustees over-tightened my drain plug. The plug leaked some, necessitating a new oil pan ($50 from ECS Tuning).
By a stroke of luck, the new pan's plug also leaked.
That (and a nagging worry that my engine had been overfilled after the pan-replacement) got me off my duff and oil-pump shopping.

It certainly looked like a Pep Boys-item when I opened the box (but appearances can certainly deceive – I disappointed many-a-date's parents at first) (some remained disappointed).
.")
The CTA pump comes with:
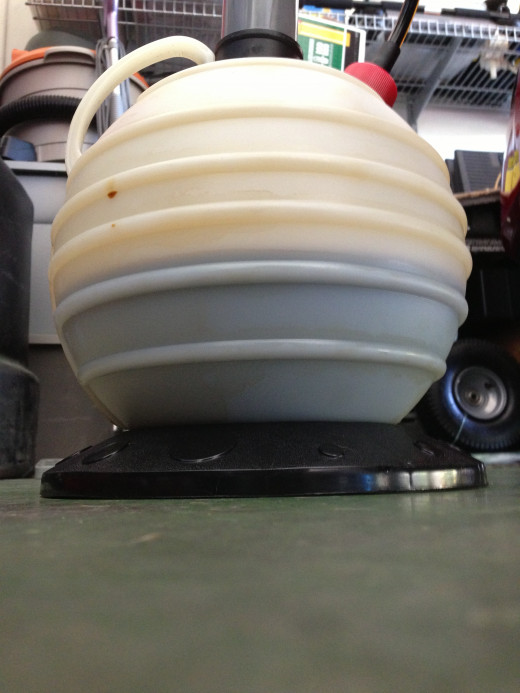
- A 6-quart-capacity tank (each rib marks a quart)
- The hand-pump
- A siphoning hose
- A Funnel attachment for pouring
- A cap for storing
The tank doesn't come that "delicious" hue of yellow, I've been using this thing – and it works.
Fortunately, I was only over the dipstick "FULL"-mark by a couple of ounces. The pump's first oil-change pulled all but a bit of oil that drained when replacing the defective plug (I may not have oriented the hose then as well as I do now).
There's nothing special to using the CTA pump. Like any other oil change, the car benefits from being warm (but not searing-hot). Park the car on level-ground, then let it cool some.
 before changing. It flows easier for removal and takes more impurities out with it.")
Before beginning, check your current oil-level – a chance to see if any oil has 'disappeared' (burned/consumed) since your last service.

Like I've mentioned before, a good-quality oil is a cornerstone of long-engine life.
.")
Mobil 1's 0W-40 is the factory-fill on a number of Autobahn-shredders, and can be used year-round despite some saying the "0W" limits it to winter use.
The CTA pump is prepared by screwing the hand-pump's handle into the piston. Then attach the hose to the tank.
Slowly insert the siphon hose into the dipstick-tube. Push in until you feel the hose reach the pan-bottom.
TIP: Gently see if it will go any further and stay (oil pans are deepest towards the back – where the drain-plug is).

TIP: If your engine uses an oil-level sensor in its pan, check with those in-the-know to see if they recommend against top-down oil changes for your car. Thread the hose in gently if still green-lit.
With the hose in place, take the hand pump and insert it over the special grommet on top of the tank to begin pumping. It's a one-way seal that evacuates air, allowing a vacuum to form inside the tank.
If you're into wine – it works just like the rubber corks that vacuum-seal unfinished bottles (maximum vacuum is indicated by a strong resistance to continued-pumping). After a few pumps, dark used-oil should move visibly through the hose –

– and into the tank (remember: you can check your progress with the "ribs" on the CTA-pump).
You can leave the pump to do its thing (returning now and then to maintain the vacuum with follow-up pumps) and take care of other maintenance – like topping up your windshield-washer fluid.

You'll know the pump has finished its job by the empty-drink-sound of ingesting only air. The CTA pump filled its tank to around the 5-quart mark – reassuring since a transversely-mounted 1.8T engine takes 4.8-quarts of oil.

That's the end of the über-easy part for me, since my filter is traditionally located low on the engine-block. I take a moment to check the underside of the oil-filler cap for milky-buildup (like in my Used Car Pro-Tips Hub) –
. Keep knocking wood and rubbing rabbit's feet.")
– then jack the front of the car up to remove the old filter.

It may not feel like a bed at the Waldorf, but getting under your car is never a wasted opportunity. It's a chance to make sure nothing else needs attention – like this inner CV-joint boot on the passenger-side front axle.
.")
It tore cleanly just before its metal end-cap (but luckily, after the last rib on the rubber part). The space between that rib and the next were perfect for a couple of zip-ties – a makeshift tourniquet for the otherwise-fine axle boot.
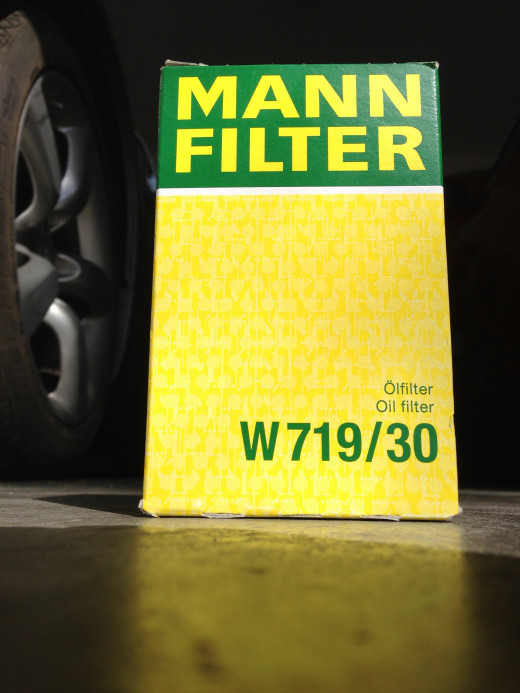
When you can procure them, MANN W719/30 filters are ideal for transverse-1.8Ts (the longitudinal engines prefer a larger version due to a smaller oil-pan). If they're rare in your area, Purolator's L20252 filter is a good alternative (with a back-flow valve that's nearly as good as the MANN's, important for preventing dry-starts).
Drained at the plug, or siphoned – the oil-filter always keeps some oil in it.
A bottom-mounted filter's only joy in life is relieving itself on you before you throw it out.

Once you sort this out with the used filter, and its replacement is hand-screwed on (after wetting its seal and filling it with fresh oil), a top-down oil change ends like any other: refill the engine.

The dipstick just began showing oil on it after around 4-quarts. The hashmarks on this dipstick are for the top-quart. Knowing your engine's capacity, see what your dipstick shows before adding the last quart/liter (however you measure).
This can be good to know when tracking oil consumption/"burning".

Whatever your engine's oil-capacity, it's a good idea to pour the last bit slowly – but you can pull the excess out with your pump if you overshoot the mark.
Finish up the job by starting up the car for a few seconds, then shut it off.
Recheck the oil level (it should have dropped as the new oil circulated), then top it up to "FULL" again.

The CTA Oil Extractor and Fluid Evacuator has been reliably effective for my top-down oil changes.
Its build quality certainly isn't polished in a few aspects.
TIP: sometimes, the tank's rubber-valve pops off when removing the hand-pump. It pops back on when this occurs and continues to work strongly.
If you'd like to try top-down oil changes instead of draining at the plug (avoiding issues like plug-leaks and damaging threads), The CTA pump is an affordable and simple choice for getting the job done.


")

 Honda CRV")

