How To Improve Your Ebay Photos and Pictures to Make More Sales and Money


If you want to have success as a seller on ebay, you need to have great photos of your product. You'll have a tremendous advantage in the marketplace if you follow the steps below to make your pictures look better than your competition.
For this example, I'm using Adobe Photoshop 7.0...although any version will work just as well. If you don't have Photoshop, there are many other image editing programs available, some of them for free (I've put a few links at the end of this article), where you can still accomplish the desired outcome - outstanding ebay photos.
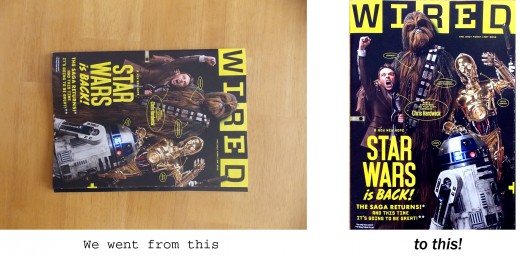
I've intentionally started with a bad picture, so that you know how you can still make the best of it. If you already take good pictures, you can probably skip the first few steps.
Take the photo
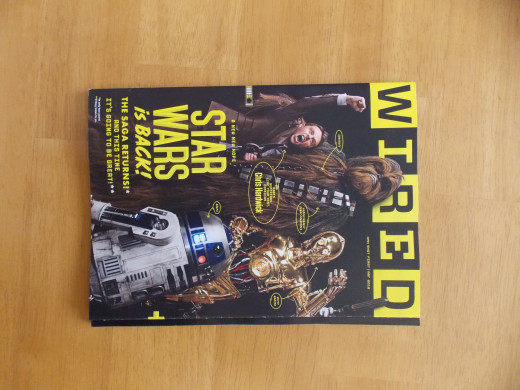
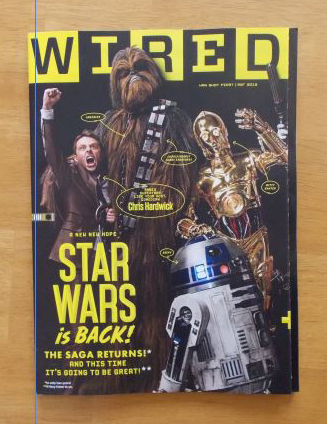
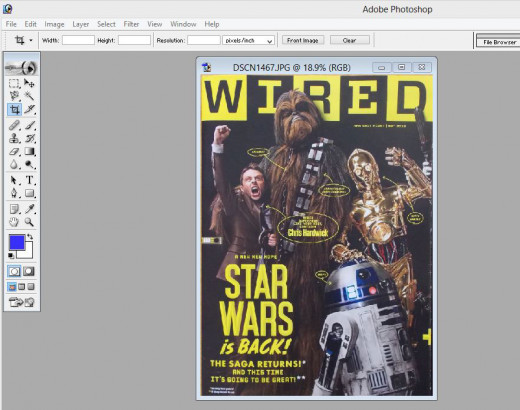
Below we have a picture of a magazine that we're going to sell on ebay. I took this photo with a basic compact digital camera using "auto-focus" mode with no flash. For a subject like this, flash would reflect off of the surface and look awful. So for this particular item, it's best to use just natural light.
Rotate Canvas
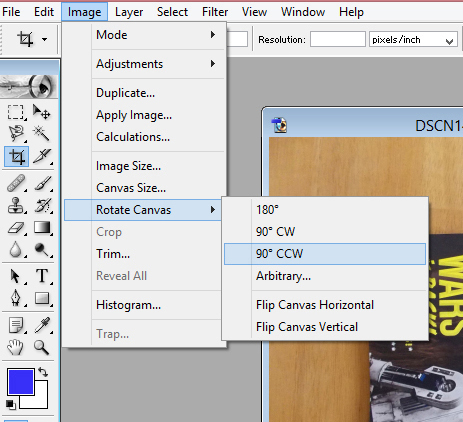
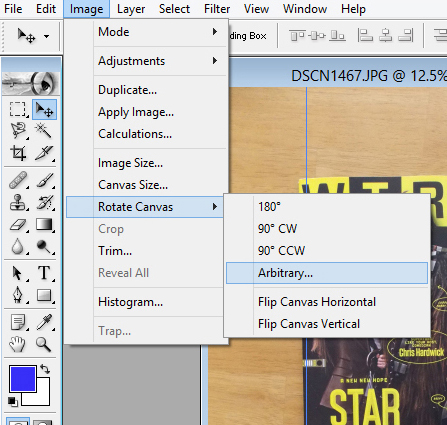
The first step is obviously to turn this photo right side up. Every photo editing program has a function to rotate the canvas. This one needs a 90° turn counter-clockwise.
Image > Rotate Canvas > 90° CCW
Line it Up
The next thing we need to do is straighten the magazine out. You could get away with not making it perfectly aligned, but for our purposes we're trying to make it look the best it can be. Remember - we want this photo to stand out.
Since the original photo wasn't taken exactly above the center of the magazine, we have a warp effect where it's not shaped like a perfect rectangle. It won't matter all that much by the time we get to the end, so don't worry if your picture has a similar issue.
To line up the image in Photoshop, we're going to use a Guide.
View > New Guide
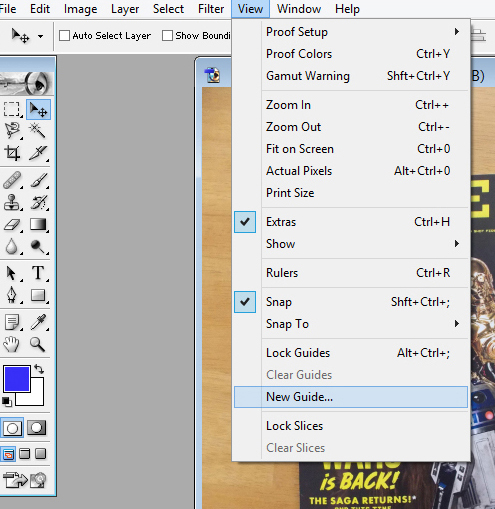
Click on New Guide and you'll get a small window with a choice of Vertical or Horizontal and a field where you can insert its location. You can measure by pixels or inches, whichever you prefer. For this example, we'll use pixels.
You'll need to know the image size in pixels in order to know what value to type in the field. It will take a little guessing and a few attempts, but eventually you'll have it so it's lined up with the image.
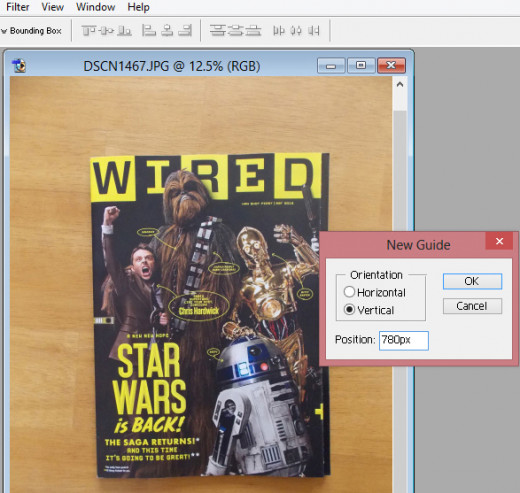
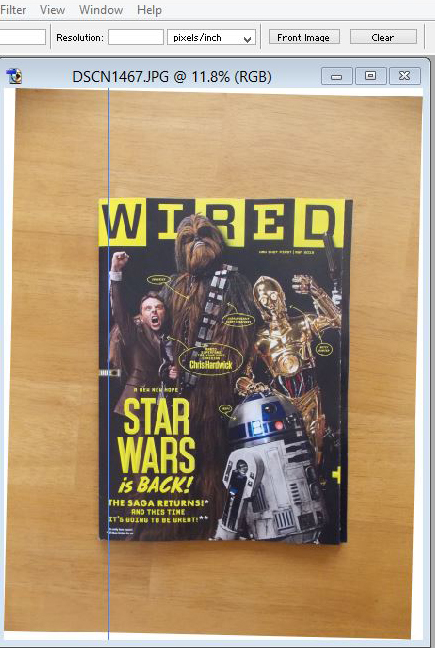
I chose Vertical Orientation and typed in 780px (pixels). Press ok, and a straight, blue line will appear over the image.
As you can see, the magazine isn't quite level. There's no way to have every side lined up perfectly, but if we have the left side lined up (people view images left to right), we'll be in good shape.
To do this, we're going to rotate the image using the arbitrary option. This will again take some guesswork, but you can always undo something you've done, and it should take no more than a few tries to get it right.
Image > Rotate Canvas > Arbitrary
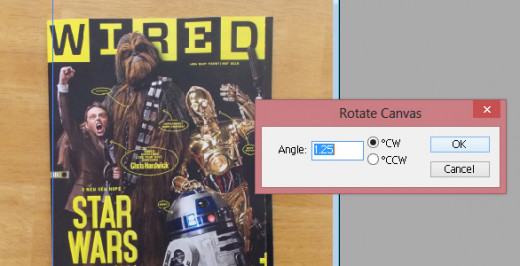
I figured out that 1.25 degrees clockwise looked best - then clicked OK
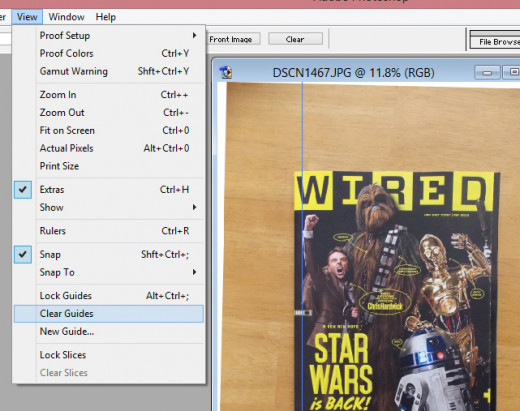
We can now remove the Guide
View > Clear Guides
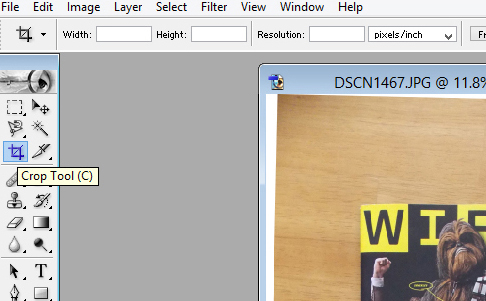
Crop Photo
Next we need to crop the photo so that all we have in the image is the product that we're selling with no background or "negative space" - which, in photography, refers to the part(s) of an image that doesn't add anything to the overall composition. We're only concerned with displaying the magazine, so let's crop the photo and get rid of what we don't need.
- Select Crop Tool
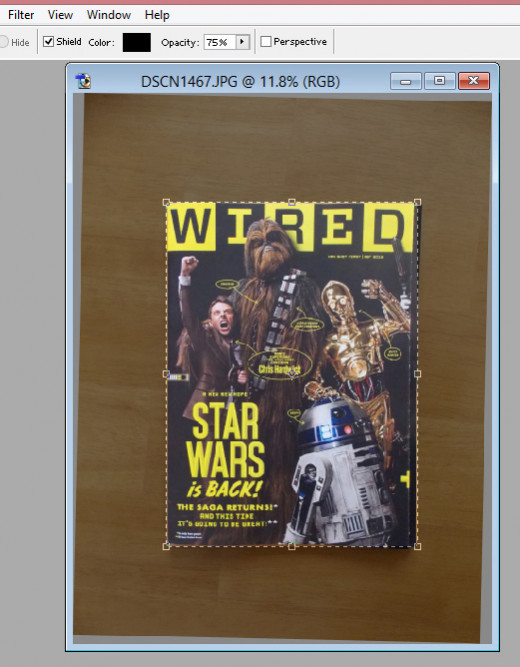
- Crop tightly around image
- Right-click and select "Crop"
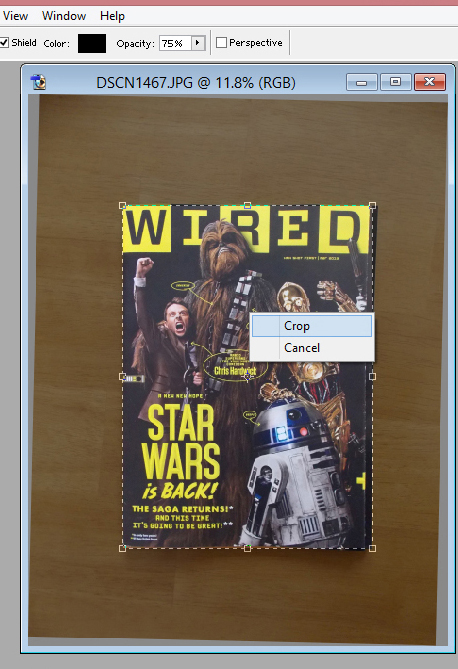
And now here is what our image looks like:
The next couple of steps are going to focus on the color, contrast and sharpness of the image. In ebay searches, you're only seeing a small, thumbnail photo that is sandwiched in-between all of the photos from other sellers. We want our picture to POP. Let's look at a couple of quick and easy ways to make this happen.
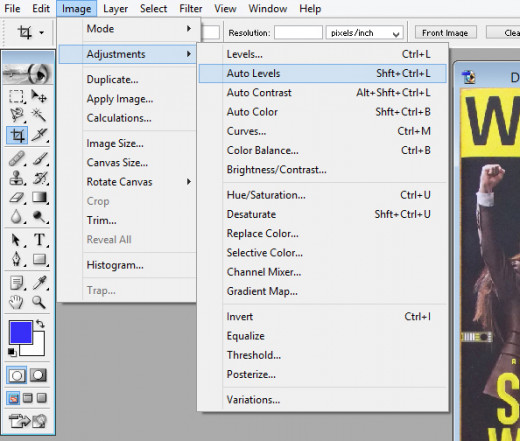
Auto Levels
This tool will basically optimize the colors to the way they should look. 95% of the time it will make your picture look even better than you thought it could instantly. You also have the option of using manual Levels, but most of the time you don't need to, and that takes a little bit more knowledge of Photoshop.
Image > Adjustments > Auto Levels
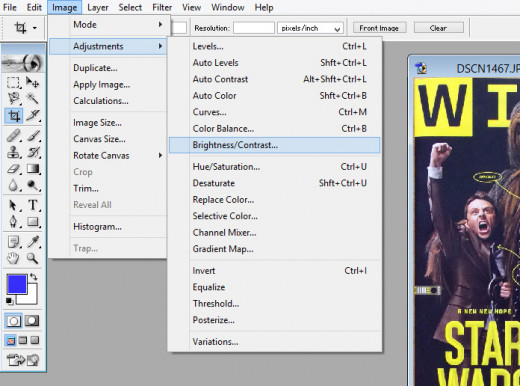
Brightness/Contrast
Of these two options, contrast is usually the one you will use. As long as your picture was taken with enough natural light, you won't need to mess with the Brightness.
Increasing the Contrast will darken the dark colors and brighten the bright colors. We have to be carerful not to get carried away with it. Just add a touch enough so that as a smaller image it will jump off of the screen, yet doesn't compromise the quality of the larger image within the ad.
Image > Adjustments > Brightness/Contrast
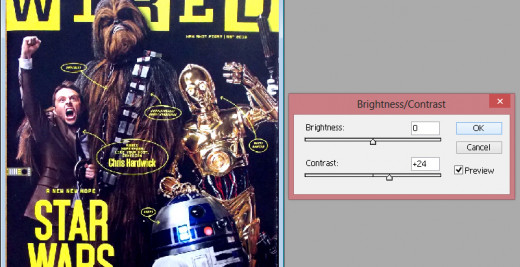
Move the slider with your mouse and keep your eyes on the image. When you think it looks good, release the slider and click the Preview check box on and off to see if you're happy with the result. Adjust as much and for as long as you like. When you think it looks great, click OK.
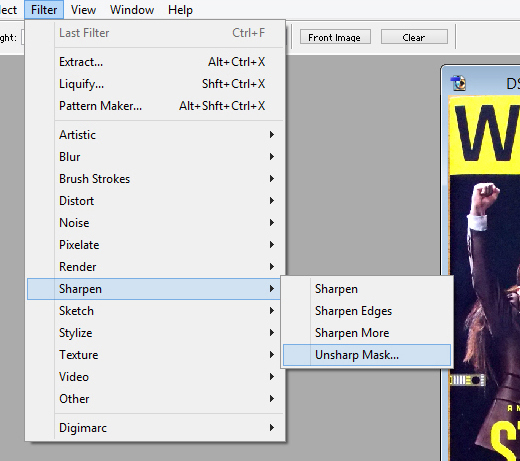
Unsharp Mask
This oddly named function in Photoshop is the best way to make your picture look sharper. This is the last vital step in making sure your thumbnail photo jumps off the screen.
Filter > Sharpen > Unsharp Mask
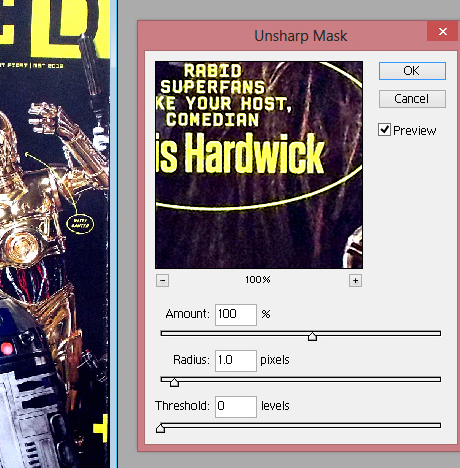
The only slider you should change is the Amount. Move the slider to the right until the words really pop (if there is text) or simply until the picture is the most pleasing to the eye. Again here you can click the Preview check box on and off to get a before and after comparison. When you think it looks good, click OK.
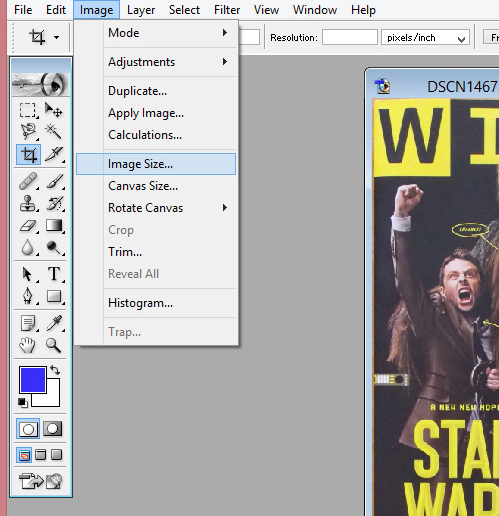
Image Size
The final step in this process is to properly size your image. Ebay recommends that photos are at least 1600 pixels on the longest side. This number has gone up considerably and regularly over the years, so I always tend to post photos that are a little bit larger than what ebay suggests.
Image > Image Size
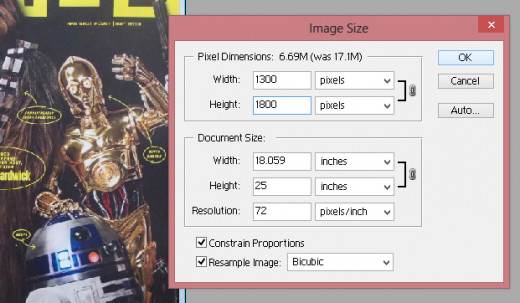
Here I simply typed in the number 1800 in the "Height" field. Make sure "Constrain Proportions" has a check in the box. That way, it will adjust the "Width" value accordingly. The only other thing you might want to do here is to change the resolution to 72. That is the Web 1.0 default resolution for photos, and still applies to a degree today. If you want to leave the resolution at the camera's default (usually 200 or 300), you should still be fine.
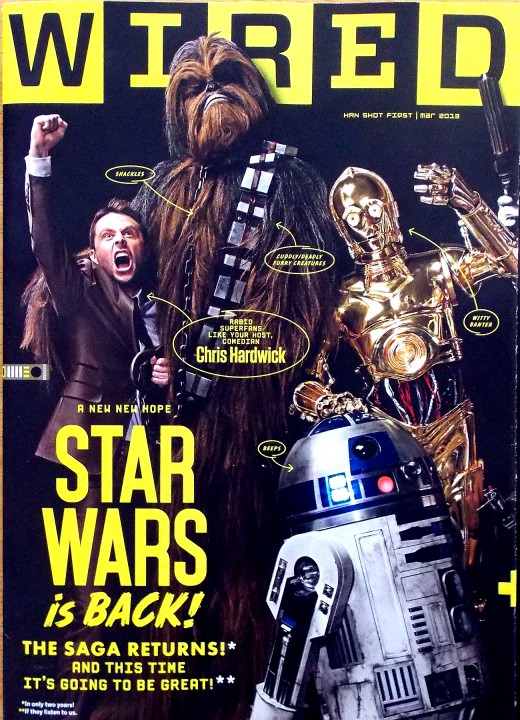
Our Finished Image (Large)
Current ebay listings with the same product
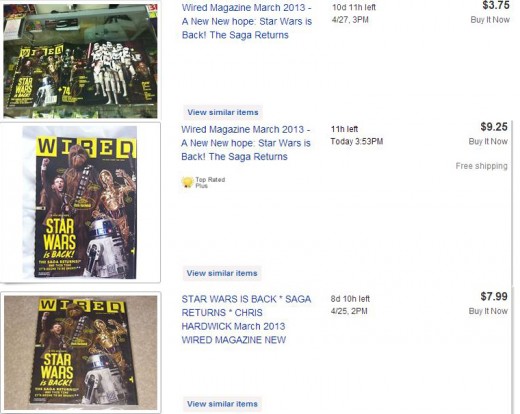
I'd say our picture looks better!
Follow these steps for all of your ebay photos and your sales will improve. You'll need to make unique modifications for every photo that you take, but don't be afraid to experiment on your own. Remember - keywords in your title let people know your product exists, but a great picture sells it!
Photo Editing Programs
Paint Shop Pro (Free for 30-Day Trial period - $79.99 to buy)
Photoscape (Free)
Serif Photo Plus (Free Starter Edition)
This tutorial was designed specifically for PC users. If you have a Mac, chances are you already know all of this stuff. : )


