- HubPages»
- Business and Employment»
- Marketing & Sales»
- Internet Marketing
How to Add Social Media Buttons to Your Gmail Signature

Recent studies attribute that population using social networking sites are increasing enormously. With increasing usage of social networking sites, advertising yourself or promoting your excellent work has become an ultimate easy task. One way of promoting your social media profiles is to add social media buttons to your email signature. Adding social media buttons to your email signature allows the email recipients to access your social media profiles. Social media buttons are small icons that contain direct links of your profiles. When the email recipients click on the buttons, they can view your social media profiles. You can add social media buttons of various sites such as facebook, twitter, hubpages, blogspot, linkedin and google plus. This article explains how to add social media buttons to your gmail signature.
Step 1
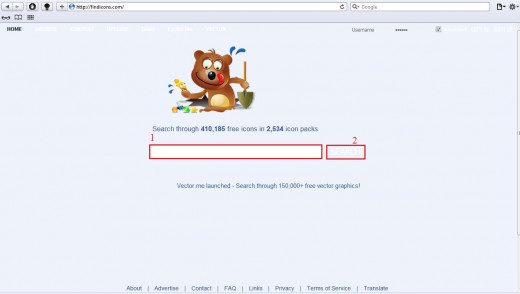
1. Download social media buttons from sites like findicons.com. Visit findicons.com. And in the search box, type the name of social media. (Example: facebook)
2. After typing the name of social media, click on search button.
Step 2
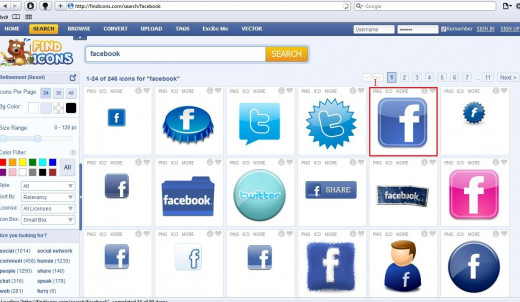
1. In the next page, it provides you with the social media icons with different styles. Click on the one, which you like to add to your Gmail signature.
Step 3
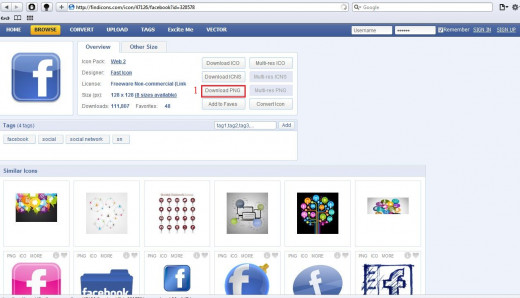
1. Click on 'Download PNG' and save the icon in your computer.
Step 4
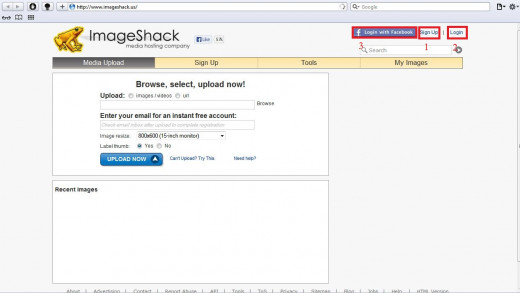
1. Go to imageshack.us. Signup if you do not have an account with imageshack.
2. If you already have an account, login directly.
3. Alternatively, you can login using your facebook details.
Step 5
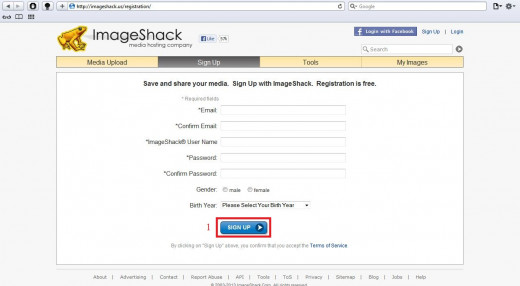
1. If you prefer to create a new account, key-in the required fields and click on 'Sign Up'.
Step 6
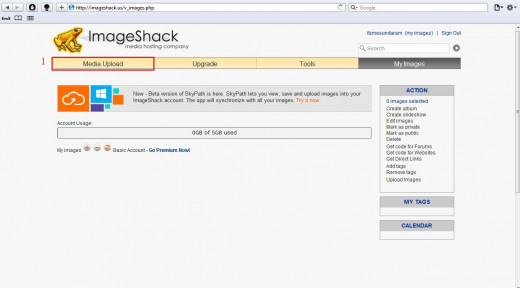
1. After signing up/logging in, click on 'media upload'.
Step 7
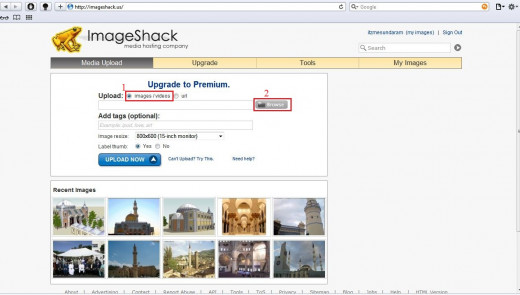
1. Select 'images/videos'
2. Click on 'browse' and select the saved icon.
Step 8

1. The selected file is shown (the facebook icon, which you saved in your computer).
2. Click on 'upload now'.
Step 9
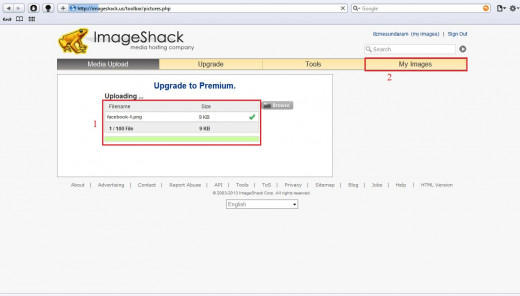
1. The box shows the status of the upload. Once the file is uploaded, a tick mark appears.
2. Once the uploading is done, click on 'my images'.
Step 10
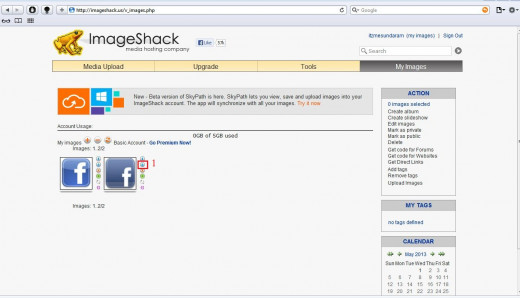
1. Here is the list of all icons you uploaded. Click on 'image details'.
Step 11
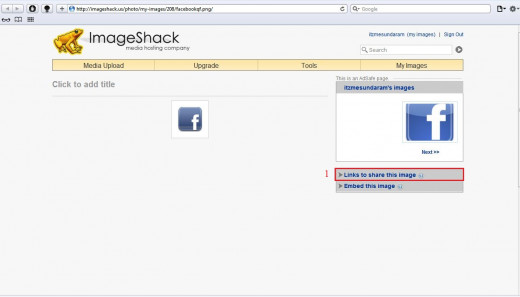
1. Click on 'links to share this image'.
Step 12

1. Copy the direct link, which is shown on the above picture. This the is image url.
Step 13
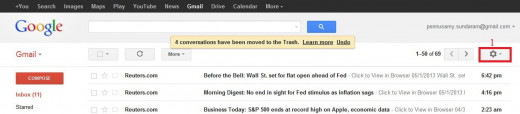
1. Log in to your Gmail account. Click on the gear box located at the top right-hand side. And select 'settings'.
Step 14
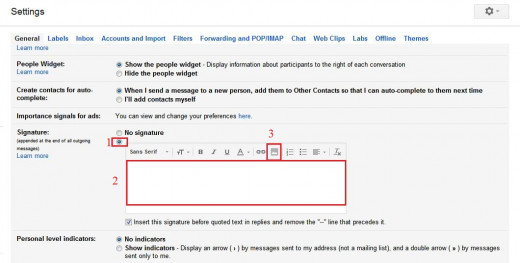
1. In the setting page, scroll down and find the field 'signature'. Check the box to add signature to the emails you send.
2. Type the information that you wish to appear in your signature. Example: your name, designation, contact details etc..
3. Click on 'insert image' to add the social media buttons.
Step 15
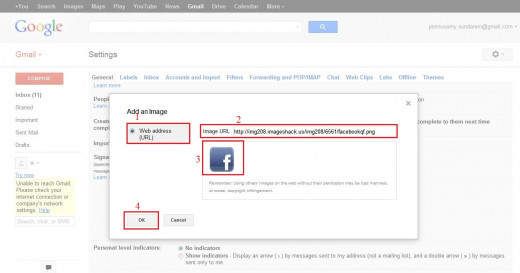
1. Check the web address box.
2. Paste the image url. (See step 12)
3. If the image url is correct, you are able to see the social media button.
4. If everything is fine, click on 'ok'.
Step 16
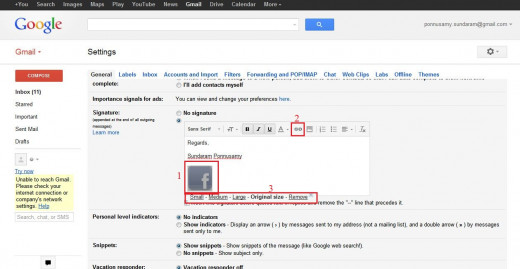
1. Highlight the social media button by clicking and dragging as you do to highlight text.
2. Click on 'link'.
3. This field helps to change the size of the social media button. Keep it small for beautiful appearance.
Step 17
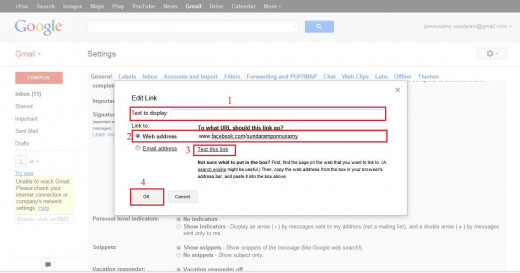
1. Leave the 'text to display' blank.
2. Key-in your social media profile address. For example, www.facebook.com/your name.
3. Click on 'test this link' to find whether the profile address you give is correct.
4. If everything is fine, click on 'ok'.
Step 18
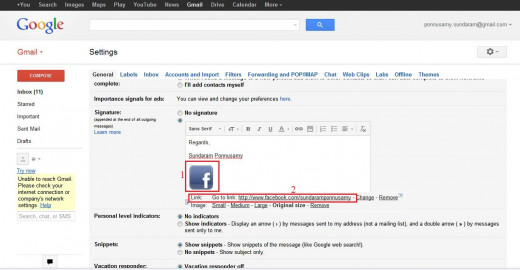
1. You have got your social media button on your signature.
2. If you click on the button, you will be able to see the direct link of your profile.
Step 19
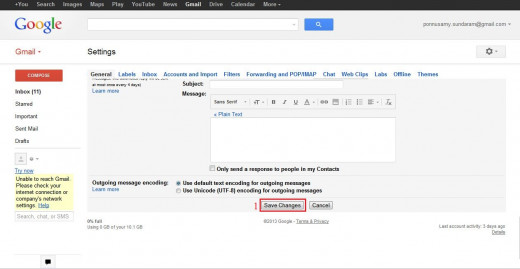
1. Scroll down and click on 'save changes'. Now when you send emails, a signature is automatically added at the bottom of your message. This signature contains the social media buttons that allows the recipients to view your social media profiles.
Tips
There are many alternatives to findicons.com and imageshack.us. You can google and find the sites that are convenient for you to carry out the tasks.
Related

Important Steps You Need to Know to Find the Potential Audience on Social Media

How to Include Social Media Icons in Your Business Card Design

Let's Disconnect to Connect: Social Media Tips for Real Life

Social Media Usage at the Workplace - A Menace or an Assurance of Employee Productivity

10 Disadvantages and Limitations of Advertising


