How to organize pictures in Seller Sourcebook Listing Generator


Image Hosting Service and Templates
Years ago I owned a Mac computer. It was pretty awesome. A neighbor hit a telephone pole down the street and I lost a few electronics that day, including my Mac. During my brief ownership of a Mac, I discovered there was image hosting/listing software for online selling venues called Garage Sale. (They have that in a mobile phone version now too!) I used Garage Sale and it was very efficient. From uploading and editing photos to listing my items. It worked out great for me. If I ever wanted fancier templates, I purchased them from other sellers.
Finding an image hosting site is fairly simple. There are many to choose from. Ink Frog, Auctiva, Vendio, Seller Sourcebook and more. I use Seller Sourcebook so that's what I'm most familiar with at this point in time.
Updated Version
Seller Sourcebook recently updated their tool bar. I'm adding new pictures and instructions herein to coincide with the updates.
I'm keeping the previous version photos on here for those that might have used Seller Sourcebook in the past and are lost when you try to list something in the new version.
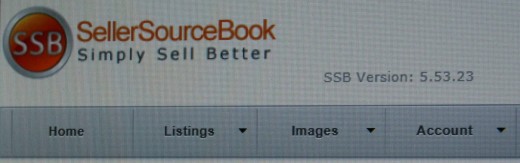
Updated Seller Sourcebook ~ New Tool Bar.
Starting out in Seller Sourcebook
When I first created my Seller Sourcebook account, I had a hard time navigating their site. At first I did not find it user friendly. But once I got used to it, it has become an invaluable listing tool.
The home page contains news and information. Currently it talks about picture requirements for listing on online auction sites. At the top of the home page is a tool bar with a clickable menu/drop down list.
Previous Version ~ Preferences

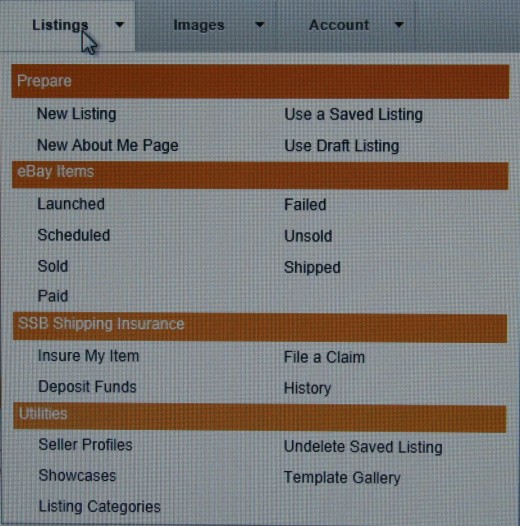
Updated Seller Sourcebook. Preferences is now called Utilities (found under Listings).
Tool bar options Home and Preferences
Home.
Home brings you back to the main page. There is no drop down list under Home.
The Listings tab now includes Preferences (which is renamed to utilities).
Seller Profiles is where you create your standard business policies, language, return policy, shipping policies, etc. Those policies will automatically appear in every listing. Those can be edited at any time. This is also where your permissions are to sell on other sites. If you get an error message that says your "key" is invalid, this is where you would go to update that.
Showcase is where you can create a scrolling showcase of your items that usually appears at the bottom of your listing. There are many designs to choose from. Once it is created, you can quickly upload it to your auction site.
Site Preferences includes a list of preferences particular to the Seller Sourcebook site.
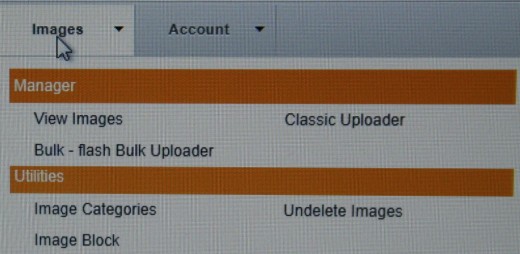
Managing your images (see new tab) ~ this tab was from before the update.
Updated Seller Sourcebook. The image menu now includes utilities.
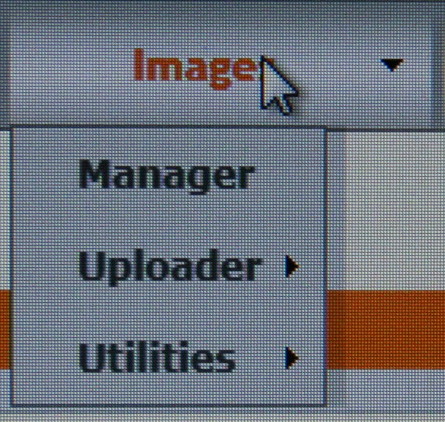
Image
Under the Image tab on the tool bar, there are now two main headings. Manager and Utilities.
Manager contains a summary view of the photos saved in Seller Sourcebook. The URLs of the images as well as the following information about each photo is shown under Manager:
Name: (name of picture as uploaded)
Upload Date: (Date and Time)
Last Public View:
File Size: _____x_____
Category: (Uncategorized Caption)
Uploader is where files are uploaded. There are two choices. Bulk-flash or classic.
Utilities has three choices under it. Categories. UnDelete. Image Block. For example, you can use Seller Sourcebook to create your About Me page. When I created mine, I wanted to keep the photos separate from photos of items I had listed for sale because I used my handmade work as examples in my About Me page. I was able to categorize those photos to the About Me page category to separate them from my listing photos. Very efficient!
Use ADD images instead of Uploader for individual listings. Uploader works great for bulk photos.

TIP! Add photos to your listing instead of using Uploader!
When you use Add photos, it allows you to create your listing while the photos are uploading. You can work on the description and title during the uploading time.
Uploader comes in handy when you have a lot of photos to upload all at once.
For example, if you have 10 pictures of one item, and you want to focus on that single item, use Add photos while you create your listing.
If you have 100 photos of 10 different items, use Uploader to upload the photos all at once and them retrieve them later when you create the listing for each of those items.
Difference between Uploader and Add Photos
When I first started using Seller Sourcebook, I didn't have experience with it and uploaded hundreds of photos all at once.
Well, I quickly realized that it wasn't very efficient of me to do that. Here's why.
When I take photos of an item I am going to list on a selling site, I use Picasa or another photo editing software to crop, straighten, and change the saturation levels if necessary. I found that I was back tracking because I would upload 100 photos and then would need to edit some. At that point I would have to go back to my editing software, edit the photos and then upload them again to replace the originals. That took multiple steps.
Now what I do is when I take photos of a listing, I edit them and upload them through the Add menu. I only upload the pictures of the item I am currently working on (not all the photos of everything I photographed that day, in other words).
That way I can work on the listing description while the photos are being uploaded and they are done by the time I finish the text of my listing.
It just seems more convenient that way to me. But uploader is a great option to upload many photos at a time. Especially if someone edits a bunch of photos at a time and gets them uploaded to Seller Sourcebook, then they can simple retrieve those photos on Seller Sourcebook that are already uploaded while they create their listing.
It works well when you have 10 items you want to list on Tuesday for instance. So Monday you take all the photos, edit them and upload them to Seller Sourcebook.
Then Tuesday you can spend your time writing descriptions instead of editing the photos and uploading them.
Either way the end result is the same. It's just a matter of preference.
For me, I find that I'm constantly not happy with my photos so I edit them a lot. I upload the photos individually as I am working on that particular listing so I can edit the photos and upload them right then and there. Focusing on one item at a time works best for me.
I can understand how that wouldn't work for a business with hundreds of listings a day. I am only to manage about 10 a day if that. It's all about preferences and what works best for your business!
New Listing ~ the toolbar has changed. See photo above for new Listings.
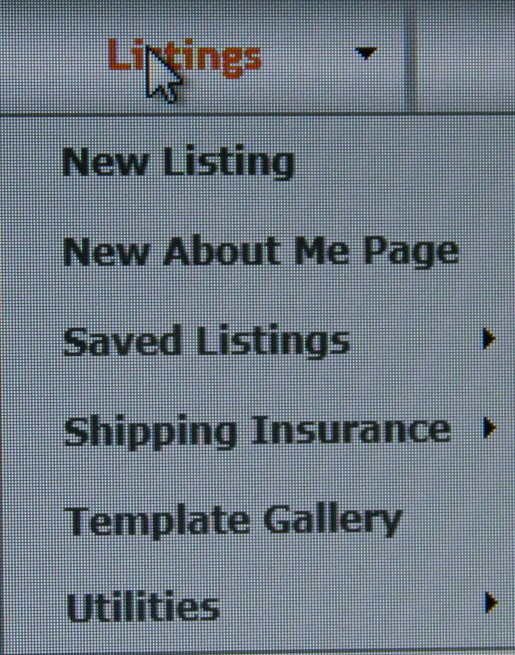
Listings
Here is the most important menu for your listings.
Under Listings, you can create a new listing, a new about me page, refer to your saved listings, and more!
I am going to focus this blog on creating a new listing.
Creating a listing
Under the Listings menu, you have a couple of options to choose from. New Listing will open up a new screen where you can create a new listing with the saved Seller Profiles (all of the information you entered in that should go on every listing such as a refund policy, shipping policy, etc.).
Under Saved Listings, you have several options including searching for items already launched for sale and drafts. This is where you would revise your items already listed. One time I had listed an item that I found an error in afterward. I ended the item. Then I came to this menu, under launched items, I found the item and clicked on sell similar. All of the information came up in a new listing. All I had to do was replace the photos I had failed to crop and list again. You can also use this option for editing the listing text.
Listing Title and Description
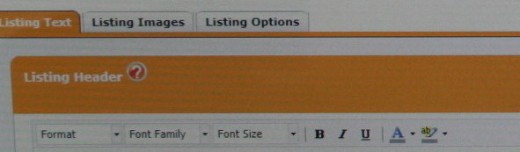
Listing Text
When you click on New Listing from the Listings menu, the next screen will look like the one pictured above.
I cropped the photo just under a few action items such as "save". This allows you to save the listing. But also note that Seller Sourcebook automatically saves the listing when you launch it. It will be under "launched listings". So the "save" function can be skipped altogether. I did use it recently because I had a listing for a handmade item and I needed to take a few more pictures. I didn't launch the item. I saved it and went back the next day to launch it after revisions. When you save a listing, you create a name for it. When it's launched, Seller Sourcebook automatically saves it without you having to create a name for it.
After choosing New Listing from the Listing menu, you will find three tabs.
Listing Text, Listing Images, and Listing Options.
Listing Text is where you enter your item title and description. There are two separate text boxes labeled listing header (for the item title) and listing text (for the item description).
As you can see, you can change the format, font, size of text, etc.
Listing Options brings you to the Seller Profiles information you saved with refund policy, shipping policy, etc.
Next we'll discuss Listing Images.
Listing Images

Uploading your images
As previously discussed, you can upload in bulk without creating a listing through the uploader feature.
I upload the photos for the listing I am working on. I usually work on one item at a time. When I've had a situation where I've uploaded a lot of photos at once, the uploader works best when I'm not working in a particular listing at the time I upload the photos.
When you click on the Listing Images tab you will see a screen that looks like the one pictured above.
Here you can change the layout. In some designs, you can change whether or not the picture can be enlarged in the listing (go to the layout tab shown above for different layouts offered.)
The next tab is "add". This is where you add your photos for the listing you are currently in.
Again, if you just want to upload a bunch of photos for future use, uploader will work more efficiently for that. "Add" is where you have the option of uploading from the image manager internally stored in Seller Sourcebook from previous uploaded photos....or uploading them from your computer directly. This is what I normally use because like I've been saying, I often work on one thing at a time and it's that much easier to focus on 10 photos for one item.
Once you choose the photos you wish to upload from your computer, then you will be given the option of writing captions under the photos. You can fill in captions about the item for every picture to clarify important information about the details.
Tip!
When I am working on a listing, I create a new listing and upload my photos first. That way while they are uploading, I can write the heading and listing description at the same time.
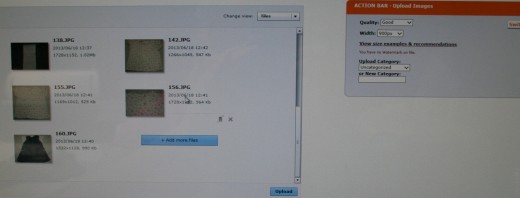
Photo Attributes

This action box appears when you are uploading photos from your computer. This is where it shows the quality, width, etc., of the photos you are uploading.
Files for Upload

Review files before upload
This screen gives you the option of adding more files before uploading.
For instance, this is very useful if you have different photos in different locations on your computer. Sometimes I use photos I took on different dates and are saved in different folders. So this "add more files" feature gives me the chance to add them all at once for quicker upload.
Tip!
To upload more than one photo from your computer at a time, push down the CTRL button on your keyboard and then click on the photos that you want to upload.
Photo Attributes and Files for Upload appear on one screen
Templates
Seller Sourcebook has many templates to choose from. They are categorized by theme. You can search for a template that compliments your listing by color or theme.
Some templates have multiple features such as color variations of the same template. I used a template yesterday which had the option of having a snowman design or just plain. Since I was using the listing on a summer item, I chose to have it plain.
There is a search function. You can search by keyword, color, theme, etc.
Once you've chosen a template, you can revise it. If you preview your listing with the chosen template and decide it's not the most appropriate, you can click on the drop down menu and choose a new template from generator. Or if the template comes with more than one choice such as the snowman one I talked about above, you can click on template and change the features of the template with the given drop down menus.
Search Templates


You can see in the upper right corner the search box. You can search for templates by color, theme, etc.

Themes
There are many themes to choose from in the templates. When you click on a theme and there are more templates than can currently fit in one page, you can see more by clicking on the small number box with arrows that pops up at the left of the screen. It's easier to miss until you familiarize yourself with the site.
Template

Templates in New Listing
Once you've chosen a template, the name of it will show up by Template on the listing you are creating. To change it, click on Template and you will have a choice on the drop down menu to choose a new template from the generator.
Organizing your photos
Once you've uploaded your photos, to organize them, you can click on a photo and drag it to the order you want it placed in your listing.
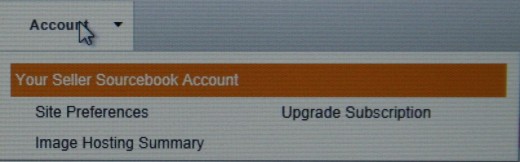
The new Account Tab on the updated Seller Sourcebook.
Conclusion
Here is a quick summary sheet of how to efficiently access and organize your photos in a new listing on Seller Sourcebook:
- Take plenty of photos of the item you are selling
- Edit the photos in photo editing software such as Picasa
- Log in to your Seller Sourcebook account
- Make sure your profile is updated to including your selling terms.
- Click on Listings
- Click on New Listing
- Add a template by searching for a template by color or theme. Or, pick a theme from the drop down menu, then search for a template. Don't forget to check other pages if there is more than one page of that listing template. (Easily overlooked if you didn't know about that little number and arrow box to the left of the screen.)
- To revise a template, click on template and you can revise the features of it there in the drop-down boxes that will appear. Or to change the template altogether, click on template and then generator to pick a new one.
- Upload images from your computer by clicking on the Listing Images Tab, then Add. If images were previously uploaded, click on Add from Image Manager under the Add tab.
- While the images are uploading, click on the Listing Text tab. Create your listing title (under Header box) and description under description tab. The other tabs (other information, payment terms, shipping terms, and listing terms should be previously stored under Seller Profiles to eliminate the need to recreate them for every listing.)
- When your photos are uploaded, write captions under them describing details for each photo if you prefer.
- Don't forget to drag your photos to the appropriate order they should be in if they didn't upload in the order you want them to appear in your listing.
- Once your listing text is entered and the photos are uploaded, click on preview. Then Prepare to Launch
- Enter the information under the Prepare to Launch screen. Here is where you will enter all other information. (Fixed price or auction, listing specifics, whether or not the item is new, shipping weight and information, refund policy (whether or not buyer pays for returns or if you charge a restocking fee), sales tax information goes here as well.
- After a confirmation screen, Seller Sourcebook will post your listing and confirm it with a screen that includes the item number.
Don't forget to add a showcase to your listings!


