Unveiling Hidden Gems in Microsoft Word: 5 Lesser-Known Useful Functions

Its popularity stems from its intuitive interface, customizable options, and comprehensive set of basic tools, making Microsoft Word accessible to users of all levels. Yet, beneath its surface simplicity lies a plethora of advanced features waiting to be discovered. Here are 5 things you can do with the program to make your work easier.
1. Create a Link to Jump to Another Part of Your Document
Establishing links within your document allows for seamless navigation, enabling users to effortlessly jump to specific sections or references. This feature proves particularly handy for lengthy documents, catalogs, or organizing content.
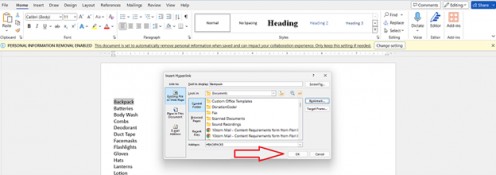
Step 1: Set up a bookmark.
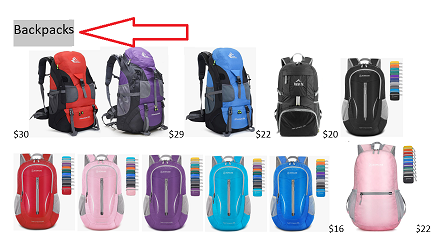
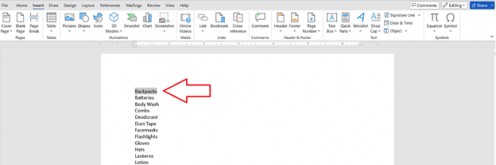
Highlight the word or phrase you intend to link to. For demonstration purposes, let's select "Backpacks."
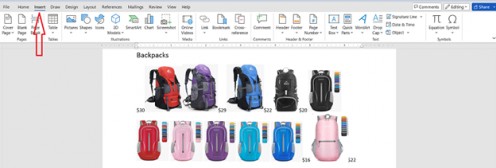
Click “Insert”
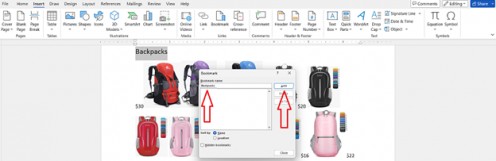
Click “Bookmark”

Type the name you want to use for this bookmark without spaces then click “Add.”
Step 2: Link to your bookmark.
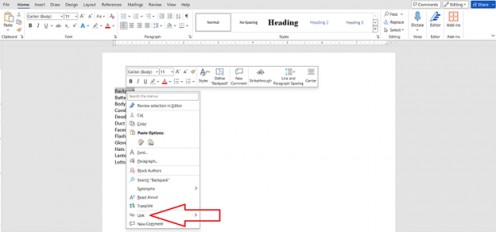
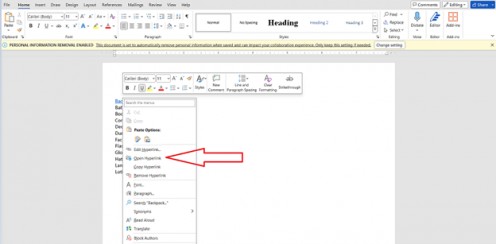
Highlight the word you want to use as your anchor text. We will use Backpacks.
Right click on the highlighted word and click “Link.”
Click “Bookmark”
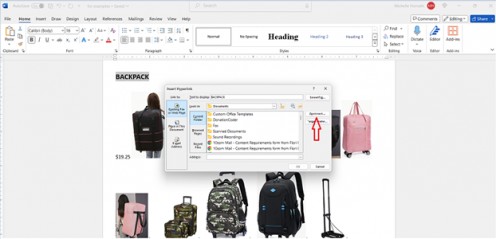
Click the bookmark you want to link to then click “ok.”
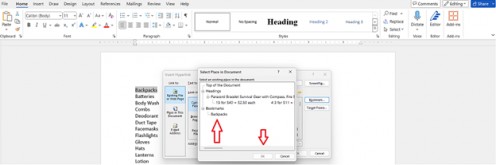
Click “ok” on the next page.
The word “backpack” should turn blue and be underlined.
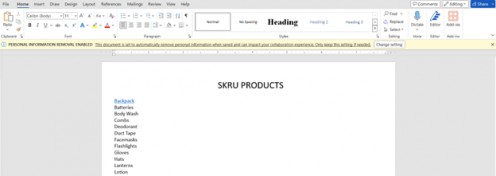
Now let’s try it out. Right click on the underlined link, then click “Open Hyperlink”.
Your cursor should jump to the text you bookmarked.
HELPFUL TIP
Add numbers to every page in your document. Under the “Insert” tab, click the arrow next to “Page Number” and select the position and style of numbers you want to use.
2. Replace a specific word in your document with an alternative.
Picture this scenario: You've meticulously crafted a lengthy letter addressed to Mr. Webber, only to discover that his correct name is Mr. Webster. Rectifying this oversight would typically involve painstakingly scouring the entire document to identify and replace every occurrence of "Mr. Webber" with "Mr. Webster," a task that is not only time-consuming but also prone to human error. To save time, use the “Replace” feature.
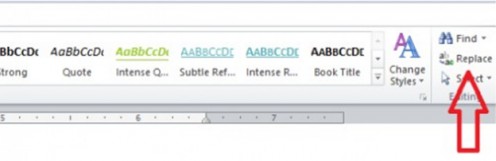
Start by clicking “Replace.”
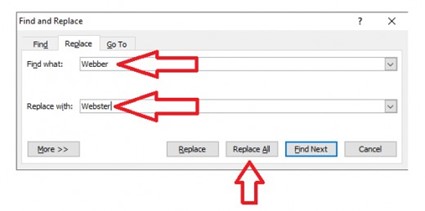
A dialogue box will appear. In the “Find what” field, type the word you want to replace. In this case “Webber” In the “Replace with” field type the correct name. In this case “Webster”. Click “Replace All”.
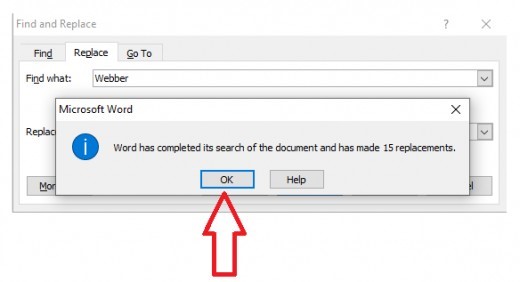
You will receive a notification with the number of replacements made. Click “Ok” and you’re done.
HELPFUL TIP
Don’t forget to save your work continuously to prevent any potential loss of important data. Moreover, consider saving iterations of your document under different file names, allowing for easy comparison of changes, or serving as backups for reassurance.
3. Add a table to your document.
To incorporate a table into your document for organizing and comparing text, begin by determining the desired number of rows and columns. Then, follow the instructions below.
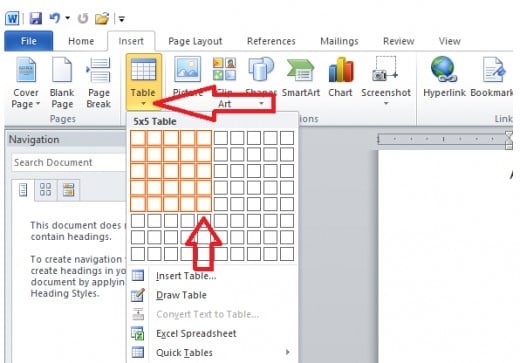
Click “Insert”
Click on the tiny arrow under “Table” and you will see a box of little squares. Move along the squares with your mouse to select the number of rows and columns you want.
Once the table has been placed inside your document you will have the option to select a design. Click on each to preview it and then choose one.
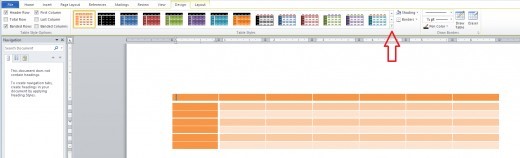
Click the bottom arrow on the scroll bar next to the styles to view even more style options.
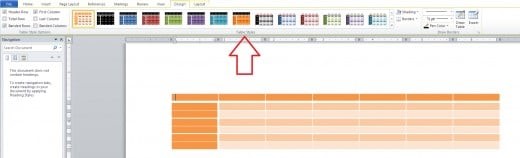

Now you can input text into your table and dress it up in bold, italic, different fonts, colors, sizes, and even change the background colors.
HELPFUL TIP
Use the “Clear Formatting” option in the “Styles” section to clean up your document. This is especially helpful after copying and pasting text from different websites. Since each site uses its own text formats, your document will look like a mess after pasting your research notes.
4. Putting Things in Order: Alphabetically, Numerically, or Sort by Date
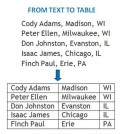
You can change the order in which your text will appear by using the “Sort” function. This allows you to sort text in alphabetical order, numerical order, or by date. You also have the option of choosing ascending or descending order. This allows you to easily find items in your online or printed document.
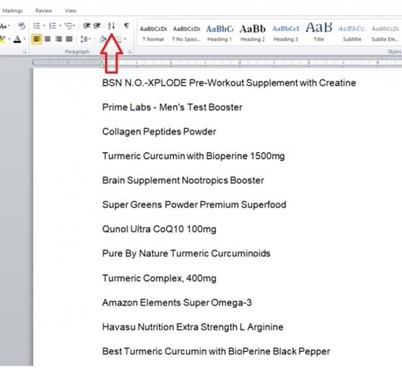
To use this function, type your text then highlight the portion you want to sort, otherwise the entire document will be sorted.
On the “Home” tab, click on the symbol with an “A” above “Z” with an arrow next to it pointing down.
Choose what you want to sort and what you want to sort by, then select ascending or descending order. Click “Ok”.
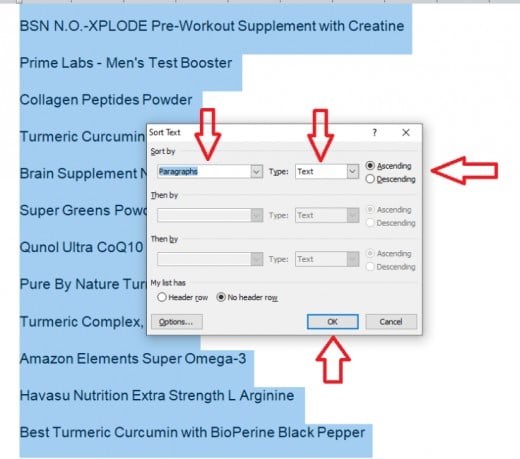
Now your text will appear in the order you selected.

HELPFUL TIP
If you find there is too much space between paragraphs, you can reduce it. In the “Paragraph” section click the arrow next to the up and down arrows and click remove space.
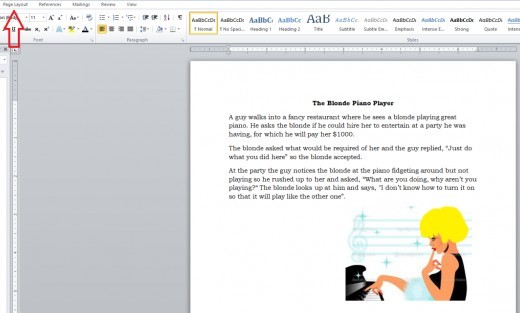
5. Enhancing the Appearance of Your Document
There are numerous methods to enhance the visual appeal of your document and tailor its appearance to suit the desired theme. These adjustments allow you to inject additional style into your work, elevating its professionalism or adding a touch of creativity.
Select “Page Layout” from your toolbar.
Click the “Design” tab, then click the small arrow under “themes”. You have the option to individually customize the colors, fonts, and effects of your document. Alternatively, you can explore pre-designed themes that offer a variety of presets to choose from.
You can also add a border. To do this start by selecting “Page Borders” under the “Design” tab.
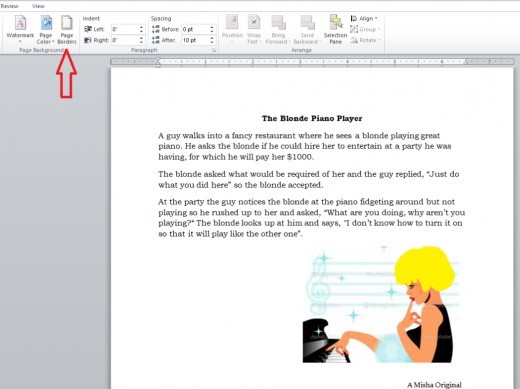
Click the part of the document you want to add the border to and then choose your preferences. You can select from different colors, sizes, and more.

Conclusion
The features highlighted here are just a glimpse of the many functionalities Microsoft Word offers. There's a wealth of tools waiting to be explored within the program. Feel free to experiment with them, knowing you have the trusty "undo" button to revert any unintended changes.
This content is accurate and true to the best of the author’s knowledge and is not meant to substitute for formal and individualized advice from a qualified professional.
© 2019 vegasmisha