How to buy a domain name - a guide for newbies
Being a total newbie when it comes to buying domain names and looking for a good web hosting company has a lot of downsides, especially if you are not the techy kind! A simple Google search on where and how to buy domain names can be pretty overwhelming and will yield a lot of results and different recommendations.
I personally opted to go along with namecheap.com since this registrar has a lot of positive reviews and as the name suggests, the domains are, well, cheap!
Here’s what I did to buy a domain name on namecheap.com. I have listed it in numbers so the steps will be much easier to follow!
1. Type in namecheap.com on your browser.
2. On the searchbox, type in the domain name you want to purchase. For illustration purposes, let’s search for mynewdomain.com.
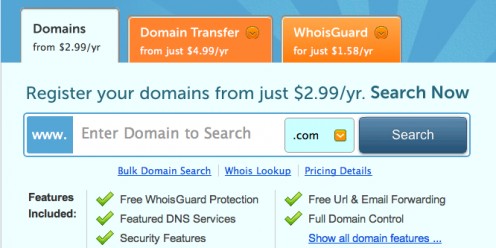
3. After waiting for a few seconds, you will be directed to the results page.
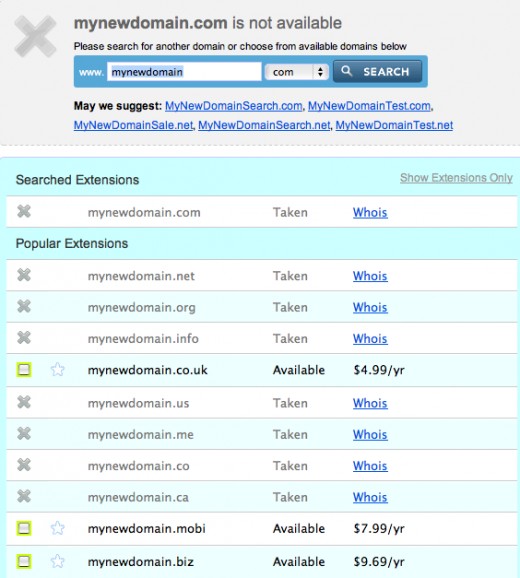
4. Unfortunately, the domain mynewdomain.com is no longer available. For this particular example, only mynewdomain.co.uk, mynewdomain.mobi, mynewdomain.nz and some other “lesser known” TLDs are available. It’s either you (a) search for another domain or (b) you can tick on the square box on the left and proceed to Checkout.
If you select (a), then you do steps 2 and 3 again. When you are ready to proceed to (b) then scroll down the page and click on the button for “Add to Cart”.
5. You will then be directed to your Shopping Cart wherein you will have the option of checking out or continue shopping.
Your shopping cart items will be displayed on the page and the items you are about to purchase will be listed. A Free WhoisGuard is included for a year, on your second year this will cost you $2.88.
6. If you have a Coupon Code, simply enter the code on the box and hit ‘Apply’. Note: there are some sites that offer namecheap.com coupon codes so it might be worth checking out!
7. If you haven’t got an account yet, you will need to create an account before you can pay for your domain. Don’t worry this shouldn’t take too long. Time will be cut even shorter if you already have an account.
8. Once your account has been created successfully, you will now be directed to the payment page. You will have the option of paying with a credit or debit card directly or you can pay via your Paypal account (recommended!).
9. Upon payment, you will get a confirmation email from Paypal and a receipt from namecheap.com.
That’s it! You have successfully purchased a domain name from namecheap.com! The next thing to do would be to buy some good hosting – namecheap.com offers a hosting service, however, the most popular one seems to be Hostgator.com. If you need help and advise on setting up your web hosting at hostgator, let me know and I'll do my best to help.

