HubPages.com HTML for Beginners Guide Tutorial For Making Money Online


HTML is NOT scary. You do not need to be a computer programmer or rocket scientist or even relatively intelligent to be able to do this. Hell, I taught myself and if I can do it, anyone can.
So lets start with the most simple parts of HTML:
Basically everything in HTML needs to start with a < and end with a >, and whatever you place in between the < and the > symbols is the action you taking.
Please click on image below or use Scroll Bar to view full Chart
BASIC-BASICS of HTML
What I Want
| Code
| Finished Product
|
|---|---|---|
A Space in Between Paragraphs
| P
| <p>
|
My Text on the Next Line, No Space
| br
| <br>
|
Insert a Link
| <a href="SITE">TEXT</a>
| <a href="#" id="broken_link_35719193" style="color:#333; text-decoration:line-through" oncontextmenu="return showBrokenLink(35719193, false);" onclick="return showBrokenLink(35719193, false)">POSH by Tori</a>
|
Insert a Link to Email Me
| <a href="mailto:EMAIL">TEXT</a>
| <a href="mailto:poshbytori@gmail.com">Email Tori!</a>
|
Insert an Image from PhotoBucket.com
| <a href="LINK" border="0" alt="TEXT"/></a>
| <a href="http://s1075.beta.photobucket.com/user/poshbytori/media/MainPNG.png.html" target="_blank"><img src="http://i1075.photobucket.com/albums/w424/poshbytori/MainPNG.png" border="0" alt=""/></a>
|
Make Text BOLD
| strong
| <strong>
|
Make Text Italic
| em
| <em>
|
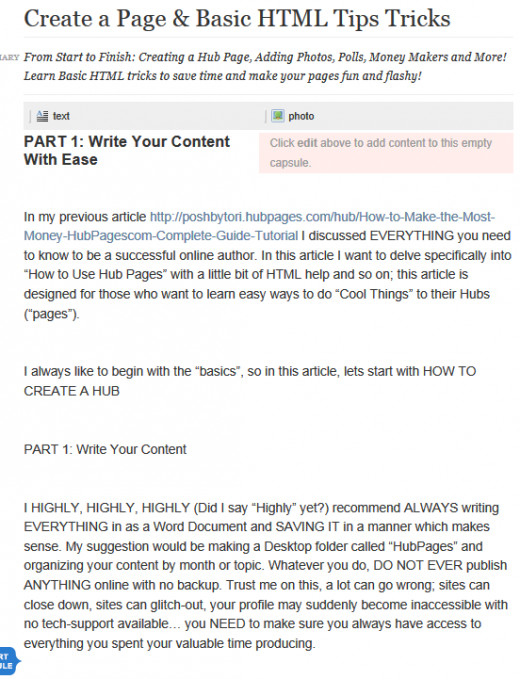
Really, to begin HTML with qa site like HubPages, Squidoo, Blogger, etc; this is more than what you need to know to be “snazzy” with your content. So, in my previous article, I showed ya how to make awesome Hubs BUT we didn’t do any html “editing” / “formatting”, so that’s what we’re going to get into now. So, in my previous article(s), I just wrote my Hub Page in Microsoft Word (and Saved it to my PC for Backup!), then copies and pasted it into Hub Pages, which left ugly “gaps” in between my paragraphs (see photo below - notice the GIANT gaps in between my paragraphs? YUCK!):
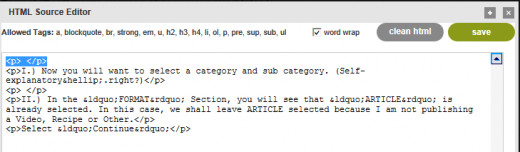
So now I want to get rid of these gaps by selecting my TEXT box, "EDIT" then the blue HTML word in the bar right above where the text is. After I select this, I will get a somewhat scary looking "code-like-thing"; NO WORRIES! Let's take a look at a small paragraph in HTML version:
GETTING RID OF GAPS / BIG SPACES
As you can see above, I have highlighted, two <P> symbols. If you referance the chart at the beginning of this article, you will see that <P> means "Paragraph", so what this means is that the HTML code is saying "Insert TWO Paragraph SPACES right here" - but we don't want two paragraph spaces there, so we are going to simply delete these <P>'s.
You will also notice more double-<P>'s two lines down. This is once again saying "Hey! Put in more gaps!" - so lets delete those as well. Heck, let's just go nuts and kill off every <P> we see that is causing an unwanted, ugly GAP.
AFTER THE <P>'s HAVE BEEN EXTERMINATED....
Now it is time to select the button in the upper right that says "CLEAN HTML"; this just means that you're done getting rid of things (or adding things). Then select SAVE. Now you should have a nice, clean-looking, Ugly-Gap-Free text box, like this one.
ADDING A SPACE / GAP BETWEEN PARAGRAPHS
So, let's say you just exterminated all the <P>'s and you now realize you made an error. You have a few options; 1. You can delete the entire text box and Add a New one OR go back into your HTML and add a <P> where you want that gap to be.
Need a lot of spaces? Add more <P>'s. Each <P> you add is telling the computer "Give me another line of blank space right here!
I JUST WANT THE TEXT ON THE NEXT LINE, No Gaps!
If you do not want a <P> (Paragraph) Space / Gap and all you want is to
make your text
appear on the next
line
then you need to go into HTML and insert BREAKS which is code <br>. You may see some of those pesky <P>s (Paragraph) symbols where you dont want them, so once again, delete the <P>s and make them <br>'s.
I NEED BOLD TEXT...OR ITALICS...OR BOTH!
Of course, you can use the B or the I in your text editor box to make text Bold or Italic. But you can also do it through HTML.
Using the chart above, <strong> means "Make this text bold!" and "em" means "Put my text in Italics!
So, if we go into html, we want to find the text we want BOLD, we want to add <strong> BEFORE the text we want to turn BOLD and </strong> AFTER the last word/letter we want to be bold.
If you want it to be in Italic, follow the same directions as above, but instead use the code <em> before the first word/letter and </em> after the last thing you want in italics.
How To Insert an HTML Link To...Anything
Every HTML code for "Insert a link to something" is made up of two simple parts, "link" and "text", like so:
<a href="LINK">TEXT</a>
The LINK is going to be the FULL URL link to whatever you want inserted. Your LINK must contain the "http://" part of the link or it will not work. For example, if I want to link to my website:
http://www.Posh-By-Tori.com WILL work.
www.Posh-By-Tori.com WILL NOT work.
So, at this point, my code looks like this:
<a href=http://www.Posh-By-Tori.com>TEXT</a>
Now I need to enter the TEXT that I want my link to say when it appears in my content. If I want it to say VISIT MY WEBSITE, I would type this where TEXT is, like so:
<a href=http://www.Posh-By-Tori.com>Visit My Website!</a>
Or, maybe I just want my link to say "Posh by Tori":
<a href=http://www.Posh-By-Tori.com>Posh by Tori</a>
Orrrrrrrr....maybe I want it to say "The Best Boutique in Michigan!!!!!"
<a href=http://www.Posh-By-Tori.com>The BEST Boutique in Michigan!!!!!</a>
Now, when I go into my HTML and insert this code, this is what appears:
The BEST Boutique in Michigan!!!!!
IF you insert your link, then click on it and, instead of going to the place you wanted to link to you get an error page, its is because SOMETHING is missing. So start over and make sure you have all of the required code: <a href="LINK">TEXT</a>
If you are missing a ", < , / or ANYTHING from the above code it won't work. And don't forget to include the http://
INSERTING YOUR EMAIL WITHOUT SHARING IT USING HTML
I love, love, love inserting my email without sharing my email address (it totally helps cut back on spam!). All you need to do is go into your HTML section and insert a "mail to code". The basic code is very similar to the traditional insert-a-link-anywhere that we discussed above. It consists of two main parts; mailto:YOUR EMAIL and TEXT, so it looks like this:
<a href="mailto:YOUR EMAIL ADDRESS">TEXT</a>
Now we simply need to fill it in correctly with the right information.
<a href="mailto:tori@example.com">Email Me</a>
or....
<a href="mailto:tori@example.com">Email Tori</a>
or.....
<a href="mailto:tori@example.com">CONTACT US</a>
INSERTING AN HTML PHOTO / IMAGE IN TEXT
With HubPages you won't be able to use this code, but with pretty much any other site you can.
I use PhotoBucket.com for all of my 100% FREE photo uploading needs.
After you upload a photo through photobucket, or whatever site you use (Flickr, Picassa, etc). Get the HTML CODE. It'll look like this:
<a href="http://s1075.beta.photobucket.com/user/poshbytori/media/main_road_banner_choice_zps53fb4484.jpg.html" target="_blank"><img src="http://i1075.photobucket.com/albums/w424/poshbytori/main_road_banner_choice_zps53fb4484.jpg" border="0" alt="TEXT"/></a>
Unlike the other codes we have used, an image code consists of three parts:
1. The image its self
2. The place where the image is stored online - meaning, when someone clicks the image, they will go to the website where the image is stored (unless you change this)
2. The TEXT that will appear if someone mouse-overs the image.
You can manipulate two of these three parts with ease.
Let's begin with the easiest; the TEXT:
<a href="http://s1075.beta.photobucket.com/user/poshbytori/media/main_road_banner_choice_zps53fb4484.jpg.html" target="_blank"><img src="http://i1075.photobucket.com/albums/w424/poshbytori/main_road_banner_choice_zps53fb4484.jpg" border="0" alt="TEXT"/></a>
As you can see above, I have BOLDED the are where the TEXT is. You can type anything you want into this area and it will appear when the visitor "hovers" over your image. You could make it say "Shoes!" or "Check Out My Site" or....anything. If you don't want it to say anything, then delete everything between the " " so it looks like this:
<a href="http://s1075.beta.photobucket.com/user/poshbytori/media/main_road_banner_choice_zps53fb4484.jpg.html" target="_blank"><img src="http://i1075.photobucket.com/albums/w424/poshbytori/main_road_banner_choice_zps53fb4484.jpg" border="0" alt=" "/></a>
NEXT, lets say you want to have the image UNCLICKABLE - meaning if someone clicks it, nothing will happen. (For example, eBay does not allow images to be clickable, so if you wish to insert an image into your eBay listing, you will need to do the following):
Simply REMOVE/DELETE the "LINK". It helps to find the whole LINK if you look at the whole script as two remaining pieces:
PIECE 1: CLICKABLE LINK <a href="http://s1075.beta.photobucket.com/user/poshbytori/media/main_road_banner_choice_zps53fb4484.jpg.html" target="_blank">
PIECE TWO: THE IMAGE ITS SELF
<img src="http://i1075.photobucket.com/albums/w424/poshbytori/main_road_banner_choice_zps53fb4484.jpg" border="0" alt=" "/></a>
Notice that the IMAGE ITS SELF starts with the code <img src <--this means "image source". We NEED this or the image will disappear. What we can play with is the OTHER link that starts with <a href <---remember seeing that before when we made links earlier in this article?
Ok, so if you want an UNCLICKABLE image, then DELETE ALL of the first part:
<a href="http://s1075.beta.photobucket.com/user/poshbytori/media/main_road_banner_choice_zps53fb4484.jpg.html" target="_blank"><img src="http://i1075.photobucket.com/albums/w424/poshbytori/main_road_banner_choice_zps53fb4484.jpg" border="0" alt=" YOUR TEXT HERE "/></a>
Now all you should have is the second part:
<img src="http://i1075.photobucket.com/albums/w424/poshbytori/main_road_banner_choice_zps53fb4484.jpg" border="0" alt="YOUR TEXT HERE "/></a>
(or, if you already got rid of the TEXT, it will look like this:
<img src="http://i1075.photobucket.com/albums/w424/poshbytori/main_road_banner_choice_zps53fb4484.jpg" border="0" alt=" "/></a>
AND FINALLY, Lets say we want to use the full code and make it so when someone clicks on the photo, it goes to whatever site or page we select, we simply change the LINK:
<a href="http://s1075.beta.photobucket.com/user/poshbytori/media/main_road_banner_choice_zps53fb4484.jpg.html" target="_blank"><img src="http://i1075.photobucket.com/albums/w424/poshbytori/main_road_banner_choice_zps53fb4484.jpg" border="0" alt=" YOUR TEXT HERE "/></a>
Lets say I want this image to go to ShopPoshByTori.com, then I will need to replace it with the new URL:
<a href=http://www.ShopPoshByTori.com target="_blank"><img src="http://i1075.photobucket.com/albums/w424/poshbytori/main_road_banner_choice_zps53fb4484.jpg" border="0" alt=" YOUR TEXT HERE "/></a>
....See, HTML isn't scary at all!!! And remember, you can always start over!
Related

ANGELS OF KARMA, Deep Trauma Healing and Karma Healing and Release

Techie Corner: Easy Steps to PowerPoint- It Only Looks Scary!
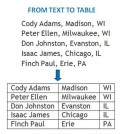
How To Convert Texts To Table | Microsoft Word 2007, 2010 Tutorial

Writing Tips: 7 Hooks to Tease Your Reader
What Takes More Courage Than Rebellion? Considering Another Point of View. Part IV: Combined Religions


