Basic Metallography and Surface Preparation Technique
Emery Paper
Introduction
Finding out the internal structures of metals have many engineering applications in our society.What is the definition of Metallography or understand by metallography? Metallography is the study of series of processes undergone to determine the microstructure of metals or materials under electron microscopes of various magnifications. It is needed in Science as the topography of materials is obtained through it. It is the imaging of topographical or microstructural features on prepared surfaces of materials which in this topic Mild Steel. These processes are carried out step-by-step until the final result is achieved. The practical on this topic is carried out in Metallography Laboratory. It is one of the major topics offered by students in Metallurgical Engineering departments. Students in Materials and Mechanical Engineering department offer this topic as well. Serious attention is paid to the topic in tertiary institutions as students in Metallurgical, Mechanical and Materials Engineering cannot do without it. It teaches what the structure of metals really look like and not just making use of metals without knowing how it is internal. It is like running X-Ray on an individual to see what is contained internally in that person. In the same way, Metallography is determining the internal structure of metals.
There are materials and basic techniques that are used in Metallography. The devices and materials used in Metallography are metal cutting saw, vice, emery papers, Gamma Alumina powder, forceps, etchant and electron microscope. These materials are used depending on the stage the metallurgical engineer or student is into. The processes involved in metallography are cutting, grinding, polishing, etching and viewing.
Surface Treatment Techniques
This area involves careful and neat work. Surface treatment techniques in Metallography are discussed thus:
Cutting: This is done using the metal cutting saw. The metal is cut out from the longer one and a flat surface is to be maintained. Maintenance of flat surface is to enhance grinding. The long mild steel is held firmly in the vice during the cutting. The mild steel or material is positioned well and less pressure is to be applied during the cutting process to avoid alteration in the final result. The engineer that cut should first be prepared in terms of safety. He must do everything possible to avoid an accident in the workshop by wearing safety boots, overall, face shield, hand gloves, and other necessary equipment. Safety precautions are to be ensured in the workshop to avoid stories that touch. The time taken for the cutting is dependent on the hardness and hardenability of the metal.
Grinding: This process comes after cutting out of the metal sample. This stage takes more time than other stages during metallography. This is because smooth surface must be obtained at the end of the stage. Grinding is rubbing the flat surface of the mild steel sample against various sizes of emery papers. The emery paper can also be called abrasive or Silicon Carbide paper. The sizes of the emery papers used on Mild steel during metallography are P60, P200, P400, P800 and P1200. The stating is from the rough to the fine size. This is to say that P60 is the roughest in the list while P1200 has the finest surface. In grinding, little or no pressure is applied to avoid generation of heat which may alter the final result in the process. Note that after grinding on each paper, the surface is cleaned with cotton wool before using it on another emery paper. The reason for is to avoid transfer of mesh (particles from emery paper during grinding) from one Silicon Carbide paper size to the other which can affect grinding result.
Polishing: It is smoothening the ground surface of the mild steel until a smoother surface is obtained. Polishing is conducted by rubbing the ground surface against gamma-Alumina powder with the molecular formula of Al2O3. The Gamma-Alumina powder has one of the large particles and other of the fine particle. That of a large particle is first used for polishing before that of fine particles. Polishing is continued until a mirror-like image is obtained. All stripes on the ground surface must be polished out in this stage before etching. No mark is to be seen on the polished surface of the sample. This is done to makes the image at the end of the process to be clear and sharp.
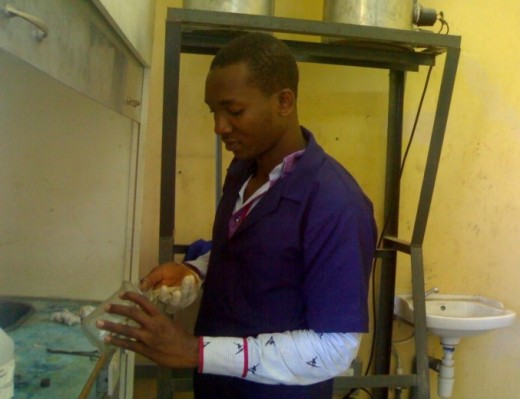
Etching: This comes after polishing. It is treating the polished surface with a reagent called etchant. During the etching which I carried out personally, I made use of Nital. Nital contains 2ML (2 Millilitres) HCL in 100ML ethanol. Other etchants that can be used are Picra and Marble’s reagent. The etching period can be between 10 to 50 seconds. The period depends on the metal to be etched. Etching is carried out in fume chamber. The metal sample is held with forceps during etching to avoid etchant from being in contact with the hand. Another reason is that many etchants are concentrated. The etchant can harm the person carry out the etching if proper precautions are not taken into consideration.
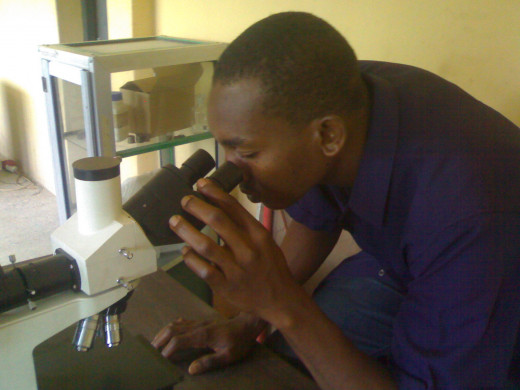
Viewing:
It is the last stage in metallography. After the sample had been etched, dry the etched surface using a device called Air gun. Air gun functions with electrical energy and used for drying through heating. The sample is viewed in electron microscope after drying. The result seen is dependent on the metal sample. When I viewed using mild steel as my sample, a martensitic structure is formed. There are higher white patches on the structure showing that it contains more Ferrite. This also shows that mild steel contains less percent of carbon. The martensitic structure was formed because the specimen was heated to its austenitic temperature and then quenched in a furnace. Without any heat-treatment being given to the mild steel, another result will be observed under the metallurgical electron microscope.
Conclusion
This topic has discussed metallography and analytical techniques, and the processes involved in it. These metallographic techniques are: cutting, grinding, polishing, etching and viewing processes. The steps are carried out one after the other. The question here is: does metallography has any useful application in the world and does science pay good attention to it? The answer is yes as this helps in determining the strength of materials before it is used in any engineering works as construction engineers cherish it. Civil engineers use this means to estimate the strength of metals before they can use any during bridge construction. During metallography, the grain arrangement of metals is being detected. It is this finding that will give construction engineers ideas on the proper application or use of such metals being examined. In all metallography is a great and nice study.
© 2013 Uzochukwu Mike

