Beginner AutoCAD 2011 Tutorial--Mystery Drawing

Mystery Drawing using AutoCAD
Special Notes:
Intended for those with little or no experience using AutoCAD. This tutorial uses Absolute Coordinates and very basic commands.
Materials:
Personal Computer
AutoCAD
Caution: Before installing AutoCAD, make sure your PC meets the minimum software requirements.
You can download a 30-day free trial at http://usa.Autodesk.com/autocad/trial/.
Install AutoCAD before beginning.
To Start AutoCAD:
1. Turn on PC.
Note: Autodesk can install a shortcut onto your desktop. If a shortcut is not available, follow the instructions below. Otherwise, click on the shortcut icon to begin.
2. Press the start button.
3. Search for the Autodesk Folder.
4. Click on the Autodesk Folder.
5. Select AutoCAD (year) Folder.
6. Click on AutoCAD(year)-(language). **Example: AutoCAD 2011-English
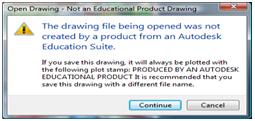
Note: If you downloaded the student version, you will receive a pop up, click on the Continue button.
Note: A Welcome Screen will appear. To Exit the Welcome Screen, click on the red X at the top right hand corner of the Welcome Screen.
Before You Begin Mystery Drawing:
**At the very bottom of the screen, you will see blue highlighted buttons on a toolbar.**

With the exception of the Grid Display button, click on any highlighted blue buttons. This will turn off the advanced tools that can confuse a new user—you will not need those tools for this exercise. The bottom toolbar should look like the picture below—only the Grid Display button remains highlighted.

At the bottom of the screen, above the bottom toolbar, you will see a command line; type any commands on that line.

- Type: Grid
- Press: ENTER
- Press: 1 (Note: Pressing one will give your drawing a 1:1 ratio.)
- Press ENTER
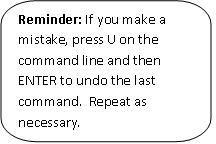
Note: If you make a mistake press U on the command line and then press enter. This will undo the previous command. Repeat as necessary. If you are unsure of the commands you entered previously, press the F2 button. This will give you a list of the commands that you entered. Click on the red X at the top of that window to exit the list.
Part 1 of Mystery Drawing:
On the Command Line Type the Following:
1. Zoom (Note: This is the zoom command)
2. PRESS ENTER
3. A
4. PRESS ENTER
5. Line (Note: This is the line command.)
6. PRESS ENTER
7. 2, 2
8. PRESS ENTER
9. 2, 8.25
10. PRESS ENTER
11. 8.25, 8.25
12. PRESS ENTER
13. 8.25, 2
14. PRESS ENTER
15. C
16. PRESS ENTER
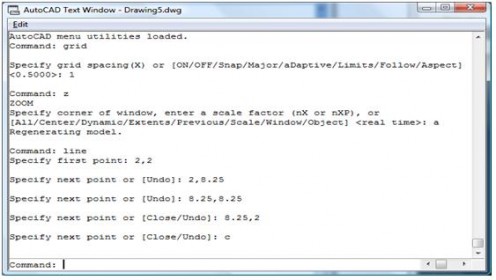
Note: Press F2 after completing each Part to check your work before you continue to the next Part. The screenshot below resembles what should appear when pressing F2 after finishing Part 1. If you made any mistakes, press U in the command line then ENTER to undo previous command. Repeat as necessary.
Part 2 of Mystery Drawing:
On the Command Line Type the Following:
1. Line
2. PRESS ENTER
3. 2, 2
4. PRESS ENTER
5. 8.25, 8.25
6. PRESS ENTER
7. PRESS ENTER
8. Line
9. PRESS ENTER
10. 8.25, 2
11. PRESS ENTER
12. 2, 8.25
13. PRESS ENTER
14. PRESS ENTER
Reminder: Press F2 to check your work before continuing to Part 3.
Part 3 of Mystery Drawing:
On the Command Line Type the Following:
1.Line
2. PRESS ENTER
3. 2, 5.125
4. PRESS ENTER
5. 5.125, 5.125
6. PRESS ENTER
7. PRESS ENTER
Reminder: Press F2 to check your work before continuing.
Part 4 of Mystery Drawing:
On the Command Line Type the Following:
1. Line
2. PRESS ENTER
3. 3.25, 8.25
4. PRESS ENTER
5. 3.25, 7.5
6. PRESS ENTER
7. 7, 7.5
8. PRESS ENTER
9. 7, 8.25
10. PRESS ENTER
11. PRESS ENTER
12. Line
13. PRESS ENTER
14. 4.5, 8.25
15. PRESS ENTER
16. 4.5, 7.5
17. PRESS ENTER
18. PRESS ENTER
19. Line
20. PRESS ENTER
21. 5.75, 8.25
22. PRESS ENTER
23. 5.75, 7.5
24. PRESS ENTER
25. PRESS ENTER
Reminder: Press F2 to check your work before continuing
Part 5 of Mystery Drawing:
On the Command Line Type the Following:
1. Line
2. PRESS ENTER
3. 3.875, 2
4. PRESS ENTER
5. 5.125, 3.25
6. PRESS ENTER
7. 6.375, 2
8. PRESS ENTER
9. PRESS ENTER
10. Line
11. PRESS ENTER
12. 4.375, 2
13. PRESS ENTER
14. 5.125, 2.75
15. PRESS ENTER
16. 5.875, 2
17. PRESS ENTER
18. PRESS ENTER
Part 6 of Mystery Drawing:
Note: You will be using a new command. Follow the directions carefully.
On the Command Line Type the Following:
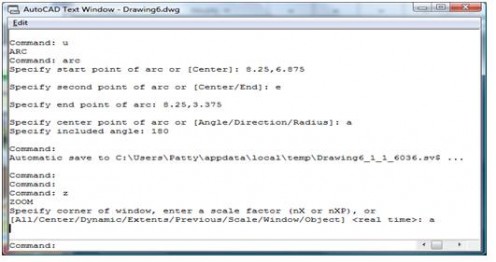
1. Arc (Note: This is the arc command.)
2. PRESS ENTER
3. 8.25, 6.875 (Note: This is the start point of the arc.)
4. PRESS ENTER
5. E
6. PRESS ENTER
7. 8.25, 3.375 (Note: This is the end point of the arc.)
8. PRESS ENTER
9. A
10. PRESS ENTER
11. 180 (Note: This is the angle of the arc.)
Note: Press F2 to check your work. The screenshot below should resemble your work for Part 6.
Part 7 of Mystery Drawing:
On the Command Line Type the Following:
1. Line
2. PRESS ENTER
3. 8.25, 5.125
4. PRESS ENTER
5. 6.6705, 4.4014
6. PRESS ENTER
7. PRESS ENTER
8. Line
9. PRESS ENTER
10. 8.25, 5.125
11. PRESS ENTER
12. 6.6705, 5.8438
13. PRESS ENTER
14. PRESS ENTER
Last Part—Save Your Hard Work:
At the top left of the screen you will see a large red A
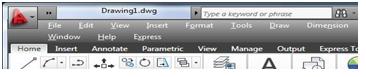
1. Click on the red A
2. Click on the Save As
3. Select Auto Cad Drawing
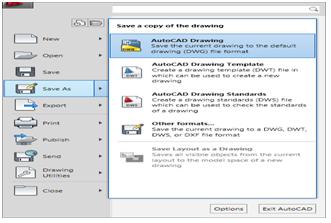

4. Choose the Folder that you want to save your drawing
5. Change the file name to MysteryDrawing.dwg
6. Click Save.
Final Thoughts
AutoCAD offers a wealth of tools and options. This tutorial/exercise barely touched any of the features that AutoCAD has to offer. For more information and products, visit Autodesk’s website at http://usa.autodesk.com
I hope you enjoyed this very basic tutorial!!


")

")


