How To Make a Timeline That Rocks
Why Make a Timeline?
If you're a school student, there will invariably come a time when you are assigned a project where you have to create a timeline. But timelines are great for other projects, as well. Create a timeline for your family to remember and display the important events that have helped your family change and grow over time. Someday you may forget all the important things that shaped your lives, but having it recorded in a beautiful, graphical timeline can help keep the memories alive, even long after you're gone.
Companies use timelines in various applications. When they make a proposal or business offer, their competitors want to know about the company's history, as well as other relevant data. Creating a well-organized, easy-to-read timeline is a great component to include in a business proposal to show that your business has a long, strong history that includes some great achievements. They are also useful when included in promotional flyers or brochures.
Infographics are very popular because they provide a lot of pertinent information in a quick, easy-to-read format, and their popularity is increasing. According to Google Trends, the popularity of infographics increased by 800% over two years from 2010-2012. It is still increasing. They're easily shared, and they tend to generate a lot of interest, if done well. By creating an accurate, visually-appealing timeline, you will have a great piece of data to include in an existing infographic, or it could very well be the entire content of your infographic.
Preparing to Make Your Timeline
If you want an awesome timeline, you must set aside some time to prepare before you jump in and create it. Take a piece of paper or open up a text document in your favorite text editor and create a guide for yourself. These are the important questions you need to answer.
- What, exactly, is the topic of this timeline?
If you're creating a timeline for a school project, the answer to this question has been given to you. If you're creating a family timeline, think about what you want to cover. Is this going to be just your current nuclear family's timeline or do you want to create a timeline that extends back a generation of two? Is it going to be general in nature, where you include anything that seems important, or is there a theme that you want to cover exclusively? If you are creating a timeline for a business project, do you need a timeline that covers events since the company's inception, or do you want to showcase your achievements in a certain area in, say, the last ten years? Think about the length of your timeline and what topics you want to include in it. You should decide on a specific starting date and an end date. Write down an interesting, relevant title for your timeline. - Gather Your Data
Many things happen in even a short period of time, so if your timeline includes several years or even millennia, you will have to sort through all the events and decide which events are the most important or the funniest, or whatever criteria you are using for your particular timeline. If you're working on a school project, your timeline will most likely deal with the major events in someone's life or in a certain era. Make a list of which events you want to include and when they happened.
If you're working on a family timeline, just listing dates and facts (such as births, deaths, and weddings) isn't that exciting. They're important to include, of course, but since your timeline is based on personal experiences, be sure to include emotional parts so that those who read it can share in the emotions associated with the event. If there was a birth, what is one thing that happened that day that you remember to this day? Maybe Aunt Mabel came running into the hospital covered in cake batter because she was baking cookies when she heard the news. It's a silly example, but the point is to make the event real. Include a quip that someone said. Detail the look on your husband's face that day - pick something that makes the event come alive and seem like it was a real experience, not just a date on a chart.
A long list of dates is just encyclopedic - and it's boring. Be sure to include other data to make it interesting. For school projects or business proposals, you can include little-known facts or relevant happenings that occurred elsewhere but had an impact on the topic you're covering. There are databases online where you can search for events that happened on a certain day in history. HistoryOrb is one, but you can find several if you search.
As you are doing your research, collect photos if you want to use them in your timeline. For example, if you're doing a timeline of Michael Jackson's singing career, find photos of him when he made his first public appearance in 1964. You could collect photos of him as he progressed through his career to correlate with certain events in his history that you are using on your timeline.
Creating Your List Takes Time
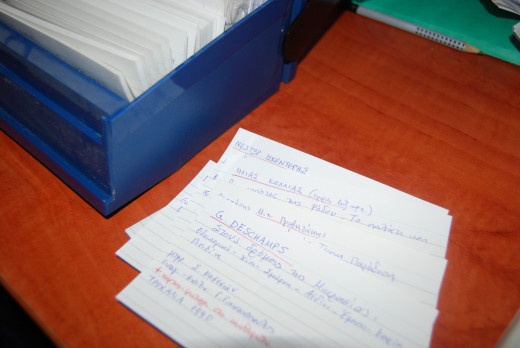
If you write the facts that you want to include in your timeline on paper, you will probably end up scratching things out and trying to put other things in. As you collect more data or remember more things, you will want to move things around to make them flow in chronological order. If you're creating your outline in a word-processing or spreadsheet program, it's not a problem since you can just cut and paste things easily to move them around and organize them better. Writing each event on an index card is great, though. You can easily line them up, move them around, discard some events or insert others.
To make your timeline awesome, search various resources for things you can include in your timeline or make it more interesting. Check several resources to make sure the data you have is accurate. If one resource shows a certain event occurred on a particular date, go to other resources and see if you can flesh out some really interesting facts about that time or event that aren't included in the main resource.
If you're creating a family timeline, you'll need to look through family records to make sure your dates are correct, but you should also interview people who were around for the event. Ask them to tell you what they remember about it. Photos are great for jogging your memory, so take some time to look at pictures. I remember the day my first daughter was born, but when I pull out the photo of me holding her in my arms for the very first time, I can feel her wispy, sweet breath on my cheek as I hold her close to kiss her. Extract the emotional parts, then include those along with the events.
If you take the time to dig deep, do some extra research, look at old photos or videos, and interview people who were there for the event, your timeline will be significantly superior.
Finalize Your Timeline on Paper
At this point, make sure:
- You have thoroughly researched your topic
- You know the specific start and end dates
- You have a title
- You have chosen which events you want to include
- You have gathered additional data to include (little-known facts, emotional impact statements, quotes, humorous snippets, information about other related historical events, etc.)
- You have ordered your items in the sequence you want to use them in your timeline.
- You have collected the photos that you want to include in your graphical timeline (optional).
Write out the rough draft of your timeline on paper or in your preferred word-processing or spreadsheet program. On paper, you could draw a straight line down the middle of the paper and insert the events along with their dates and the corresponding snippets you plan to use. You can place hash marks at even intervals, for example in 10-year increments or, if you're covering millenia, in 10,000-year increments. A business timeline might divide its timeline into 3 or 5-year increments.
If you are using a word-processing program, you could just make a bulleted list of the events in chronological order. If you're using a spreadsheet program, make columns for the year, month, day, event description, and associated data. In spreadsheets, you can enter them in any order you wish because the software can sort them by ascending years after you've finished.
Take note of how clustered or spacious your timeline appears when you look at it. Generally speaking, you don't want a timeline where most of the elements are bunched up tightly together in one spot while other areas seem pretty empty. If that happens, you may want to rethink your starting and ending dates. If you have "birth: 1932" and then nothing else until 1948, you could choose to simply leave out the extraneous data and focus on the years when events were actually occurring. You could adjust your timeline to only include events starting from 1948. You don't have to leave out the earlier data, of course, but it's an option that might make your timeline more balanced and visually appealing.
Choose a Format for Your Graphical Representation
After all that research and organizing work is done, it's time for the fun part. This is where your creativity can run wild.
- Think about how you want to display your timeline.
This is the most important part. You want your graphical representation to be:
- Pleasing to the eye
- Related to the topic of your timeline
- Not overly cluttered. Have plenty of empty space so that the data presented can be glanced at and understood quickly.
- Have a nice color scheme
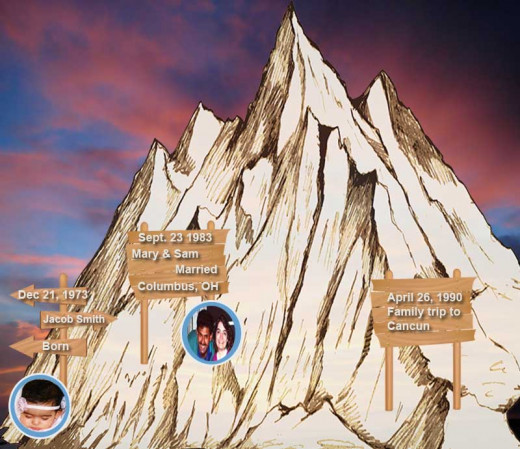
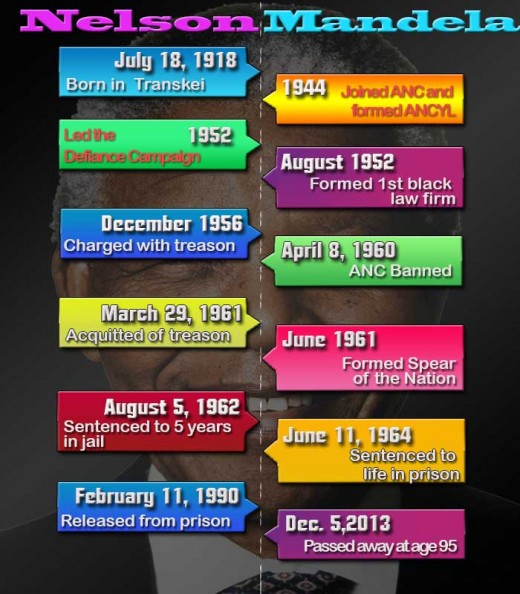
There are myriad ways to display your data, and here's where you can really be creative. Maybe you want a simple, modern timeline that has a black background and simple, colored shapes that contain the data, all emanating from a dotted line that runs down the middle of the page. Maybe your family loves the outdoors and you would like to use that theme to display your timeline. You could choose to create a mountain as the timeline. You could use signposts and tents and other climbing images going up the mountain. These images could contain your data.
Which design you choose will depend on how much information you plan to include. If you're only adding dates and important events, a linear timeline with (or without) hash marks will suffice. If you intend to include pictures or paragraphs of descriptive text, as well, think about a design that will allow you to include more than a line or two.
You could choose to use a winding road as your timeline, and use various road signs placed alongside the road as the containers for your data. If you were creating a timeline detailing Michael Jackson's singing career, you might choose to use a winding musical staff as the time line and musical symbols or musical notes as the data containers.
To get inspiration, do an Internet search of images for "timelines in infographics" just to get an idea of how others have visually presented their timelines. You don't want to copy someone else's idea, but you can find a good idea for your own creation.
Creating Your Timeline: The Fast and Easy Way
To create your timeline quickly and easily, you could:
- Use a free online timeline creator
To create one, just enter your data and click "create". Many of the online creators are for digital display or embedding on websites only. You may not be able to print or save them on your own computer. Some of them offer the ability to add video and audio, however, which you can't do on paper. Some websites offering free timeline creation are Dipity, OurStory, and Timeglider, to name a few. You can do a search and find more. Besides not being able to print or save them, creating them online doesn't offer you a chance to make something that's stunningly beautiful or totally unique. - Use a text-editor program to create your timeline. To create a timeline using Microsoft Word, you can follow the short tutorial at microsoft.com.
- Use a spreadsheet program to create your timeline. To create a timeline using Microsoft Excel, here is an online tutorial.
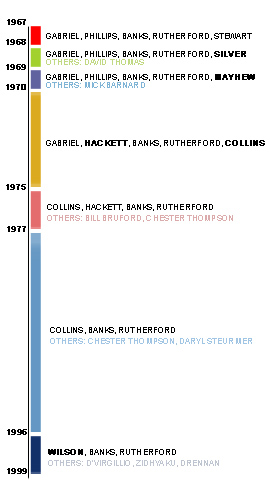
These methods are fairly quick and easy, but they do not offer you the ability to create a stunning work of art that is of infographic-quality. You can't create a unique image-based timeline. Most of these methods provide a way to create a line with bubbles or text boxes emanating off the line at different points. But they do provide a way to get the job done.
What Do You Think?
What Would You Use a Timeline for?
Design a Simple, Modern Timeline using Photoshop
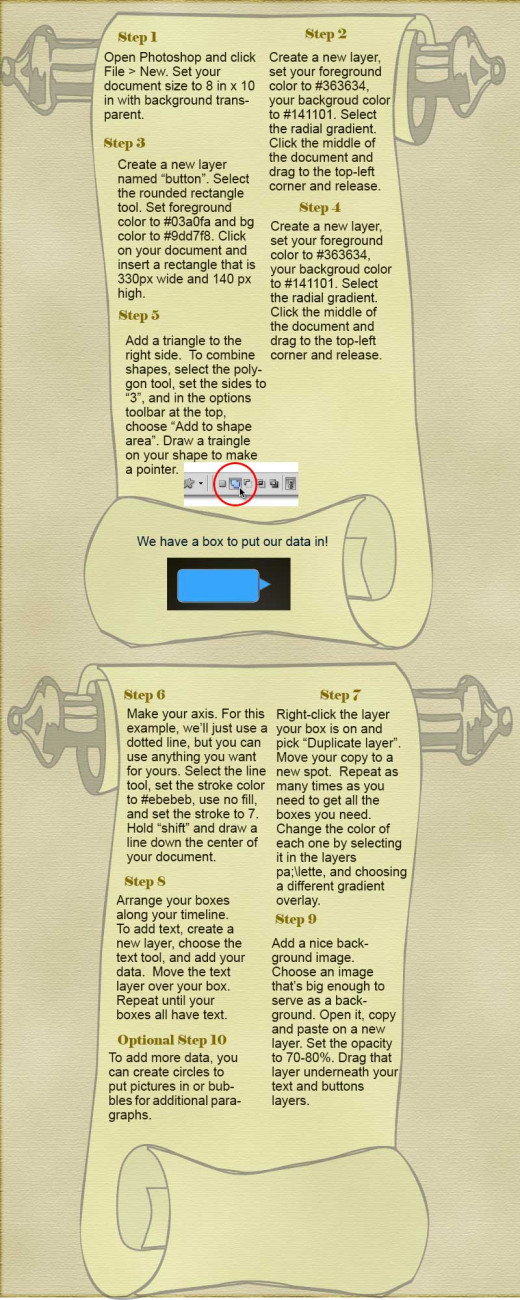
Let's create a simple timeline that has more visual appeal than what a word-processing or spreadsheet program can offer you. If you don't have Photoshop, you can follow along using your favorite image-editing software of choice.
Make a Simple Modern Timeline Step-by-Step
The Finished Timeline
Make an Image-Based Timeline
In addition to just creating a timeline like the one we did above where we put our data inside shapes and aligned them along an axis, you can create an image that tells a story. Choose an image for your timeline axis. A timeline of a musician's life might use a winding musical staff as the axis. A family timeline might include a winding road. Choose something that shows movement - you can use a mountain and then place your data as signs as you go up or down the mountain. You can choose an image of a winding river and use trees, signs, or other nature-based images along the banks to house your data. The possibilities are endless.
If you're adept at drawing in Photoshop or Illustrator, you can create your own. If you're not great at drawing (like me), find a free custom shape or brush for Photoshop online and use that. Just do an Internet search for "Photoshop music csh" (for custom shapes) or "free Photoshop brushes signs" or whatever you're looking for. Csh is the file-name extension for Photoshop custom shapes, so using that will help you get results that actually offer custom shapes instead of just regular images. I created the scroll above using a custom scroll shape I found online. I'm no good at drawing a scroll! Alternatively, you can search for a free tutorial on how to draw what you want in Photoshop. There are free tutorials for hundreds of objects. Try searching for "create a mountain Photoshop tutorial" (or "illustrator" or "Paint" or whatever software you're using).
Instead of drawing one, you can just use a photo you have in your library, or you can find an image online that you would like to use. Be sure to check the copyright and license restrictions on any images you find online and make sure it's big enough for your document.
Once you've drawn your image or opened one that you found elsewhere, make sure it's on it's own layer. Use separate layers for everything so you can easily move individual objects around. Say you have a mountain image for your background. On a new layer, select your custom shape tool, choose a signpost custom shape (that you found online), and draw a sign. Decorate it using the "blending options" at the bottom left corner of the layers palette - add color, a drop shadow, etc. Create a new layer for the text, then add your text. Move things around to position them where you want them. Duplicate layers as needed or create new ones for different shapes, and repeat the process until your timeline has enough data containers to store all the data you want to include.
An Image-based Timeline
