How to Use Real Clay

A Few Simple Tricks Can Make Working With Clay Easier
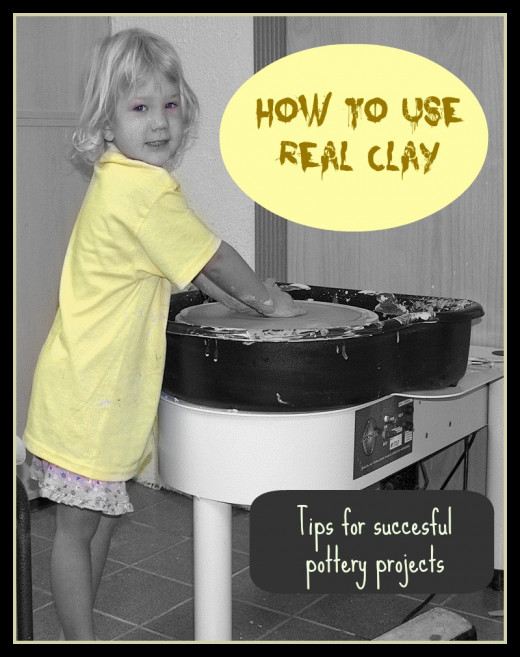
Some of you have asked me about using "real" clay for the Pottery Road Trip projects. I wanted to give you some tips to help your projects be successful.
First, allow me to define the types of clay you can work with.
Air dry clay is probably the easiest clay to get. Crayola makes an air dry clay that is great. It looks and feels very much like real clay. It's affordable, and it's washable.
Polymer clay is also easy to get. You can get more detailed with polymer clays, and they come in colors. They are expensive to purchase, but they work great.
Earthenware clay is a natural clay that gets fired to a lower temperature. This clay can be purchased through art supply companies or clay suppliers. This was my clay of choice when teaching my pottery classes because it is affordable and easy to use.
Stoneware clay is also a natural clay. It gets fired to a hotter temperature than earthenware. It can also be purchased through some art supply companies and clay suppliers. This is my clay of choice for throwing on a potter's wheel.
No matter what form of clay you choose, I suggest you go for "white" clay. It usually actually looks grey but is called "white." Red clays stain, so I would avoid using those, even if you are using air dry clay.
If you use air dry clay, you can just bust open the pack and start working. This is true of polimer clays, as well.
For stoneware or earthenware clay, you will need to wedge the clay first. This is just a fancy way of saying "squeeze it" to get out all the air bubbles. Here are two ways to wedge clay:
For small amounts of clay, simply squeeze it in your hand.

For larger amounts, press it with the heel of your hand onto a cloth-covered surface. Rotate it and press again. Do not make a pancake. Instead, keep it in a

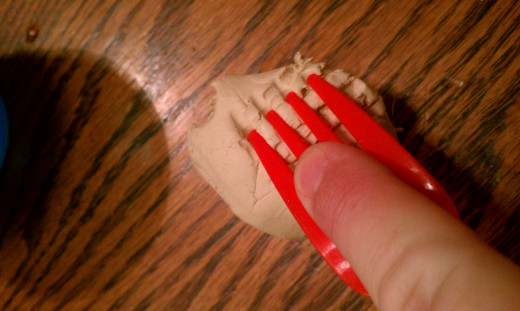
Scratch or "score" both pieces that will be stuck together. A plastic fork works great for this. I used to tell my students to make a tic-tac-toe mark on the
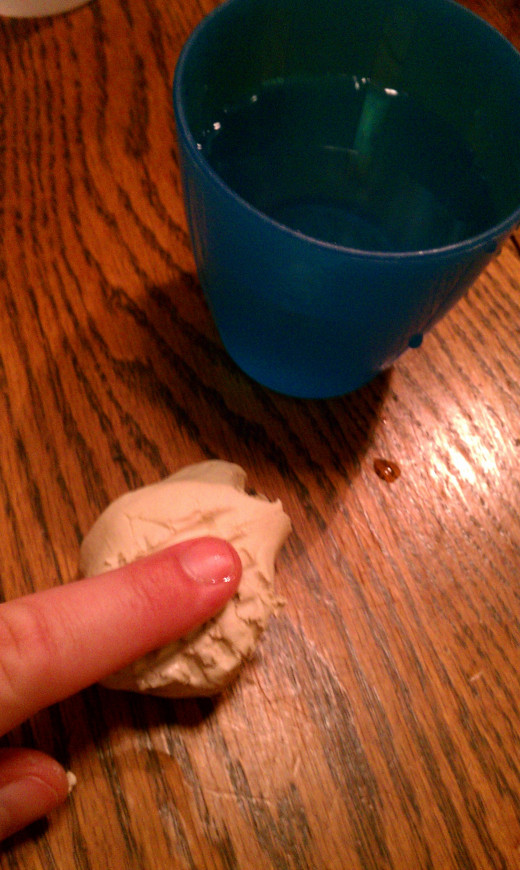
Wet the places where you scratched. This is the "slip" part of the process. "Slip" is the name for wet clay.
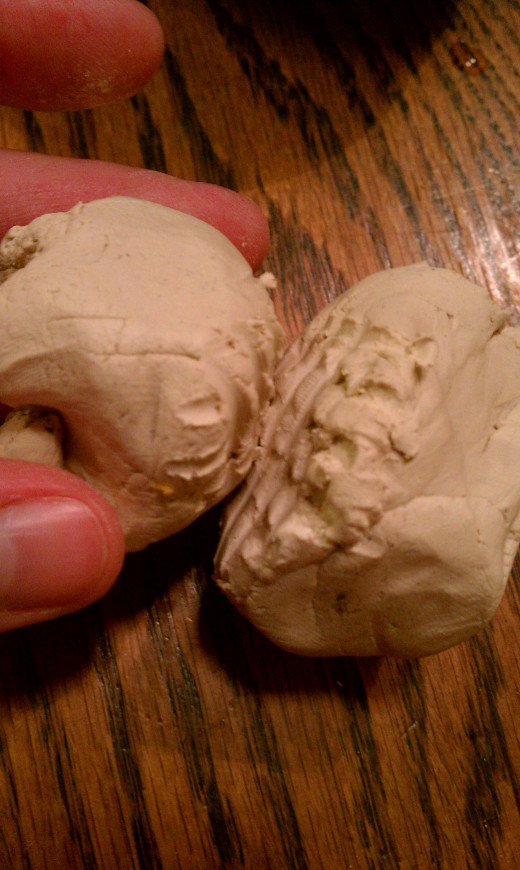
Stick the scratched and wet pieces together.
Following these steps will help to ensure that you end up with durable pieces. Of course, if you are working with playdough or you are not planning to keep the pieces you make, there is no need to score and slip! No matter how you work with the clay, have fun.
If you use stoneware or earthenware clay, it will need to be kiln-fired. Just putting it in the oven won't work, and the piece will be extremely fragile. Your oven only goes to 500 degrees, and a lower firing for clay is 1850 degrees, so the little Kenmore ain't gonna cut it! For air dry clay, you can let it air dry. Some brands can also be sped up by placing the clay in the oven. Check your packaging for instructions. Also, for polymer clay, read the packaging or check the manufacturer's website.


