Fun, Educational, Crafting Projects for Functional Level Students or Small Children at Christmas.

Functional level learning should be fun - Crafting projects to try in your class or home.
The best way to learn any concept is through doing.
Application of knowledge is the road to a deeper understanding.
This lens will detail two crafting projects that are fun, educational and affordable for young children or functional level students to create during that most festive of seasons.
While imparting knowledge and skills has to be our foremost goal, there is no reason it can't be fun. During the season of jolly, let's think crafting and bring out the holly!

Start by setting the mood.
It's time to cop a festive attitude.
Super teachers know to change out classroom decorations and academic visual aids often in an effort to keep students interested. To begin your seasonal units through crafting, consider setting up a very basic holiday theme through thoughtfully placed garlands of holly or other greenery.
Be sure to go with the fake stuff. Little ones may be tempted to try munching on real holly berries which are poisonous to humans. If you don't like the greenery idea, try just plain garlands. Mixing the two, with one woven within multiple strands of the other, gives a nice look. Long strands of beads or simulated pearls can work nicely.

Greenery provides a calming affect while being festive and fun.
The advantage of going with the fake stuff, other than the obvious safety reasons, is that it can be reused over and over again. Saving it allows for much faster speed of decoration in the future. It will already be cut to size!


The room is your canvas.
Now that you have set the room as the basic canvas, get the students into the spirit by having them make the more specific components of the Christmas decor.
Take it up a notch by making some cross curriculum connections. Present the children with choices for the theme and have them vote. Have a mini discussion on responsibility and citizenship as it relates to voting.

Christmas time creativity keeps kids centered on learning. - Children learn how to make choices through doing it.
To make cross curriculum connections, provide the students with pre-printed ballots. Use pictures to represent the theme choices you thoughtfully provide. Students simply circle their selection. Be sure to include a textual tag with each selection and keep it to four or less choices. Make a big deal when tabulating the votes to keep them interested. Once the kids know the results, the fun begins.


Need some ideas for themes?
Think about what you will be teaching and how to tie that into the choices you provide.
* Snowflakes for math or science - In math they allow for easy teaching of angles, symmetry and other concepts. In science they make great hooks for introducing crystals, weather units and so forth.
* Ornaments in various shapes for functional levels - Classes working on shape identification or very young children learning the same will benefit from this selection.
* Elves for vocational skills training - Elves are known for having a great work ethic.
* Ornaments in simple circular shapes for vocational skills training - Put tools in the middle to introduce tool related vocabulary and spelling.
* Arctic animals for science classes - Children love units on animals. Such units allow for the teaching of multiple concepts. Have students write short biographies for each animal for writing connections.
* Red, white and blue ornaments for social studies - It keeps thing focused on the patriotic.
* Santas, reindeer, snowmen, Christmas trees and presents always are a sure bet with any class at Christmas.
Whatever choices you decide on, keep them fun and festive.
Sadly, when being realistic, teachers know that for some students classroom decorations may be the only ones they get. With that in mind, go all out!


Whatever theme the children select,
let them use technology to access the means of making it happen.
Gather them around the computers, or more likely computer if the district is feeling the budget crunch, and get to surfing. Give students a few web sites that you trust and have already been through extensively to select their coloring pages. Have them print and get to coloring and cutting.
They will love it. Let them put up their creations and get in the holiday spirit before the crafting begins. Think about playing some seasonal tunes softly in the background while they work.

Materials all teachers should keep on hand. - Don't let your lesson be sabotaged by a lack of supplies.
Remember to teach good work habits as you go by having the students pick up everything when they are done. Sorting markers by color is a good way for little ones and functional level students to work on learning colors. It helps keep teachers organized and kids love to help out.


Super teacher safety tip:
Avoid temptation. All that glitters is not golden and might just send some to the hospital!
While we all love Christmas lights twinkling, do NOT allow them in your classroom. Irregular flashing light patterns have been documented to trigger seizures in some people. With functional level or very young students, it is not a chance worth taking. You may be thinking, what can it hurt, the light patterns are not random and therefore can't be a danger. You may think I don't have any students with a seizure disorder in my class.
Wrong, possibly on both counts. All it takes is a power surge, someone holding up a piece of paper in front of the lights and moving it, walking in front of the lights, anything can interrupt a pattern viewed by some poor student from across the room. Furthermore, considering age and communication capacity, it is possible that you have students who have yet to be diagnosed. Seizures come in multiple forms and are not always easily spotted.
Honestly, the chances are slim that a seizure would result. Is a slim chance worth taking with a child? I think not. Be kind to the planet and your students. Toss the lights.

Project - Ornaments out of piatas
Yes, that's right, piatas for Christmas.
These are so much fun to make and super cost effective. The first time my class ever did this, I was concerned the outcome might be less than desired.
I am committed to crafting projects that come out looking good, so students earn a sense of pride in accomplishment.
A colleague pushed the idea and I was looking for new projects, so I decided to give it a go. At the time, I was working with 18 - 22 year old functional level students in a self contained transition program. Some of my students had some serious difficulties with fine and gross motor tasks.
I was concerned that perhaps I had bit off more than we could chew.
I could not have been more wrong.
Everyone was able to participate in meaningful ways and create some fantastic looking Angry Bird pinatas. That was our first pinata. Christmas ornaments were a piece of cake by the time December rolled around. Students were used to the process by then.


What do I need?
Materials list:
Balloons
Flour
Water
Newspaper (a lot)
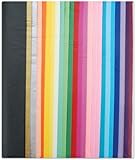
Tissue paper
Scissors
String
Rulers
Christmas tunes in the background (optional)


How do we make this?
The first thing is to get sticky with it.
First, make the glue. There are two ways to do this, with a cooking component or not. For mid range and above functional level classes, I really like the cooking component. It allows for real life application of kitchen safety practices.
Glue recipe using kitchen appliances -
Because it will take some time to cool, it's best to do this in the morning or do it a day ahead of time. In a good skillet, mix equal parts flour and water. Cook on low heat. You are looking for a thick, glue like consistency here, so adjust as needed. The mixture must be stirred continuously to prevent lumps. When it is totally smooth, warmed throughout and the desired consistency, it's ready.
Glue recipe without kitchen appliances -
Use the recipe above in a mixing bowl on a flat surface. Seriously, it works just as well without the heat.

Making the shell -
The next part gets messy.
So, of course, students love it. Invest in a few vinyl table cloths to protect work surfaces and make for easy clean up in a hurry. Always have students do the clean up whenever possible. It teaches good work habits. It also affords students more ownership in their education and their environment. If you make it a routine, every time, soon you will find they will automatically begin cleaning up after themselves. For real. It's true!

I like to do this in a big group setting.
* Have students blow up the balloons and tie them off.
* Coat the newspaper in glue.
* Wrap the paper around the balloons until the entire surface of the balloon is covered with a few layers. I found three at a time worked well for us.
* Wait. This part is not fun, but it teaches a valuable skill, patience. If you're not big on waiting, have students work on cutting the tissue paper or starting more balloon pinatas. As you get groups of new wet ones turned out, you will have dry ones to work on while others are sunning in no time.
* Repeat the process a few times until the students have built up a good hard shell over the balloons.
* Cut a hole just below the tied off end of the balloon, if you want to be able to fill with candy. These are great just as ornaments. Be sure to leave the tied off end of the balloon to have something to affix the ribbon to. Some students may need assistance with this step.
The year we did these, my class was located right by the building doors. We got in the habit early on of putting them outside to dry quickly in the sunlight. It's not a bad idea, but we were quite the sight running willy-silly to retrieve our pinatas in the making during an unexpected shower. The kids got a kick out of it and we learned to check the weather reports twice a day online. Technology in education can be a wonderful thing, when the weather man is right.


Decorating the shell -
Have a plan ahead of time.
Print a picture of ornaments that have simple designs such as stripes or geometric patterns. Make the pictures big and in color so the students have a good visual to aim for. It's a good idea to laminate the pictures. You can use them again next year if you want and it keeps them from getting destroyed by glue covered hands.
* Have students fold the tissue paper into long strips of three layers folded over each other. You will need to do guided modeling instruction for this. Using a ruler, have students mark off sections at half inch intervals resulting in a fringe look when cut.
* Cut the folded tissue paper on the intervals. Have students leave a one inch layer at the top that is not cut to create a firm foundation for affixing to the balloon.
* Using paint brushes, students will paint the uncut portion of the strips with glue and affix to the balloon shells. Start at the bottom of the balloon and work upwards. This is essential for success. Students will replicate the color patterns on the picture.
* The product may look "thin" or "patchy" at this point. Don't worry. Let it dry. When dried, fill in any spots that are somewhat see through, thin, or otherwise not filled in properly. Use scissors to trim up any fly away tissue and make fine detail corrections.
* Tie a ribbon, piece of twine, or decorative cord.
* Enjoy a good looking ornament!


Project - Make a necklace,
or a bracelet.
I started my transitions program with jewelry making projects. It was affordable and I thought the students could make money for themselves marketing the product. I was right. Now, everyone did not do so well. But, I had several students that made over a hundred dollars and one that made just under five hundred dollars.
Jewelry making affords teachers opportunities to teach patterns in sequence, prediction, measurement and a host of other math related skills. It's fun for students. Once they get the hang of it, you will be amazed at some of the intricate patterns they start designing on their own.


What do I need?
Materials list:
Not much. That's one thing I really love about this project.
* Beading boards
* Beads
* String/wire/cord
* Scissors


How do we do this?
It's as easy as 1 2 3.
* Measure the string, wire, or cord to the size desired. Add eight inches to that number. It's important! The additional string is for ease of manipulation when students tie the ends together. Once you check their math, have them cut the string.
I have seen many a necklace get dropped at the tie off stage because of too short a string. It's more than a little upsetting to see all that hard work go on the floor as beads fly everywhere. Using the beading trays will prevent this from happening. I always had a few students that tested that theory and regretted it while picking up beads off the floor.
* Select the pattern. This can be anything from the most simple stringing of one bead over and over until the strand is full to intricate patterns made over several strands and used all together. There really is no limit.
* Have students lay out the beads in the proper order in the beading tray before beginning to string the necklace. They may be eager and want to skip this and go straight to the string. Discourage this. If there is an error in the pattern assigned they will have to restring the entire thing. Tell them, check the pattern twice, string once. Not the reverse!
* If making a piece with a pendent or center point, have the student work on each side of the center point. For example, put a cross in the center point. Place one silver bead followed by two blue beads on each side of it. Repeat until the strand is four inches from full on each side.
* If using pendants, always connect with a jump ring, a little tiny metal or wire circle. If students string straight through the pendant hold, it just does not hang right.
* Tie the ends together. Knot it three times. Use scissors to carefully trim off the extra string.
* Do the happy dance.

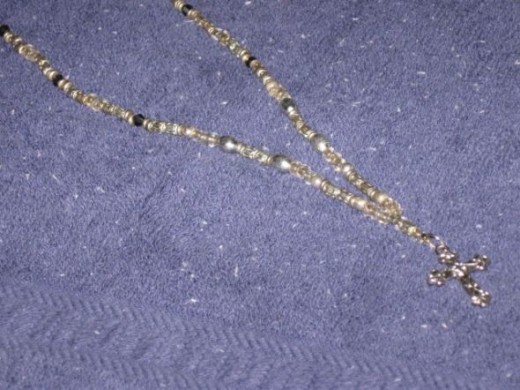

Beads, beads, and more beads. - The patterns you can create are inumerable.


Color code information on the board. - It really helps students sort through information.


All word art pieces were made by Vix at www.cooltext.com.
Image source; Vix

Crafting idea resource for children with disabilities:
- Kinderart
Find lessons, printables, resources and other cool, useful things.

Related

50+ Cozy and Creative Small Apartment Christmas Decor Ideas

100+ Easy-to-Make Christmas Decorations for Your Home

A Perspective Towards Online Education During Covid-19 Pandemic.

The Positive and Negative Sides of Using Cell Phones for Teaching and Instruction in the Classroom

Why Finland's Educational System Is Dominating the World Stage?


