My Solar Eclipse Photos 5-20-2012

Great Eclipse Photos with a Bozo Camera!
I did everything wrong for the May 20, 2012 solar eclipse. Yet through luck, duct tape, mylar and a butter tub, I managed not only to see the eclipse, but to photograph it!
My photos aren't professional quality, but I'm still proud of them. Let me share with you my crazy eclipse adventure and pictures.
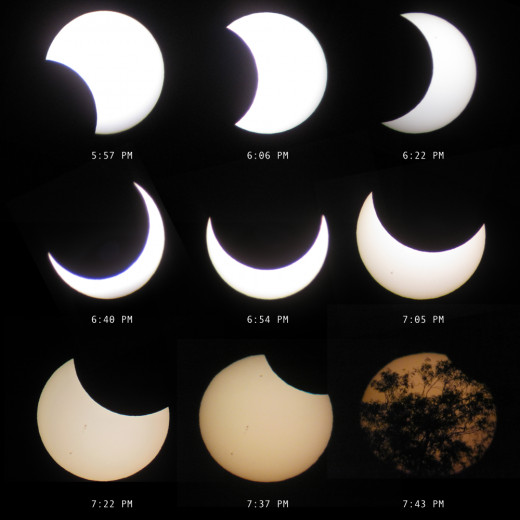
Right: Collage of my solar eclipse photos. The rotation is slightly inaccurate; see below for why my camera wasn't in a fixed position.
My Solar Eclipse Adventure - May 20, 2012
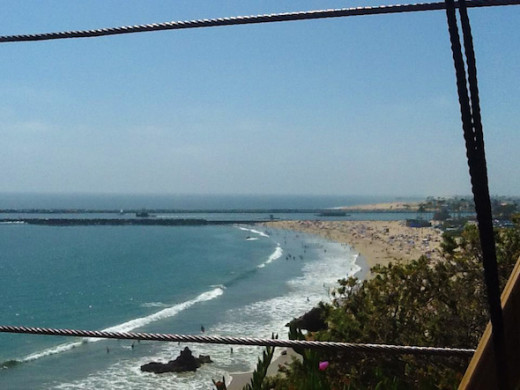
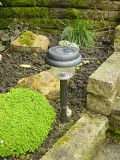
I headed to Corona Del Mar, California, where "Inspiration Point" overlook provides a lovely view of a sandy beach pointed straight at sunset. At 2:45 PM, I had my tripod set up, my telescope ready, a cold drink and a beach chair. There are worse places to wait for a celestial event. (I was sitting down while taking this picture; my telescope stood above the cables.) I could even see sunspots very faintly with my binoculars.
A professional photographer arrived with his fancy camera and filters. We shared our anticipation... and our anxiety. Slowly, inexorably, the afternoon sea-haze grew thicker and thicker, transforming into clumpy clouds. At 5:05 PM, I lost my nerve. I knew the eclipse would be starting around 5:45 PM, but I was afraid the clouds would hide it! So I bundled all my gear into my car and hurried inland, seeking a clear vantage point.
First Photo: 5:57 PM
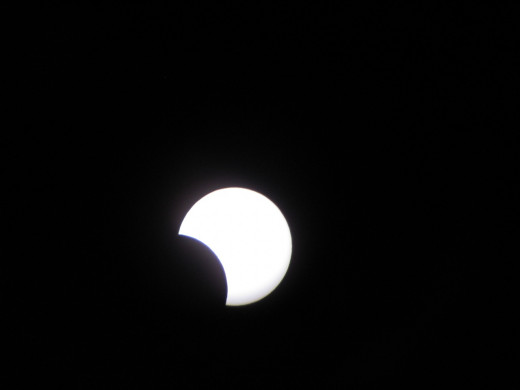
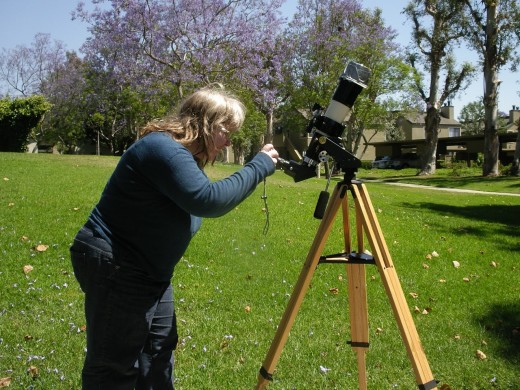
Just in time! I reached the Orange County Great Parkat around 5:50 PM. It's a new park being converted from an old airstrip, so there's plenty of open space. I lugged my tripod, telescope, camera and filters off to the edge of a field and set up. Bingo!
My automatic light meter was struggling. So was I: trying to get everything lined up was tricky. Most of my early photos were a little blurry.


The lenses of my telescope refract light like a prism or raindrops, producing a slight rainbow at the edges of the white sun.
I took a break to visit some palm trees and see if I could capture eclipse tree shadows. Tiny gaps between leaves create natural pinhole lenses, which can project miniature images of an eclipse onto the ground. I discovered that the steep angle of sunset made the eclipse crescents stretched and fuzzy:

Here's another photographer's stunning photo of eclipse leaf shadows projected against a wall by trees. That's what I'm talking about!
The sun was too bright to look at even during the height of the eclipse, but the sky took on a strange, pre-dawn twilight quality. It's hard to explain why it feels so uncanny, but twilight ought to be red, pink, or yellow, not white-gray.


The sun and moon don't follow exactly the same track in the sky (otherwise, there would never be an eclipse, or there would always be an eclipse). Their criss-cross paths make the sun's crescent appear to tumble in slow motion. This great timelapse photo of the eclipse from Huntington Beach, half an hour north of me, shows the exact sequence.
About this time my friend the professional photographer appeared, despondent. It had fogged in along the coast. He had captured some eerie shots of the solar eclipse through the clouds, but had come inland for a clearer view.
I see sunspots!


As the sun sank towards the horizon, it took on a yellowish cast. At the same time, I finally coaxed my digital camera to tamp down the exposure and give me a glimpse of sunspots. One normally needs special filters for this kind of photo, so I was very excited to see them.
In the 7:05 photo, my lack of camera mount is obvious. Unless one gets the target, the telescope, and the camera lens all exactly lined up and centered, a tilted lens anywhere in the chain will cause perspective distortion.
It's worth clicking on the 7:14 photo to see its details at full-size.
Sunspots on waning solar eclipse, 7:15 PM
Air turbulence in the atmosphere bends sunlight variably and causes a wavering effect, especially at low angles where light rays must pass through a thicker slice of air.
As the sun sank lower and lower, atmospheric refraction began to flatten its disc into a squashed oval. Slowly but surely, the eclipse and sunset drew to a close:


At last, the sun reached a row of eucalyptus trees upon the horizon. I stepped back from the telescope and snapped an ordinary sunset photo.
This shot is correct; the rest of my photos are flipped left-to-right by the telescope. (Its refracting lens flips the image horizontally and vertically, but the mirror reflecting the image 90 degrees up into the eyepiece reverses the image again, correcting the vertical axis.)
One final glimpse through the telescope revealed an eerie sight of the eclipsed sun behind a silhouette of eucalyptus branches and leaves:

What a magical day! Hungry but thrilled, I headed home dreaming of the next eclipse.
Video of Annular Eclipse in Japan: May 21, 2012 - (On the other side of the international date line)
Here's what the annular eclipse looked like for those lucky enough to see it -- including my parents in Utah! In Tokyo, stormy skies created an especially eerie effect. Jump to about 1:00 for the full "ring of fire"!
The Next Solar Eclipse?
Hey, this is fun!
While documenting my jury rigging, I experimented with camera settings and captured another image of the sun with sunspots even in the glare of full daylight:

You can see that the sunspots have shifted in the past day and a half. Neat!
Be Ready For 2017 Eclipse!
Now I'm hooked. A total eclipse will cross the United States from Oregon to South Carolina on August 23, 2017.
I'm tempted to try to catch it. It covers a great deal of nowhere in the middle of the country, but the pilgrimage might be worth it!
Possibly with a camera mount and a different camera.
Moral of the story: if you know there's going to be an eclipse anywhere near you, find a telescope store and buy a solar filter or #14 mylar. Cover your camera lens, or at least cover a pair of binoculars, and get familiar with using them on the sun the day before the eclipse!
Of course, nothing can compare to astrophotography by experts. Check out the following amazing photo, which required split-second timing, positioning, and a really good telescope to capture:


Solar Eclipse from International Space Station - The moon's shadow looks even stranger from above!
Canon Powershot

My Camera
This was my camera for years — or rather, a much earlier model. It looks like they've now added image stabilization and all sorts of bells and whistles that would greatly improve image quality. I've just picked up a Panasonic LUMIX camera which has a lot of smart ways of compensating for shaking and poor light conditions; stay tuned. In the meantime, though, the Powershot did surprisingly well -- see below!
Televue Pronto 2.8"

My Backpacker's Telescope
My Televue Pronto is practically an antique now. I bought this lovely old 2.8" telescope back in 1996. Nowadays you'd probably want an ETX or something that tracks the sky automatically.
So, here's my setup which I worked out for photographing the solar eclipse. Since then, I've trotted out this rig to check out sunspots.
If you follow astronomy blogs, you'll often read about X-flares, large solar flares, or see spectacular photos from the Solar Dynamics Observatory. It's fun to see with your own eyes what the scientists are looking at!
My Astrophotography Set-Up
Real astrophotographers spend years getting ready for a solar eclipse, gathering the right equipment (solar filter, tracking tripod, high-quality camera, good telescope) and trekking to the path of totality. In this case, it was not a total eclipse, but an annular eclipse. That's when the moon, appearing smaller at the far end of its orbit, fails to cover the solar disc completely and leaves a thin rim of the sun visible all the way around.
Where I live in southern California, I was a few hundred miles outside the direct path of the eclipse, so I would see it off-center and miss the "ring of fire" effect. Even so, 84% coverage of the sun is exciting!
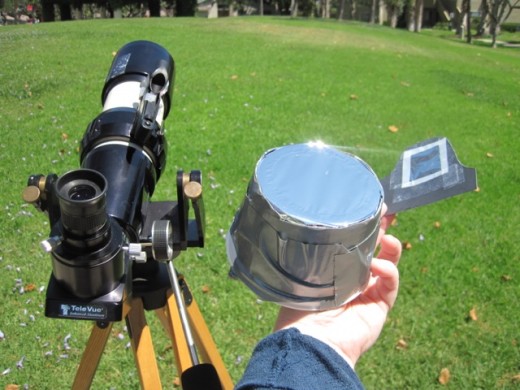
On Saturday, I found a telescope shop selling mylar thick enough to be used safely to view the sun or point a camera at it without frying the camera's optics.
I had four problems. First, I only had a point-and-shoot digital camera. Second, I had no way to mount the camera on my old-fashioned backpacker telescope. Third, I needed to stretch the mylar flat across the end of my telescope. Fourth, my telescope doesn't have automated tracking: I had to aim it by hand, which meant staring at the sun. Even during an eclipse, looking at the sun unprotected causes permanent retina damage leading to blindness! It's not worth it.
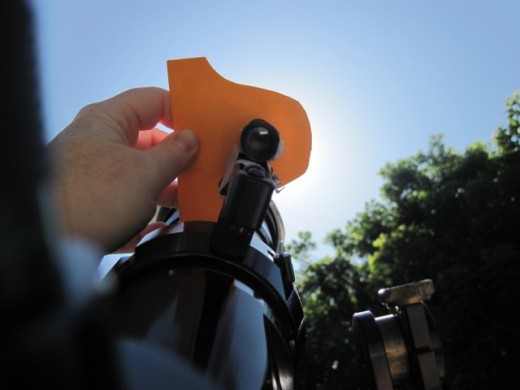
So I improvised. I cut a hole in a small plastic butter tub and used superglue and duct tape to cover it with the mylar. Posterboard, tape, and leftover mylar yielded a hand-held filter that I could use for lining up my spotter 'scope. (I used the remainder to cap a pair of binoculars.)
[Link: Instructions for Making My Homemade Solar Filter]
There was no way to mount my oddly-shaped digital camera. I had to hold it over the telescope eyepiece and try to shoot straight without shaking the camera or telescope.