An Introduction to how EQ Works
Equalization, or most commonly known as “EQ," is arguably one of the most fundamental and versatile ‘effects’ you can apply to any recording or audio piece.
For those of you without sound engineering backgrounds, the true and scientific concept of how EQ works and how it relates to the frequency spectrum (and audio in general) might seem a bit overwhelming and technical at first. So my goal for this article is to simplify the concept of EQ so that it can be understood in a more broad and practical sense. I will attempt to leave out complicated technical jargon wherever possible, and it’s my hope that you will gain enough of a practical understanding of how EQ works that you can start using it on your recordings right away, even if you don’t have the advantage of a technical degree or background!
2. Remember the good ol’ days?
Everybody remembers listening to their favorite song on their Walkman or Discman, right? Remember that awesome little switch called the “Bass Boost”? Do you remember how it made your favorite rock song sound so much more heavy, thumpy and generally, just way more awesome? Well, that’s EQ at work!
A “Bass Boost” button does exactly what the name implies. It boosts the bass frequencies in the audio you’re listening to.
3. Explanation
Sound ‘vibrates’ through the air in frequencies. That is what allows our ears to hear the sound and process it. Our eardrums pick up the vibrations that sound creates, and our brains processes and interprets it. For example, bass frequencies are low and deep sounds like rumbles, while treble frequencies are higher pitched sounds like squeals and whistles. Most sounds contain a complex mix of low, mid and high frequencies all at once that make up the final product that we actually hear, so by boosting (or cutting) any of these frequencies individually, we can generally alter (or enhance) what we’re listening to dramatically. This process is called equalization (EQ), and it’s exactly what that “Bass Boost” button is doing.
For example, picture a large glass mirror with a wood backing crashing down on the floor and shattering into thousands of pieces. Let’s analyze and separate the sounds of this catastrophic event and figure out what frequencies they exist in. The initial THUD of the mirror hitting the floor will most likely be mid and low frequencies, and the high pitched shattering of the glass as it litters the floor will likely exist in the high frequencies.
If we ended up cutting out all the highs in this audio recording, it would end up sounding dramatically different. The ear piercing ‘shattering’ sound would mostly disappear, and what we’d be left with would be a less assaulting, and perhaps muddier sound. It would almost sound as if we were listening to it from the other side of a thick wall. In fact, that’s a very common strategy among sound designers and sound effect producers. If you ever want to make something sound like it’s coming through a wall, simply cut the highs out!
4. EQ
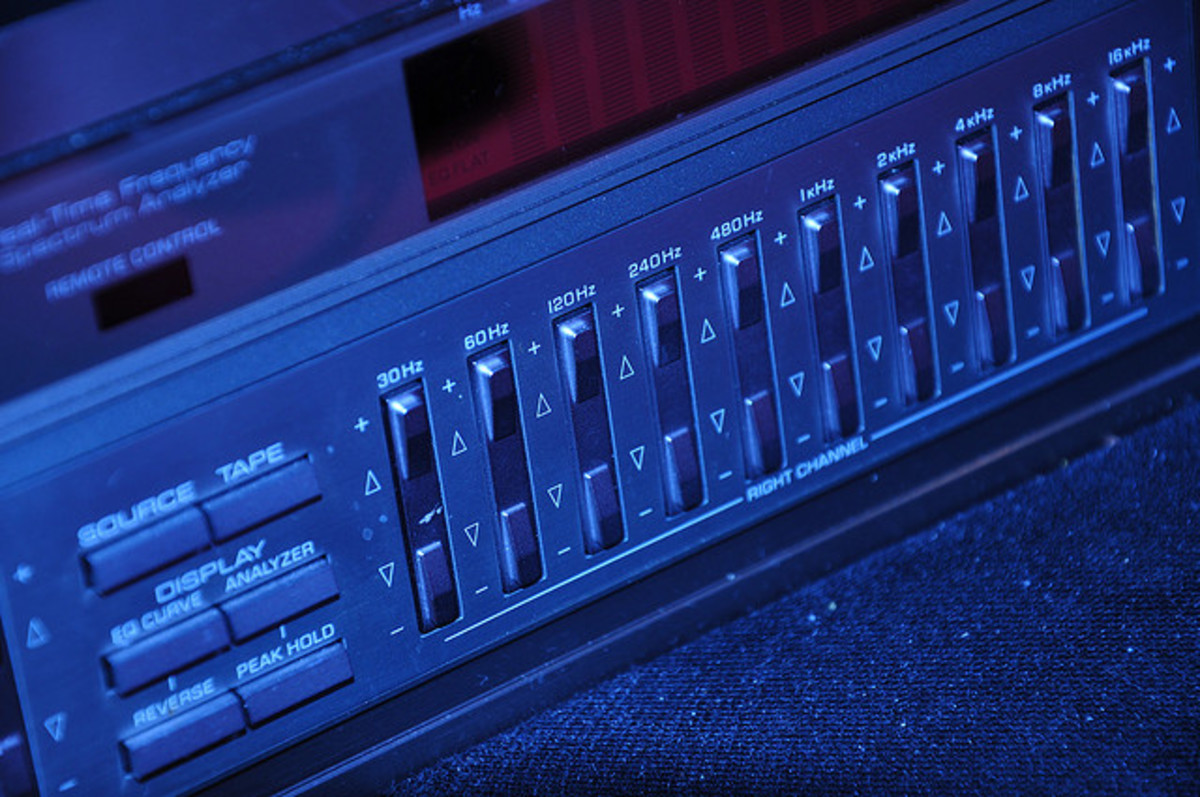
Let’s take a look at a common equalizer, and let’s see how we can manipulate the sounds. This part may seem a tiny bit technical, but bear with me. It’ll get easier.
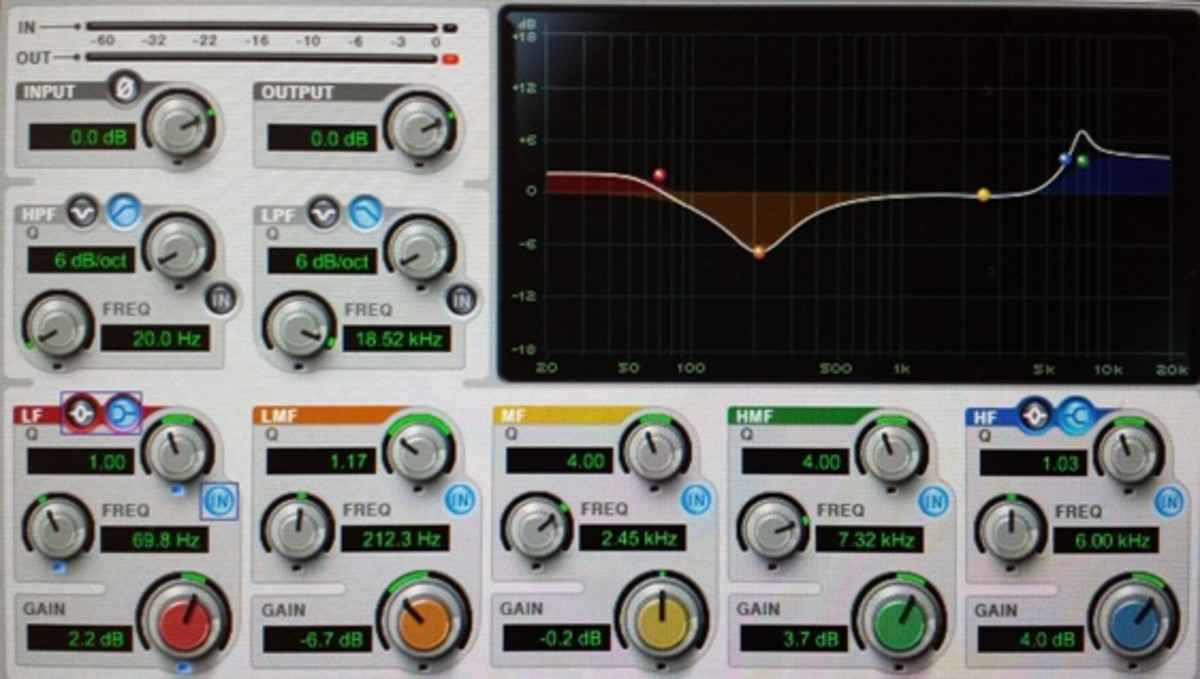
Above you’ll find an image of an EQ3 7-Band Plugin found within Pro Tools, which is a very common EQ display. On the graph-like display, the x-axis represents the frequency spectrum. The low frequencies (bass) are on the left of the x-axis, and the high frequencies (treble) are on the right. The y-axis represents gain (volume).
Frequencies
| Color
| Graph Location
| |
|---|---|---|---|
LF
| Low Frequencies
| Red
| Left
|
LMF
| Low-Mid Frequencies
| Orange
| Middle-Left
|
MF
| Mid Frequencies
| Yellow
| Middle
|
HMF
| High-Mid Frequencies
| Green
| Middle-Right
|
HF
| High Frequencies
| Blue
| Right
|
So for example, if we wanted to boost the bass of a recording, we would simply need to increase the gain of those frequencies, which I've done ever so slightly here. You can do this by dragging the little red point up or down with a mouse, or by using the knobs at the bottom to control the location of the red point in the graph.
Now look at the low-mid frequencies (orange knob). Do you notice how I’ve reduced those frequencies quite significantly? Also notice how the reduction I’ve applied here is a gradual dip instead of a narrow ‘spike’. If for example, I wanted to reduce ONLY a very narrow selection of frequencies, I could narrow that dip to focus more intently on specific frequencies instead of the wide selection that I have here.
The reason this EQ looks this way is because of what I’m using it on. This EQ is a default preset I often use for spoken vocals. Let me explain my strategy…
The bass gives the VO some warmth, while the cuts in the mid range tend to thin the voice out a bit, which I like, because of how it sounds after compression is applied to it (compression should be researched separately).As far as the high frequencies go, I almost always give these a generous boost because it tends to lend the VO a nice sparkle that makes it crisp and easy to hear. It brightens everything up and prevents it from sounding too muddy.
However, keep in mind, that there is no right or wrong way to EQ something. How IEQ depends on a wide variety of situational factors, and my EQ settings are always different. There is no magical setting that makes everything sound great. I EQ every single voice differently based on which frequencies are naturally more prominent in that persons voice. It’s very important that you experiment on your own to develop your ears and to find out what kind of sounds resonate well with you.
5. Summary
Developing your ears is an important concept and it’s one that I would strongly recommend doing. To practice, try recording a dry (un-altered) vocal. Now apply some EQ in a wild and unpredictable way! Make it crazy! Listen to how dramatically it changes! Now, take a second un-altered copy of the vocal, and try to recreate what you've just done using only your ear. This will help you train your ears to recognize different frequencies, which in turn will help you manipulate them more easily to enhance your music.
So, now that we have a practical and general sense of how EQ works, we can use it on both instruments and vocals alike to dramatically improve their overall sound and how well they fit in the mix.
Related Hubs
- Audio Compression – Compressing Instruments and Vocals in Musical Recordings
Compression is often the most misunderstood aspect of music production. It’s also one of the most important things you can apply to your music to improve the overall sound of your recordings. - How to EQ Instruments
A brief guide on how to properly equalize various types of instruments, including drums, guitars, piano and vocals. - EQ Fundamentals and the Frequency Spectrum
A brief guide to understanding the essential fundamentals of equalization and frequency spectrum.


