How to Make a DIY Photography Tripod
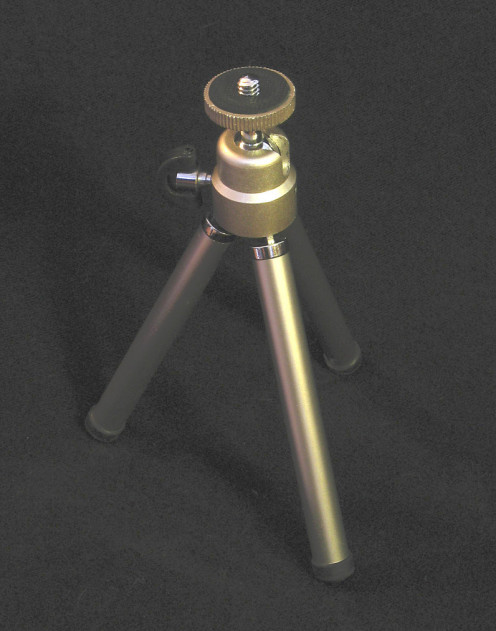
There are some photographic equipment which are often considered to be essential in many situations and there are some that are essential in some photo situations. One of these pieces of gear is the tripod. But tripods can be expensive, at least the good quality ones.
Macro photography is one of those situations since any small movement, even the slightest can and will show at the magnifications usually needed for macro work.
These macro tripods are usually the easiest to be made at home often requiring materials that can be quite cheap.
Another situation that can really use the aid of a good solid tripod is night photography. Because you usually require long exposure times camera shake and movement will be captured in the shots and can, and often does, ruin a good shot.
By far the best thing to do is to buy a commercial tripod but they can range from about $169.00 to over $300.00 and these are the good ones. There are much cheaper ones from about $14.00 but these are usually not as sturdy as the professional grade ones and they do not always feature a good tripod head.
The best tripod heads are the ones that have a ball head that allows you movement in almost any direction without the need to make any adjustments or tighten any clamps or screws. They can range from about $39.00 to over $300.00.
Many tripods are usually light and made from carbon covered aluminum which is probably the best combination, especially for field work.
With some work, some tools and directions you can make your own tripod or monopod and the price is usually about half of what a commercial one would be.
The best route is to buy a commercial ball head that can run you anywhere from $16.00 to over $500.00 and built the tripod around it. Remember that you get what you pay for!
Wood is a good material and much easier to work than other material but hexagonal metal tubing is not that expensive and works a little better than round ones. You will need screws and some chain to keep the legs from spreading too wide.
Another cheaper alternative is to use PVC pipes but you need to either reinforce their interior by filling them with expandable foam, insert smaller metal tubing or better yet fiberglass rods or get a PVC pipe of no less than 11/2" thickness.
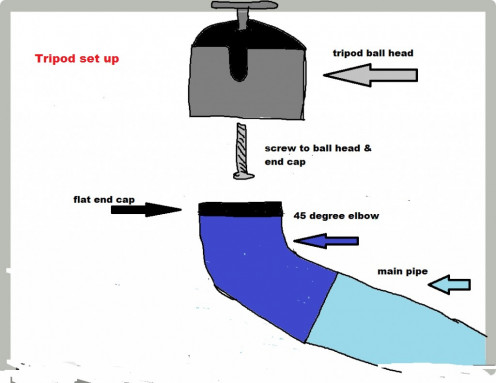
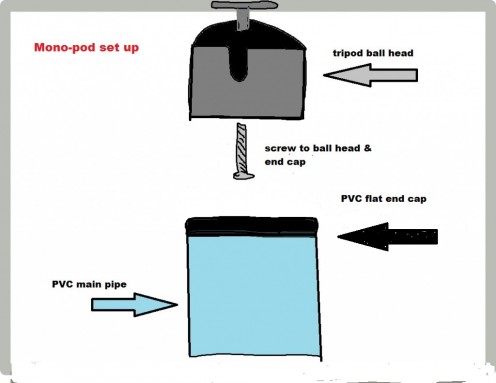
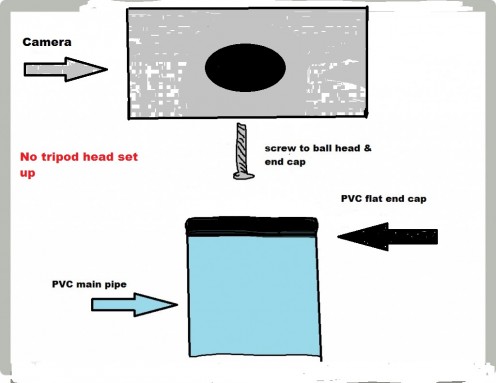
If you chose to go with PVC pipes, like I did, and you have a ball head, then the next step is to drill a hole on a PVC flat end cap through which you insert the screw that attaches to the camera underside, then secure the bolt with a proper nut. Attach (glue optional) this PVC end cap to a proper size PVC pipe and you now have a monopod which will work in many instances. The Home Depot has basically all that you will need and their prices are rather modest.
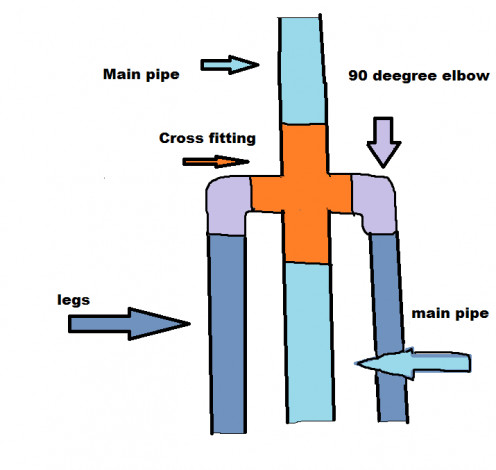
If you now want to convert this set up into a true tripod you have to get other accessories like a PVC Cross section, one 45 degree PVC elbow and two PVC 90 degree elbows. Cut the main PVC pipe above where the legs will be located, attach and glue this PVC cross to join the two halves of the main PVC pipe, attach (do not glue) one PVC elbow onto the remaining opposite sides ends of the PVC cross, attach and glue one PVC leg to each elbow and you now have a tripod.
Now attach and glue a PVC 45-Degree Elbow to the top half of the main PVC pipe. Attach (glue recommended) a PVC flat end cap to the other end of the 45 degree elbow that goes to the tripod ball head, attach ball head to end cap via a screw. Why the 45 degree elbow? When you spread the legs the main PVC pipe will, of course, be at an angle. The 45 degree elbow is what keeps it in a vertical format. But if you rather have the 45 degrees angle at the bottom of the main pipe it can be done too but you will have to face the elbow downwards.
For added strength you can glue all PVC fittings (except where the PVC elbows attach to the main central PVC pipe to allow rotation) but you may find that this is not necessary except where indicated.
If you glue the end cap(s) (which is recommended) then removing the tripod ball head would be done by twisting the entire ball head set up instead of only the screw or the camera itself to separate it from the tripod ball head. Don't forget to attach end caps to the bottom of the legs to keep dirt out, plus it make them look nicer too.
If you do not mind re-positioning the entire tripod for each shot then you can do without the head and simply use a screw to attach the camera underside to the flat PVC end cap.
You total cost minus the tripod head should be no more than $34.00 (if using expandable foam) but when you consider the price tag for an equally sturdy commercial tripod being about $200.00 plus then this makes sense.
Think you may want to do your own tripod?
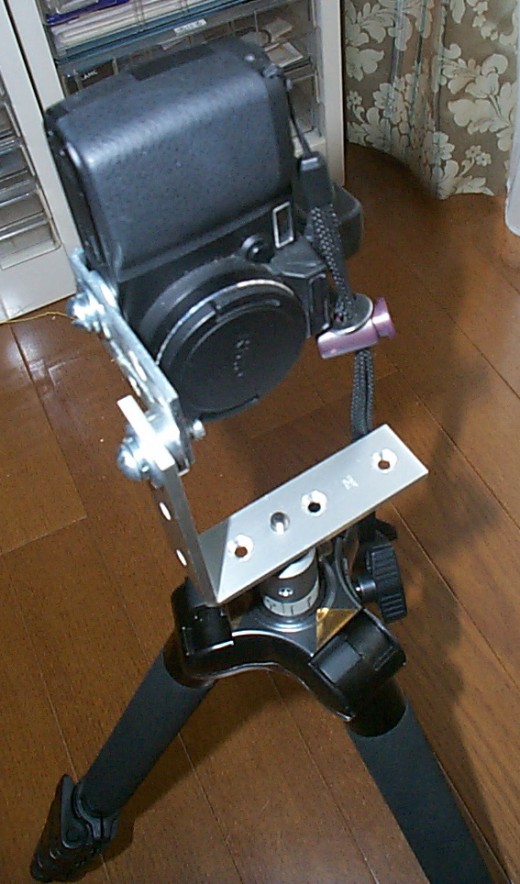
- DIY camera tripod
Few weeks ago I was thrilled when I seen 360 panorama and I started to search about panoramas and how to make one. I found out that i need panorama he...
© 2015 Luis E Gonzalez


