How To Clean Stickers Off 45 rpm Record Labels

Stickers on 45 rpm Records
The vinyl 45 rpm was one of the most common means of music distribution from the 1950s through the mid 1980s. Generally, the 45 rpm records were released in conjunction with radio released songs. They were a cost effective means by which the consumer could purchase the hit song rather then purchase an entire album. Top selling singles sold millions of copies. The 45 rpm was also a cost effective means for an artist or label to release and distribute their songs to radio stations or other promotional outlets. An artist could produce enough copies at a reasonable price to distribute them as a promotional tool. In these cases, a small handful of records were produced, and as a result, because they were not million sellers or abundant, they are harder to find, and in turn worth more. Naturally, the cleaner a record is, the more it's value is increased. Because of this, collectors do what they can to increase value by cleaning their records.
One constant struggle is removing stickers from records. It was a common practice for the record owner to mark ownership of the record. This was done through a number of methods. One of the most common was adhering an address label to the record. In some cases, the owner would tape a piece of paper to the record with their name on it. Another popular form of identifying the record was using various types of tape with the owner's name written on it. Over time, these records often ended up as collectible, and the collector diligently works to remove these identification stickers without damaging the label.
Another type of sticker that is often found on records are catalog stickers. These stickers are typical small stickers with a number on them. Cases designed for 45 rpm records included numbered dividers where the records could be stored. An index card cataloged what number was in what slot. To make it easier to place the record, small stickers were included with the case to be placed on the record. These helped to identify what record belonged in what indexed slot. Collectors often attempt to remove these number stickers without damaging the record label to restore the record to it's original condition.
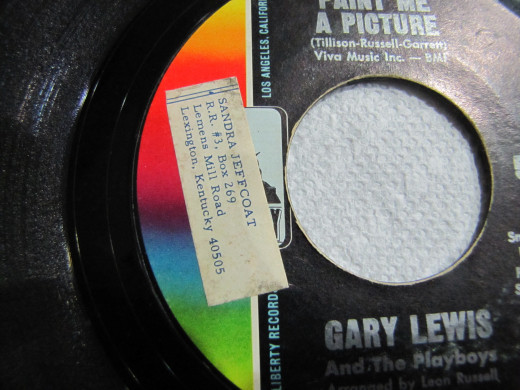
Remove Address Labels From 45 RPM Records
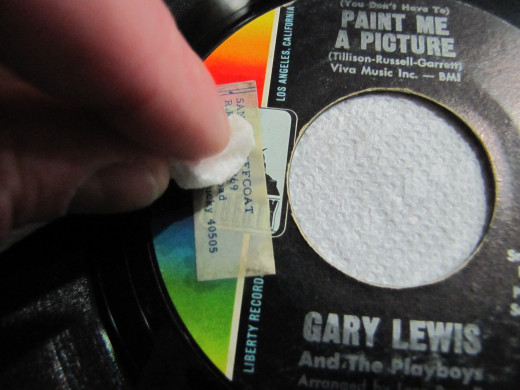
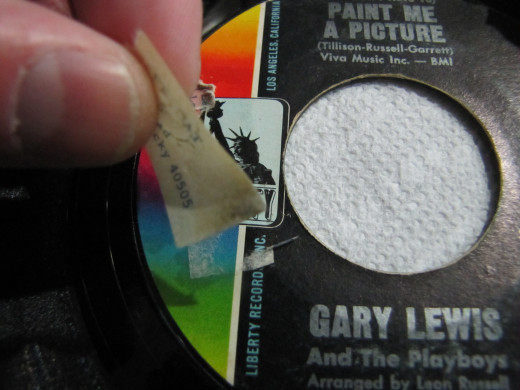
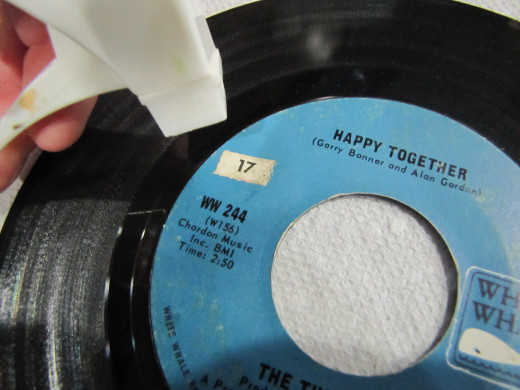
The address label is one of the most common forms of proof of ownership of a record. They were an easy way to show who the record belonged to. All the owner had to do was stick the label on the record and it was done. In doing so, the sticker covered information regarding the record and gave it an undesirable look to any collector. In addition to being unsightly, it can also be a struggle to remove and can easily damage the label upon removal. Here is an example of an address label on a 45 rpm record from 1966. The sticker has been on this record for 48 years!
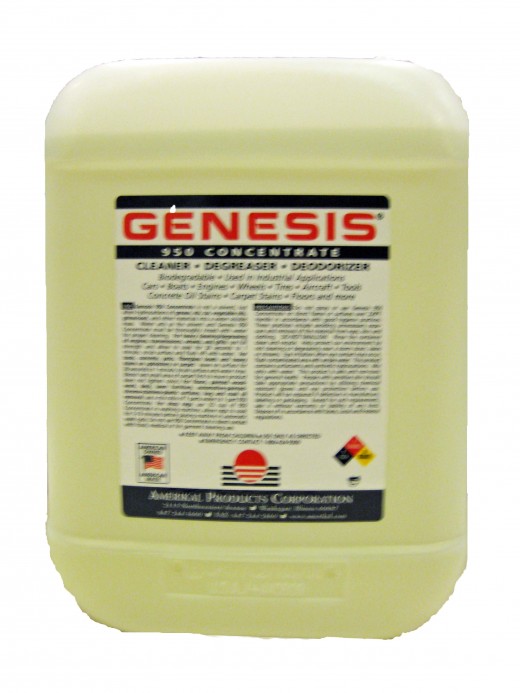
Genesis 950
There are many methods suggested to remove stickers from record labels. One of the most common methods suggested is rubbing alcohol. However the rubbing alcohol can easily wear down the record label in addition to the sticker. This can leave the record's label damaged.
One of the safest and most effective ways to remove stickers from record labels is with Genesis 950. Genesis 950 is a surfactant based cleaner. It works with water to break the bonds of stains. This makes it very effective for removing stickers from records because it will break the bonds of the adhesive used on stickers. If properly applied to the sticker, it will do so without damaging the label.
How To Remove Stickers From Record Labels
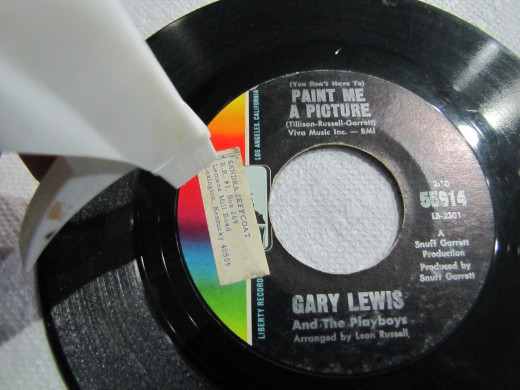

Loosening The Sticker
Genesis 950 comes in concentrate form and has to be mixed with water for it to be active. The general cleaning ratio suggested is 1 part Genesis 950 to 7 parts water. However when cleaning records that ratio can be increased to a 50/50 mix. Typically, a mix of 3 parts Genesis 950 to 7 parts water is most effective for removing stickers from record labels.
When mixed, the solution can be applied to the record in a variety of ways. In the example used, the mixture was put in a spray bottle and then the spray directed at the sticker. This was a top 40 record with minimal value. For records that have greater value, or require more care in restoring, the solution can be applied with an eye dropper or a Q-Tip. This will allow for more control of where the solution is applied. Naturally a spray bottle does not isolate the application as a Q-tip or an eye dropper might.
Once the label has been sprayed with the mixture, blot it with a paper towel to absorb any excess moisture. Do not allow excess moisture to run off the address label onto the record label. Again, this can be more controlled by how you apply the solution.
Let the sticker sit for a few moments. This will allow the solution to soak into the address label and break down the adhesive backing to the sticker.
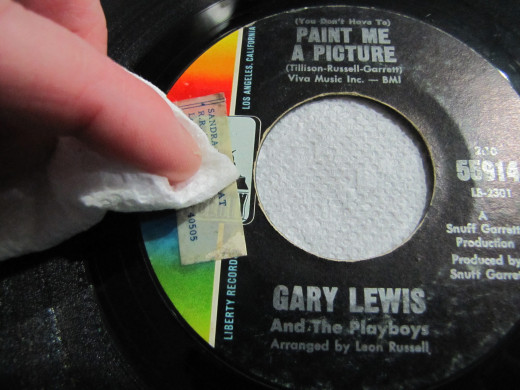
Peel The Sticker Off
Peel The Sticker Off The record Label
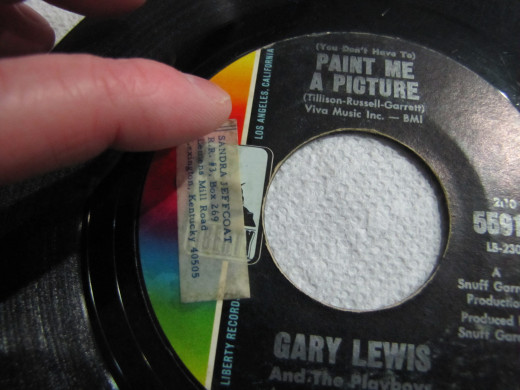
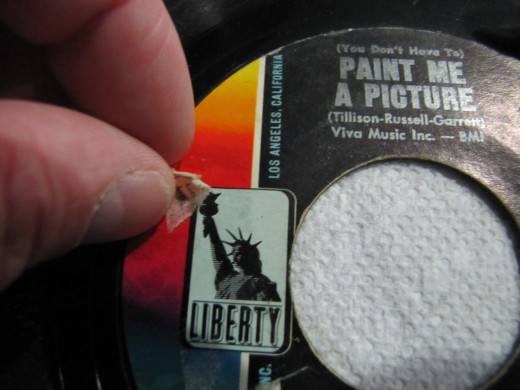
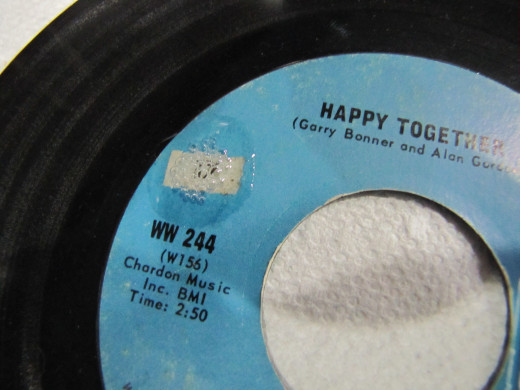
After the sticker has set for a few moments, it should be ready to be easily removed. Start by gently rubbing the address label with a paper towel. This will again absorb any excess moisture. It will also help loosen the label. Next, roll your finger along the edge of the sticker. Try to avoid using your fingernail as you might accidentally scratch the actual record label. Simply rub the flat part of your finger over the edge of the address label until you can feel it start to lift from the surface.
As it loosens, run your finger from the outer edge of the address sticker to the inside of it. Do not rub back and forth. Keep rubbing only in the one direction as the address sticker begins to lift.
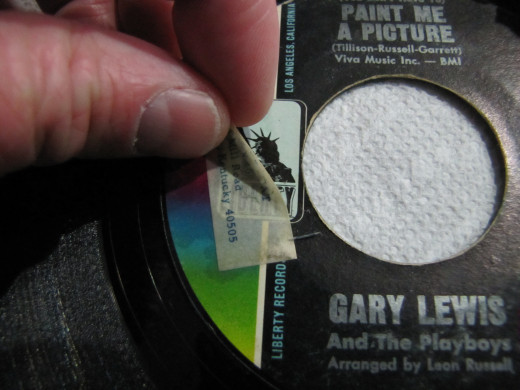
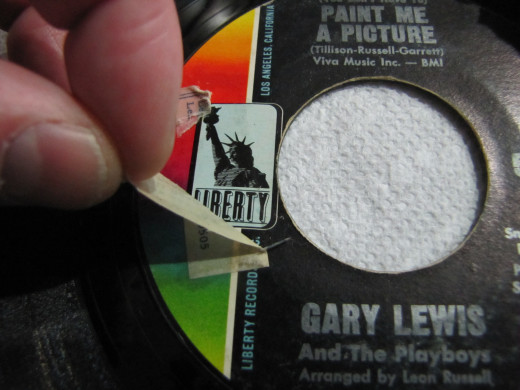
Before long, you will feel the label has separated from the record and you can begin to peel it off. Do it slowly, working with the resistance of the adhesive. Be sure to peel as slowly as possible. If the adhesive has not been properly saturated, and if it is still clung to the record label, you may risk it pulling the record label up with it, in turn tearing the label.
When done properly, the sticker is removed without any damage to the record label.
Remove Excess Adhesive
Remove Excess Adhesive
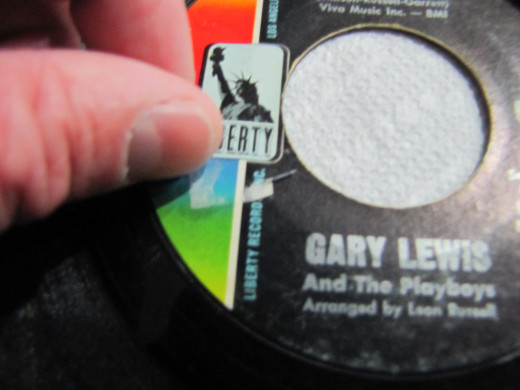
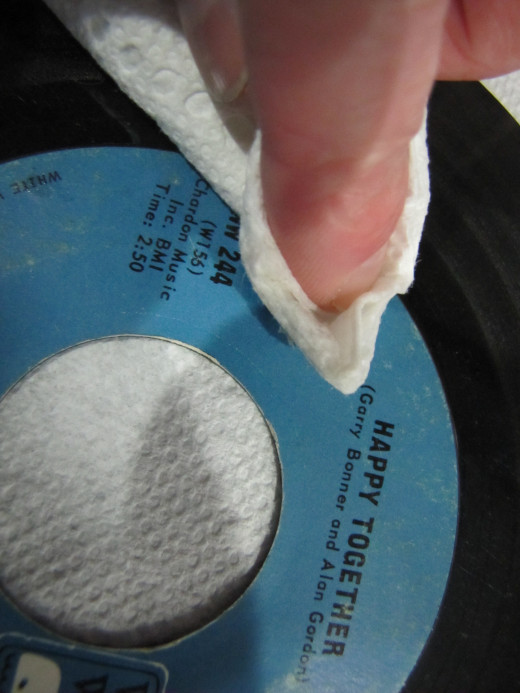
In many cases, there will still be some extra adhesive or portions of the address sticker still stuck to the record label. Remember, these stickers may have been on the record for decades.
Any remaining adhesive or sticker remnants can be easily removed with your fingernail. Gently slide your nail over the edge of what is remaining and scrape it off. If the remaining sticker does not have a prominent edge, try rubbing the flat portion of your finger over the area, or use a paper towel.
If you have too much moisture on the label, do not attempt to remove the remaining portion right away. Allow the area to dry completely. Once it has dried, use a paper towel with the 950/water mix on it and gently clean the area. Typically the mixture of Genesis 950 and water will not harm the actual record label. While it can remove the address stickers, it will not damage the label if used properly and in moderation.
Clean Record Label
Cleaned Record Label
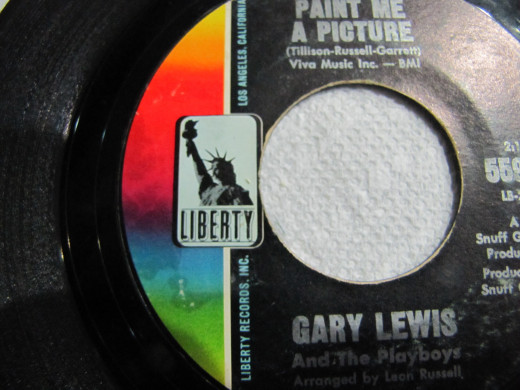
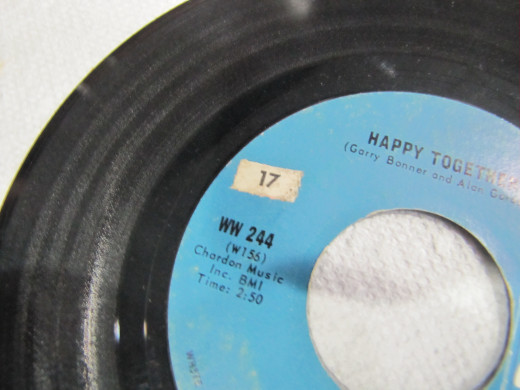
Here is the final result. The label has been removed. On the bottom of where the address sticker was, you can see there are some marks where too much moisture was used. This came as a result of the mixture being over applied due to the lack of control from the spray bottle. This record was cleaned quickly with little attention to detail. Had a more controlled method of application been used (such as an eye dropper or Q-Tip) there would not have been any excess application and only the sticker would have been targeted. However it is important to include this in the "How To" as it does show how different variables will impact the cleaning and how by properly controlling the area you will determine the outcome of the preservation of the record.
Remove Catalog Number Stickers
Remove Catalog Stickers
Numerical catalog stickers can also be removed with Genesis 950. In this example, the spray bottle was used once again. You can better isolate the area again by using either an eye dropper or a Q-tip using the solution.
Blot any excess moisture to prevent run off onto the record label.
Allow it to sit for a moment once it has been blotted.
Peel Off The Catalog Sticker
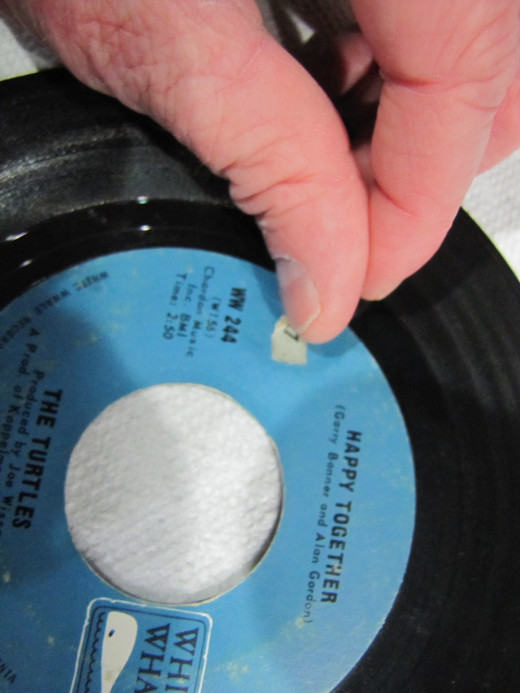

Peel Off The Catalog Sticker
Gently peel off and remove the catalog sticker.
Clean 45 rpm Label
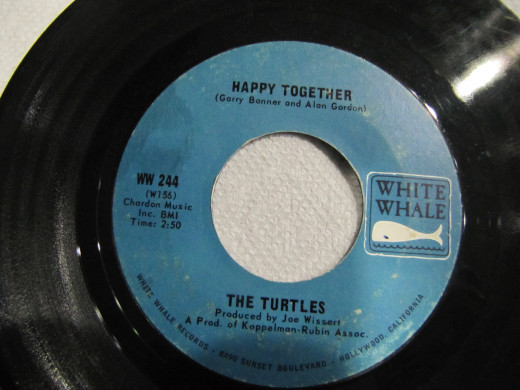
Clean 45 rpm Label
The catalog sticker has been removed and the record label is now clean. In the photo you can still see some moisture where the excess solution surrounded the sticker. This will dry in time with no residue. Again, this can also be control by the method of application. Applying in a spray bottle gives less control. Distribution of the solution can again be controlled better by using alternative methods to apply it (i.e. eye dropper or Q-tip).
Clean Vinyl Records
In addition to removing stickers from the label, Genesis 950 works wonders in actually restoring the vinyl. Genesis 950 can remove dirt, dust, grime and fingerprints from vinyl. To clean a record, lie it flat on a paper towel.. Spray the mixture of Genesis 950 and water directly on the record and allow it to sit for about 5 minutes. The Genesis 950 will get into the grooves, break apart any particles and lift them from the vinyl. Once this breakdown has occurred, use a paper towel or micro fiber rag to clean the record. Wipe in a circular motion following the grooves of the record.
By cleaning a record properly, background noise, popping and hissing can be reduced. A record that rates as Good can very easily be restored to Very Good if properly cleaned. Genesis 950 can take years off of a record.
We will post a full length example of cleaning a vinyl record with Genesis 950 soon!


![These Companies Will Send You Free Stickers [#02]](https://images.saymedia-content.com/.image/t_share/MTczODA2NTAwNzM2MDE4MDU5/free-snowboard-stickers.jpg "These Companies Will Send You Free Stickers [#02]")


