4 Leaf Crafts You Just Have to Make With Your Kids This Year

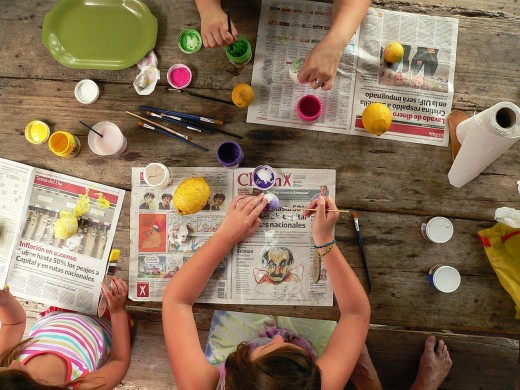
Making Crafts With Your Kids
Like most of us, children learn from hands-on activities that allow them to explore the world around them. You can tell them how something works but they learn much faster when they explore it themselves or make it work with their own hands. Setting aside a bit of time each day to do hands-on activities with your kids is essential for their growth and development. These super-cute leaf craft ideas are simple, inexpensive, and a lot of fun for children. Pick one to try with your kids today.
1. Leaf Wreath
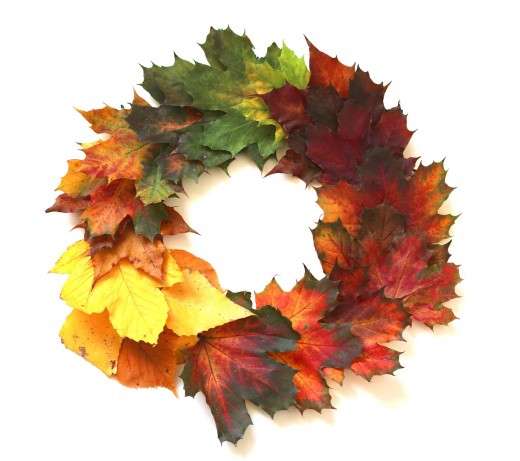
How to Make a Leaf Wreath
You can make a wreath out of anything that can be glued together. This is essentially the idea behind this awesome fall craft. Not only will it look great hanging in your home, but creating them is fun for the entire family. Grab a basket, go outside, and find some beautiful leaves for your wreath today.
You need:
- Paper plates
- Glue
- Ribbon
- Scissors
- Fall leaves
Instructions:
- Cut the middle out of the paper plate. The easiest way to do this is to fold the plate in half and cut out the center. Have an adult help younger kids with this part, or prep the paper plate rings ahead of time.
- Apply glue to one side of the ring.
- Cover the plate-ring with leaves.
- Add any additional decorations (stickers, flowers, etc.).
- Allow the glue to dry completely.
- String a ribbon through the center to hang the decoration.
2. Leaf and Rock Picture
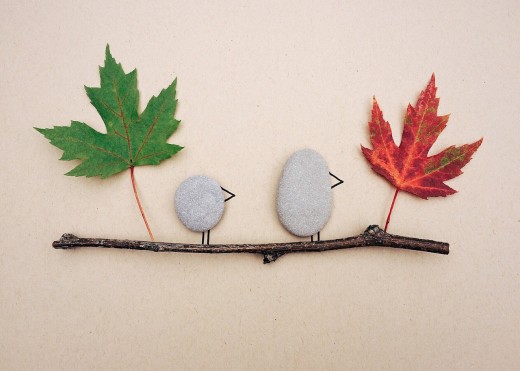
How to Make a Nature Picture Craft
This is a wonderful craft for all ages and needs almost no supplies to complete. The results are super cool, and people will beg you to tell them where you bought such neat decorations.
You need:
- Rocks
- Leaves
- Sticks
- Glue
- Markers
- Tape
- Paper
Instructions:
- Decide what you would like your picture to look like ahead of time.
- Go outside and gather things from nature that you can build your design with.
- Use the items to create your masterpiece by gluing them to the paper.
- Add the finishing touches with markers or crayons.
3. Sunlight Leaf Prints

How to Make Sunshine Leaf Prints
This craft is incredibly simple but does require some patience. Younger kids like to see results immediately and might not understand having to wait, but it is a great way to show how things react to one another in different ways.
You need:
- Construction paper
- Leaves
- A bright sunny day
- Tape
Instructions:
- Choose which color paper you want to use. Darker colors work much better than lighter ones and the effect is more dramatic.
- Find a handful of leaves.
- Arrange the leaves on the paper and tape them in place. Do not put too much tape on since you will be removing the leaves.
- Set the paper out in the sun for a while.
- Check your craft often to note how the sun is changing it.
- Remove the leaves once the area surrounding them has washed out in the sun.
- Frame and hang them around your house this fall season.
4. Hammered Leave Prints
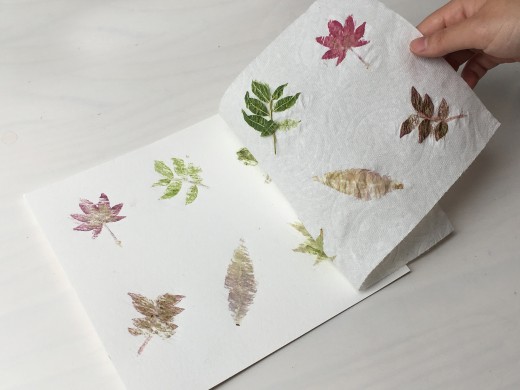
How to Make Hammered Leaf Prints
As the name suggests, this craft is basically all about hammering leaves. It's a lot more fun than it sounds, and the results are beautiful. Give it a try today, but make sure to be safe.
What you need:
- Goggles
- Hammer
- Paper or T-shirt
- Leaves
- Paper towels
Instructions:
- Gather an assortment of leaves. They cannot be fully dead or they'll just crumble.
- Arrange the leaves on the paper or fabric.
- Cover the leaves with a paper towel.
- Hammer the leaves until they have left a "stain".
© 2018 Meagan Ireland