A Cheap Meal for College Students

The Taste
Saving you cash!

Great food that is easy on the wallet!
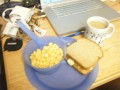
This meal is one that I cook for myself after I finish up my workout. It is high in proteins and rich in carbohydrates. Furthermore, it has good essential vitamins and minerals such as iron and vitamin D. It is simplistic and filling, a really nice, hardy breakfast, lunch, or dinner. Train hard, eat hard with a muscle building meal!
Delicious Food

Cook Time
Prep time: 10 min
Cook time: 15 min
Ready in: 25 min
Yields: Serves one to two people.
Ingredients
- 1 Boneless Roast
- 2 Eggs
- 1 gal. Milk
- Vegetables, Sliced or diced
- 1/2 cup Rice, (White or Brown)
- Spices, Your preference
- 1/3 cup Flour
- 1 cup Cooking Oil, Any type will do
Detailed Steps (Easy)
- First you will need to prepare your food. Gather your eggs, meat, vegetables, flour, spices, oil, and dry rice (brown or white). Also, grab your tools. Spatula, fork, kitchen rag, pots, pans, and plates.
- Let us start off with the meat, shall we? Get out your flour and spices. Drop 1/3 cup flour into a medium sized bowl (anything larger than a cereal bowl) and add the spices to your desire. Also, if you're cooking for someone else then be mindful of their taste and not just yours. Now take your roast and slice it to your preferred thickness. Now place the meat into the bowl and start padding flour onto it. Do this until you have a nice even coating around the meat. Once finished, leave sitting in the bowl until it is time to cook.
- Next, you need to have your eggs on standby, meaning have them near you when you are about to cook. This will minimize movement which can lead to accidents if you are not continuously aware of your surroundings. Now depending on how you prefer your eggs, not a lot of preparation is needed.
- Now for the vegetables. Take out a chopping board, if you have one, if not then just use a plate or some solid surface to slice the vegetables to your preference. Once you have sliced them, set them to the side near your placement of the eggs. Again to keep everything near so rushing won't be necessary.
- Now for your rice. Grab the rice and get a 1/2 cup out. Then I would get 1 cup of hot water, get a small pot and place the water in it. Do not turn the stove on until it is time to cook!
- Now it is time to get the oil. I would suggest using an iron skillet because they are über easy to clean. If you do not happen to have one then any pan will do. So get about 1 cup of oil and pour it into the pain and place it onto the stove. Do not turn the stove one yet!
- Now that preparation is complete, it is show time!
- First thing is first. When cooking with oil you must take extreme caution. It is very dangerous if you take the situation too lightly. A lot of people get hurt, badly, while cooking with oil because of negligence. Please be careful and do not act a fool while doing these practices.
- It is time to turn the stove on. Turn your water and oil on high. Let the oil heat up for about 2 minutes on high then immediately turn it down to medium. Oil loves to retain heat so you can cook at a lower temperature on the stove and get the same results as a high heat temperature.
- When your water has come to a boil, it is time to drop the 1/2 cup of rice in. Once you do so the water will settle down for a few seconds. Let the water return to a boil, then it is time to lower the heat to medium and cover. Stir every 3 minutes to avoid sticking to the bottom. (Please take into consideration; if you have an electric stove, it isn't an instantaneous reduction of heat. Be mindful of the cooling out process.)
- Back to the oil. Now you have your meat, eggs, and vegetables out and ready. So it is time to place the meat into the oil. BE CAREFUL do not splash hot scalding oil onto your skin. It does not feel well. Go ahead, ask me how I know. After you have placed the meat into the oil let it cook for about 3-4 mins on one side. Let it cook for a little long if you have a thicker stack, about 1 inch or so. During this brief moment, check and stir your rice.
- After the allotted time has passed, it's time to flip. BE CAREFUL this is another dangerous point, no splashing. Take your spatula and place it under the meat. Then take a fork and stab the meat on the opposite side you inserted the spatula. Slowly twist the spatula while holding slight pressure on the meat with your fork. Have the meat on its side, and continue to twist, slowly. Now let that side cook for another 3-4 mins. Check and stir rice.
- Remove your meat and place it on a plate or desired container and keep it set off to the side. Now it is time for your vegetables. This will only take 1 minute or so to cook.
- I shall reiterate this statement religiously. Be careful! Do not splash the oil. Gently place your sliced vegetables into the oil. They will only take moments to begin to brown. Normally I do not turn the vegetables. They usually brown on both sides and just let them cook for about 30 seconds to 1 minute. Once they are browned, place them on top of the meat on the plate. Check and stir rice.
- Now before you begin the 2 eggs. It is wise to finish the rice, usually by this time it should be getting close or is finished. So check the rice, if you see very little water in it, it will be best to turn the heat off but keep the lid on it. (If you're on an electric stove, remove from the eye.) Once your rice is finished, let it stand in the pot for a moment while you complete the rest of your meal.
- Now depending on your style to which you like your eggs, This step can venture off into two directions. If you enjoy them over-easy, over-medium, or "sunny-side up" then you will be continuing to use the oil. Scrambled, on the other hand, you will need another pan and 1 tablespoon of oil to coat the bottom.
- Now for those whom want it not scrambled, you will need to hold your egg over the oil and crack it. BE CAREFUL! Do not splash. Have the crack facing upward until you are ready to cook. Once ready, turn the crack towards the oil and hold the egg above about five finger lengths. Slowly let the egg fall into the oil and toss the eggshell somewhere convenient.
- Now as far as "sunny-side up" just let egg cook, poking down the bubbles that form while it is cooking in the oil. No worries, they will not pop blistering hot oil onto you. I normally take the spatula and gently wave oil over the top to get the center whites to cook. If you are going to go for over-easy/medium, then you are going to have to turn the egg over. This is a very annoying and can be difficult task for you have a chance at popping the yolk. But the main difference of over-easy/medium is the duration you cook the other side. Easy yolk is still runny, while medium is very little movement around the yolk, practically almost cooked. Usually the time to cook an egg varies.
- THOSE WHOM WANT TO SCRAMBLE READ. IF NOT, SKIP THIS STEP! Place the 1 tablespoon of oil onto the new pan, heat to medium. Once the pan is hot, take your scrambled eggs and pour onto the pan, coating the bottom with eggs. Let it stand for about 30 seconds and then take your spatula and begin mixing around the eggs. They will be nice a fluffy, once they are it's time to remove them from the pan and place them onto the plate.
- Now place your fried eggs onto your plate, and then it is time to retrieve the rice! Place the rice onto your plate, and pour yourself a 8-16 ounce glass of milk. Add additional spices and flavoring elements as you desire.
- TURN OFF YOUR HEAT! Do not forget this step. It is the most important step.
- Enjoy your meal, and be sure to clean up your mess afterwards!
Stats May Vary
| Nutrition Facts | |
|---|---|
| Serving size: 1-2 | |
| Calories | 1281 |
| Calories from Fat | 621 |
| % Daily Value * | |
| Fat 69 g | 106% |
| Saturated fat 36 g | 180% |
| Carbohydrates 39 g | 13% |
| Protein 101 g | 202% |
| Sodium 559 mg | 23% |
| * The Percent Daily Values are based on a 2,000 calorie diet, so your values may change depending on your calorie needs. The values here may not be 100% accurate because the recipes have not been professionally evaluated nor have they been evaluated by the U.S. FDA. | |
Oh Homer Simpson, you know us all too well!

Happy eating!
I hope you all enjoy your meal! Do not be frustrated if something gets burned. Master cooks did not become fanatic cooks by not burning meals. This is a trail and error trade, but one that pays off ever so well. Also, it leaves you with satisfaction. You can cook for yourself and you do no need someone else to survive! Best of wishes to all!
© 2015 Benjamin J Briley
Related

The Increase in Narcissism in College Students

Cheap Spring Break Ideas and Activities - Alternatives to Travel for College Students

What Causes Many College Students to Fail or Drop Out?

How To Make A Cake In A Jar For Year Round Gifts: Perfect Way To Remember Servicemen, College Students Or Friends.