Pitfalls of Baking with Yeast


Baking with yeast can be a very frightening endeavor. Perhaps that is why I put it off for over a decade of baking and cooking. I have made delicious coconut cakes with buttercream frosting, tiramisu laden with espresso and brandy, and a cheesecake so rich and decadent that my then-boyfriend proposed on the spot.
But yeast? No, thanks. Or at least, that's what I have been saying for the past 12 years. After all, bread is inexpensive, readily available at the grocery store or for a special occasion, the local bakery. Why would I bother putting in all that time and effort for plain ole' bread? When I'm setting the meal on the table, no one "oohs" and "aahs" over the bread. No one says, "Oh, where oh where did you get that fabulous bread?" It's certainly not the centerpiece of the meal like roasted duck, nor the finishing touch that chocolate silk pie is. So why spend countless hours mixing, kneading, rising, punching, shaping, rising, baking, and resting all before the main point of it all: eating?
The Challenge
I will never forget the moment I decided I would be the best yeast-bread baker in the world. It was the new man in my life. I was aflutter and wanting to fulfill his every desire. When he commented on the freshly-baked yeast rolls at the local steakhouse, I was determined to make the best he'd ever had. I was not about to let some nameless cook in a generic restaurant outshine my home-cooking. I have always been a bit prideful in that respect.
I came home and immediately began searching for yeast roll recipes. I found one with a thousand or a more positive reviews and decided on it. My man and I went to our local grocer and I grabbed a bottle of yeast. I could already hear him proposing!

Of course I would say yes, then we would live happily-ever-after. My dreams would all come true because I am a fabulous baker who can bake anything perfectly the first time, every time.

Pride Came Before the Fall...and the Fire
As you no doubt have already imagined, things did not go as planned. I was so certain of my prowess in the kitchen that I even invited a friend over (I wanted my best friend to see the proposal live). The menu was a fantastic summer feast: grilled ribeye, fluffy baked potatoes, a fresh vegetable garden salad with homemade ranch dressing, and of course, the pièce de résistance: the yeast rolls with whipped honey butter. I didn't even plan a dessert, so sure was I that everyone would be so satiated from the rolls that they wouldn't consider another bite.
Like I said, things did not go as planned.
I had purchased three beautifully marbled ribeye steaks. I rubbed them with my unique blend of seasonings and fired up the grill. While the grill was preheating, I checked on my yeast rolls, now in the middle of their second rise. Oh, yeah. I'm a master baker. The rolls look just like the ones from the local steakhouse that my soon-to-be-fiance (STBF) loved so much. I can hear the wedding bells chiming. Okay, back to reality and the steaks.
One of the key elements of grilling a juicy steak is searing both sides with high heat. I've done this many times before, and it always results in a sizzling outside and juicy, tender inside. I have a lot of practice, so at least this part I'm not worried about. I throw the steaks on the grill, rotate them, flip them for picture-perfect grill marks, then head back in the house to start baking the rolls while the steaks finish cooking.
At this point, my best friend is telling me how wonderful the house smells, just like her grandmother's when she was a child. My STBF is nearly drooling on himself. It's all within my reach! That's when I glance out the kitchen window and see flames shooting out of my grill.

Are you kidding me? I run outside and being careful not to catch myself on fire, I grab the steaks off the grill with a pair of long grill tongs. Talk about sizzling! They are still on fire when I put them on the platter. Miraculously, after the flames die down they look okay, so I wrap them in foil to let them rest while the rolls finish.
Okay, back in the house to check the rolls. I am giving myself a serious pat on the back now, as I have managed to save the steaks and the timer is just beeping for the rolls. Everything is right on schedule.
I pull the rolls out of the oven. The smell of yeast wafts through the air. They are golden, beautiful orbs of deliciousness ready for a slathering of honey butter.
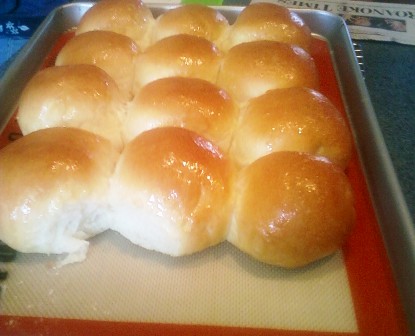
I am so impressed with myself, as is everyone else. I plate our food and arrange the table. The STBF uncorks a bottle of cabernet, and we begin to indulge. The steak is amazing. Perfectly medium, juicy, tender, and flavorful with just the right amount of seasoning. I have outdone myself! No one has said anything about the rolls. Hmm. Perhaps I was right; no one really cares all that much about the bread. Well, I at least am going to savor my accomplishment. I take a big, hearty bite and...
Holy macaroni! I have never before eaten bread that tastes like that! Did I somehow manage to dump the entire container of yeast in the mix? The rolls are so strong that I cannot imagine that live wild yeast collected in a container and fed honey and flour until it was the size of Manhattan would taste any more...well...yeasty. No wonder no one commented on them. Their mothers must have taught them the "If you can't say anything nice" rule. I break the silence and confess that I hate the rolls. My gracious friend and not-ever-going-to-be-fiance are kind enough to pretend they are edible. They may have the good graces to go ahead and choke them down, but I don't feel so compelled and leave my beautiful yet nasty little yeast pile all alone on the bread plate.
The Moral
I'm still working on becoming a master yeast baker, but I'm not there yet. For example, last night I doubled a recipe for honey wheat bread and while the taste is pretty good, the loaves fell while baking. Something I've learned is this: if it's edible, it can be used. I'm going to use my flat loaves to make french toast casserole and bread pudding. With a more savory and less sweet loaf, I could make homemade bread crumbs or croutons.
The moral of the story is this: with each new attempt, whether successful or not, something is learned and one becomes another step closer to the truth.
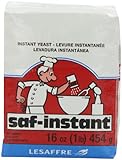
The Only Yeast I Use
Other Lessons Learned
From this experience and several others, I have learned some very important lessons:
- There are many ways you can cut corners while cooking to save time and money, but when you are baking yeast bread, this is not advisable. Buy high-quality ingredients. The ordeal described above was caused by a cheap yeast. I used it once more to make pizza crust and it tasted exactly like the rolls. I threw it out, and now I only purchase SAF-Instant Yeast.
- Pay attention to the timer, but also to the dough. If a recipe says, "Let rise about one hour or until doubled in size," make sure you check the dough about 10 minutes before the hour is up. Depending on the temperature of your kitchen, the dough may rise faster (if warmer) or slower (if cooler).
- If the dough is not yet doubled at the end of the stated time, continue to let it rise until it has doubled (or whatever measurement the recipe states). Baking with yeast is not an exact science as yeast is a living thing and will respond to changes in the environment.
- Use a large measuring cup or bowl for the rising process and make note of where the dough is at the beginning so you will be able to determine where it should be when it's finished rising.
- If you aren't a mathematician, use a calculator whenever you are unsure about any measurement. Yeast recipes often are not as forgiving as others. A little too much water or not enough flour can change everything.
- Use a scale to measure dry ingredients, especially flour. This may be one of the most important lessons learned. When you scoop into a bag of flour, the flour is compressed resulting in more flour in your measuring cup than there should be. Too much flour = dry, hard bread.
- If you are a newbie to baking with yeast, use recipes with very clear instructions.
- Try YouTube for videos on kneading, rising, and more. If you've never done it, it's hard to figure out some of the techniques. For example, I was kneading the dough like I wanted to hurt it. That's a big mistake. Kneading is a much gentler process than I imagined.
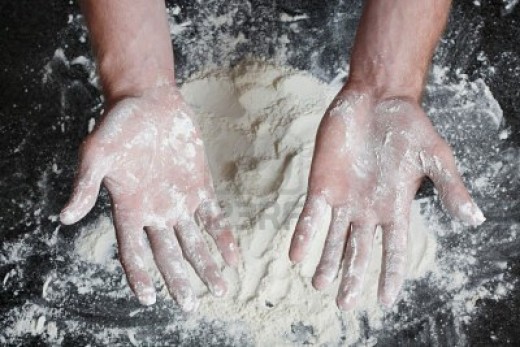
- Don't touch the dough when your hands are even the slightest bit moist with water (or sweat). You can rub a little flour on your palms to ensure you don't stick to the dough. Some recipes call for dough to be turned out onto a greased surface. If that is the case, you can rub a little vegetable oil on your palms instead of flour.
There will be many follow-up posts with additional tips and stories. Feel free to post any questions or comments. I have lots of tips and techniques, and I'd love to hear some of yours as well.
**I am not affilliated with SAF-Instant Yeast in any way. I simply love the product.
When rolling out dough or kneading, a silicone mat is one of the handiest tools in the kitchen. Dough doesn't stick to it like it does cutting boards or the counter top. Most silicone mats are oven-proof up to a certain temperature, which means you can shape your loaf right on the mat and take it from counter to oven without having to transplant it somewhere else. Anything that cuts out steps is a keeper for me!
Silicone Mats Make Kneading & Rolling a Breeze

Once you start baking with yeast or if you're a long-time baker, you will want to experiment with new recipes. There are a lot of recipes out there. Use tried and true recipes when working with yeast, especially if you're a newbie like me. There are so many things that can go wrong. Having a good starting recipe is key.
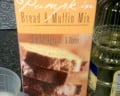
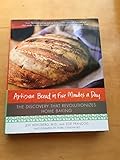
5-Star Cookbook on Baking Bread with Yeast
© 2012 Leah Wells-Marshburn
Related

How to make Authentic Italian Bread Recipes from Tuscany, Pane Toscano, Panini All'Olio.

A Lazy Cook's Guide to Baking Pumpkin Bread or Muffins

Product Review: "Eggies"-- As Seen on TV!

The Wonderful World Of Barbeque: BBQ, Offset Barrel Smokers, Outdoor Cooking Tips And More

Red Wine Marinade for Steaks - Southern Style