Ask Carb Diva: Questions & Answers About Food, Recipes, & Cooking, #93
Inspiration
I find that the most difficult part of this weekly Q&A is the introduction. More often than not I am simply at a loss for words. Our Hub pages friend Bill Holland (aka billybuc) always has some amazing words of wisdom and insight in his Monday mailbag. Me? Not so much. How do I start today's article? I decided to look at the calendar of National Food Holidays. This is a food column, so why not start there?
. . . Oh well, it was good in theory, but somehow National Gummy Worm Day and National Tapioca Pudding Day just don't get my creative juices flowing.
So, I can't fake it; I have no scintillating words to offer, so let's open the mailbox.
Here It Is
If you're an old friend, you already know how this works. But, if this is your first visit, let me introduce you to my kitchen.
Each week I receive questions about food ingredients, cooking or baking terms or methods, requests for recipes, and queries about nutrition. Just about anything food-related has been covered here.
I'm sharing this past week's questions and my responses; it happens every Monday. Want to join in the fun? You can leave your question in the comments below, and next week the answer will be right here. It's that easy.
The first question I received was from Mary (Blond Logic).
Can I Make My Own Instant Pudding Mix?
"My husband wants this but I can only find the ones that have to be cooked. What is the difference? Can I make a mixture that I just have to add cold milk?"
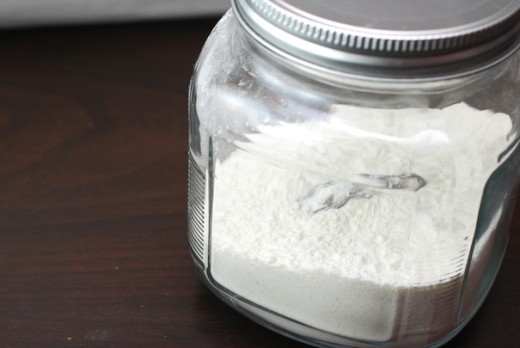
Mary, I've made my own salad dressing mixes, cream of "whatever" soup mix, and even my own biscuit/scone mix, but had never thought about instant pudding. Thank goodness someone else did. I found two links.
- Alejandra puts whole vanilla beans in her jar of homemade pudding mix to impart real (not imitation) vanilla flavor.
- Alton Brown (American television personality and host of numerous food cooking shows) devised an instant chocolate pudding recipe for the Food Network.
Meal Help Programs for Seniors, Part 2
Last week I received a question from Pamela.
"... I am wondering if any of these organizations where you can purchase meals is worthwhile. I was looking for something where I don't have to stand and cook due to my back pain. What I have seen so far are meals where I still have to peel vegetables, cut them up and cook. I am looking for something where I do less standing to cook, as it is really painful."
I gave Pamela the names of several organizations that provide ready-to-cook or ready-to-eat meals. It was an okay response, but I felt that I had let Pamela down, that there certainly must be something more that could be done. My readers came to the rescue, and offered these suggestions:
From FlourishAnyway:
It may be helpful for her to pursue crockpot meals, soups, meals with limited numbers of ingredients, and quick meals billed for busy moms. She may also consider a tall seat or stool to stand/sit at the counter as she chops and cooks or chop vegetables sitting at the kitchen table or take a large cutting board and go sit the recliner in front of the tv like I do both. Pay particular attention to the preparation time on recipes and go for baked recipes where you don’t have to stand over the stove and actively cook for an extended period. Put extra portions in the freezer and label them with date and contents— no cooking later. An occupational therapist may provide recommended solutions we can’t think of.
MizBejabbers:
"I'm thinking about getting a tall stool on wheels to use in the kitchen. They are readily available, and some cost as low as $69. I think those with the tractor seats are really cute. Hope that hint helps."
How to Make Homemade Pizza Taste Pizza-y
"Ours just tastes like bread with cheese and toppings. I use olive oil in my dough mix but there is something missing. Pizza in a restaurant just tastes better. Why?"
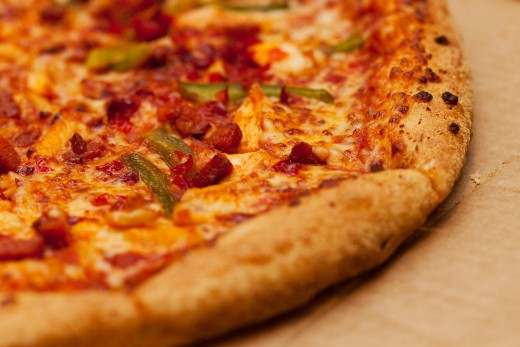
Every website, blog, or Food Network host will tell you that you must use a pizza stone to achieve that perfect crisp and chewy pizza crust. I don't own one and the prospect of sliding a wet slab of dough onto a blazing hot stone (you're supposed to preheat it in your oven for an hour) scares the dickens out of me. So here's what I do and we get a pizza that may not be perfect but it's pretty close to pizzeria pizza (and certainly better than frozen).
- Use the right flour. If you can find it in your area, purchase bread flour. It has more gluten which means that your crust will have more structure.
- Don't forget the salt; season your dough.
- Make your sauce from whole tomatoes, not tomato sauce or tomato paste. But you don't have to use fresh; in fact, canned are preferable because they are always consistently good.
- Don't use pre-shredded cheese. It doesn't melt as true pizza cheese should.
- Get your oven as hot as it will go. Mine goes up to 575 degrees. Hopefully, your oven goes to at least 500 degrees F.
Below I'm going to give you my recipe for pizza crust, a simple pizza sauce, and then, instructions for putting it all together.
Perfect Pizza Crust
Ingredients
- 3/4 cup warm water (maximum 105 to 115 degrees F.)
- 1 teaspoon sugar (to feed the yeast)
- 1 package active dry yeast (2 1/4 teaspoons)
- 2 to 2 1/3 cups bread flour (plus more for rolling)
- 1/2 teaspoon salt (for flavor and to prevent the yeast from expanding too much)
- 2 tablespoons olive oil (for flavor and to make the crust crispy)
Instructions
- Place the water, sugar, and yeast in a small mixing bowl; whisk to combine and then let sit for 10 minutes. At the end of 10 minutes, it should smell yeasty and have some bubbles on the surface.
- Place the bread flour (2 cups) and salt in the bowl of a large stand mixer. Pour in the water/yeast mixture and the olive oil. Mix for about 5 minutes. You will have a ball of dough that cleans the sides of the bowl. If it seems that the dough is too loose, add the additional 1/3 cup flour.
- Remove the dough from the bowl. Knead a few times to shape it into a ball; place in a large oiled bowl. Turn to get all of the sides coated with the oil. Cover with plastic wrap and set in a warm place for about 1 hour or until doubled.
- Gently pull the dough from the sides of the bowl and then transfer it to a lightly floured surface. Knead a few times to deflate and form into a round ball.
- Use a rolling pin to flatten into a 12-inch circle. Transfer to a greased pizza pan. Drizzle a small amount of olive oil on the dough, and use a pastry brush to gently coat the entire surface. Poke the dough with a fork (this is called docking) to prevent bubbles from forming.
If you do a lot of baking, you might want to treat yourself to the purchase of a "dough docker." This is a small, spiky rolling pin that is attached to a handle. I boughtthis one from Winco. Of all the dockers on the market, I think this is the best one. It's lightweight (important if you have arthritis) yet study (it's stainless steel. It's small enough to fit in any drawer but wide enough to get the job done in mere seconds. I use mine not only for pizza but for pie crust and making crackers.
Perfect Pizza Sauce (makes enough for 2 or 3 pizzas)
Ingredients
- 1 28-ounce can whole tomatoes
- 1 tablespoon olive oil
- 2 garlic cloves, minced
- 1 teaspoon dry oregano
- a pinch of red pepper flakes
- 1 teaspoon sugar
- salt as needed
Instructions
- Prepare the canned tomatoes (and their juice) by whirling in a blender, using a food processor, crushing by hand (messy but fun), or use my trick of chopping in a bowl with a pastry blender. Set aside.
- Place the olive oil in medium saucepan and heat over medium-low heat. Add garlic and pepper flakes and cook, stirring constantly, until fragrant. Don't allow the garlic to brown. Add the tomatoes and sugar.
- Bring to a simmer (bubbles pop along the edge), then reduce to the lowest setting on your cooktop. Cook, stirring occasionally, until reduced by half. This should take about one hour. Season to taste with salt.
Perfect Pizza (putting it all together)
- Preheat your oven to the maximum heat available (my oven goes up to 575 degrees F; most ovens have a high temperature of 500 degrees).
- If you followed the directions above, you have perfect pizza dough rolled out and sitting happily atop a pizza pan just begging to be topped with sauce and cheese and other goodies.
- Smear a thin layer of sauce on the dough, followed by whatever toppings you want. Bake in the preheated oven until golden and bubbling, 8 to 12 minutes (depending on the heat of your oven).

Herb Stems
We use the leaves from herbs to season our cooking and baking; they’re vibrant, colorful, and full of flavor, but the stems are more than fuel for the compost pile. They are also packed with flavor and the same nutrients and antioxidants as their leafy kin. Here are a few ideas for you:
Basil
- The stems can go into pesto along with the leaves
Cilantro
- Any place that you use cilantro leaves, you can include the stems as well. They are softer than other herb stems. I love their crunch in salsa.
Dill
- Add a little of the minced stem to mayonnaise (potato salad anyone?)
- Include with your salad greens
Parsley
- Add to the pot when making stock
- Another addition to the green salad, but just a subtle amount (too much parsley will impart a bitter taste)
Rosemary
- The stems are woody and so aren’t candidates for pesto, soup, or salad but they make perfect skewers on the barbecue.
- Stuff inside a chicken before roasting in the oven.
- Add to the pan for butter-basted steak.
One note of caution: There are countless posts on the internet extolling the joy of creating your own herb-infused oils. The FDA (Food and Drug Administration) cautions that infused oils have the potential to cause botulism, a dangerous and potentially fatal food poisoning. Here is a link to the FDA’s publication if you want more information.
Infused vinegars are slightly less problematic, but care should still be taken that all of the ingredients and equipment are clean. The National Center for Home Food Preservation posts their guidelines here.
We're Organized
Did you know that there is a Table of Contents for this series? I have created an article that provides a detailed listing of each question I've received. It's broken down by category, and within each category, the questions are listed alphabetically. Each question is actually a hotlink back to the original post.
Here's a link to that Table of Contents.
I have also cataloged all of my personal recipes that I have shared with you in this weekly Q&A series and in all of my other articles as well. The link to that Index is here. There are hotlinks to each recipe and this will be updated as new recipes are shared.
Let's do this again next week. If you have questions about foods, cooking techniques, or nutrition you can ask them here. If you are in search of an old recipe or need ideas on how to improve an existing one I can help you. If you want to learn more, let's do it together. Present your questions, your ideas, your comments below. Or, you can write to me personally at this email address: lindalum52@gmail.com.
And, I promise that there will always be at least one photo of a kitty in every Monday post.
© 2019 Linda Lum

