Cheesy Bacon Garlic Bread

Cook Time
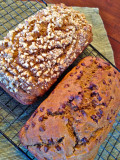
Finished Product

Ingredients
- 1 Packet Yeast, Dried
- 1 Teaspoon Sugar, White
- 1 Cup Water, Warm
- 4 Cups Flour, Plain
- 1 Teaspoon Salt, Fine
- 1 Cup Bacon, Diced
- 1 Cup Cheese, Grated
- 1 Tablespoon Garlic, Minced
- 1/2 Cup Shallots, Chopped
- 1 Tablespoon Milk, Any Type
Ingredients and Process Overview
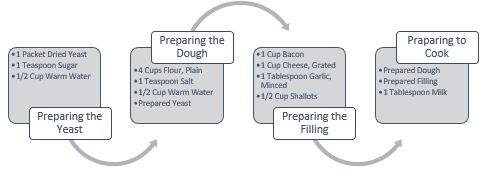
Overview of Ingredients Required for Each Step
Preparing the Yeast
| Preparing the Dough
| Preparing the Filling
| Preparing to Cook
|
|---|---|---|---|
1 Packet Dried Yeast
| 4 Cups Plain Flour
| 1 Cup Bacon
| Prepared Dough
|
1 Teaspoon Sugar
| 1 Teaspoon Salt
| 1 Cup Grated Cheese
| Prepared Filling
|
1/2 Cup Warm Water
| 1/2 Cup Warm Water
| 1 Tablespoon Minced Garlic
| 1 Tablespoon Milk
|
Prepared Yeast
| 1/2 Cup Shallots
| ||
= Prepared Yeast
| = Prepared Dough
| = Prepared Filling
| = Ready to Cook
|
What do you think?
Instrucitons: Quick Sweet/Short Version
- Combine the first three ingredients (dried yeast, sugar and warm water) and allow to sit for 10 minutes. If foam develops move on, otherwise repeat step 1.
- Combine the next three ingredients (plain flour, salt, warm water). Then combine the result with the outcome of the first stage. That is the yeast mixture. Knead & cover with glad wrap then allows the dough to sit in the fridge for an hour or more to rise.
- Combine the following three ingredients with the result of the previous step (the dough). The amounts of ingredients used in this step do not need to be exact. As long as you do not go overboard. You can use more or less of any of the toppings. Alternatively, even add some of your own.
- Knead and roll out (dough), spread with (filling) and roll up. Glaze with (milk). Cut as desired. Set aside for 30 minutes to settle before cooking.
- Cook in the oven uncovered at 210 Degrees Celsius or 420 Degrees Fahrenheit for 30 minutes or until golden.
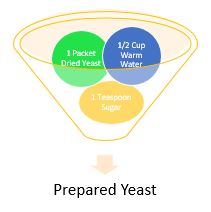
Preparing Yeast
Instructions: Expanded Version
Step 1: Preparing the Yeast
To make the yeast, you will need to combine in a small bowl the packet of dried yeast with one teaspoon of sugar and about half a cup of warm water. Then leave the mixture to sit for at least 10 minutes in a relatively warm area to develop foam. If the mixture does not produce foam, that means the yeast is no good, and you need to start preparation again from the beginning. Sometimes a packet of yeast just doesn’t work; it does not always mean the rest are bad, but sometimes this is also the case. It is best to check the expiry date before you begin just to be sure. Additionally this produces what I believe to be a not very nice smell, and it would be advisable to place the bowl somewhere with proper airflow. When your yeast is ready, you are prepared to move onto preparing the dough.
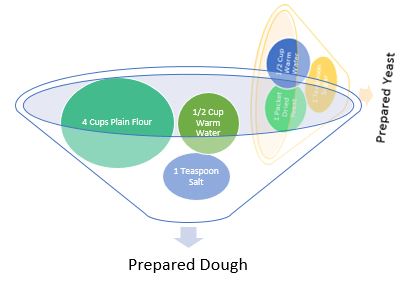
Step 2: Preparing the Dough
Not to make the dough. First you will need to combine 4 cups of flour, one teaspoon of salt, ½ a cup of warm water and the yeast mixture from step one together on the bench or in a large bowl. If it is done on a bench or counter top, then it is advisable to mix the dry ingredients first and place them in a mound on the bench. Then make a well in the middle of the dry ingredients and gradually add the warm water. Incorporating the dry ingredients gradually by incrementally bringing them into the center and mixing with the liquid. Once the ingredients above are mostly combined with no visible running water or chunks of flour. It is time to start kneading the dough. Now kneading the dough is a simple as flattening out the dough, bringing it back in, and flattening it again, repeatedly.
Now, it is not necessarily that simple and some things can go wrong. As a rule of thumb, if it is too wet, add more flour and if it is too dry, add more water. Knead the dough until it shows no visible flaws and place in the fridge for at least an hour to rise. However, do this slowly as a little can end up being way too much. If you have not had any previous experience kneading the dough, and this is your first time. I would recommend doing a quick search for information on kneading dough and common issues encountered. I have never had any issues personally, and that is not the focus of this article. However, it is better to do some research first, than deal with a failed attempt latter. Although you learn something new each time a recipe does not work out quite right, you learn how not to do it next time. You can use the hour the dough is rising to prepare the filling. That will not take an hour though so you should plan ahead something to do in the meantime.
Preparing Dough
Preparing Filling
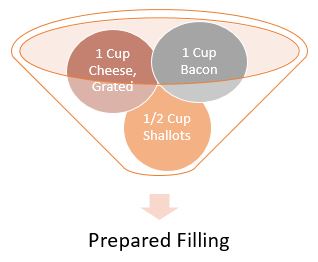
Step 3: Preparing the Filling
You are almost ready to cook. However, you still need to make the filling. Now it is time to dice 1 cup of bacon, grate 1 cup of cheese, fish out one tablespoon of garlic and chop up a cup of shallots. Combine the bacon, cheese, minced garlic and shallots in a bowl and set aside. That sounds like the easiest part done, but the next step is even simpler, and why this is my favourite stuffed bread recipe. You also don’t need to use the exact ingredients mentioned here. You can add or remove any of them and even think of some of your own. The ease of this recipe is how it comes together as a whole, not the exact ‘filling’ used.
Preparing to Cook
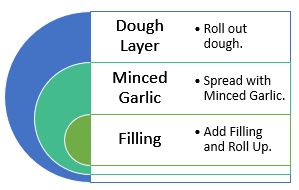
Step 4: Preparing to Cook
Now it is time to grab out the dough from the fried if you have not already, and put it all together. Roll out the dough (on the bench if necessary) into a long thin strip. Now coat most of the strip with the prepared filling. Carefully roll up the dough and place on a prepared baking tray almost ready to go in the oven. However, first you need to let the dough sit for a further half an hour (30 minutes) to finish entirely rising. Additionally you have the option at this point to make small cuts in the top of the dough, as follows (refer to image beneath). The part is optional as it is mostly decorative and doesn’t influence the overall result in terms of taste or cooking time/temperature.
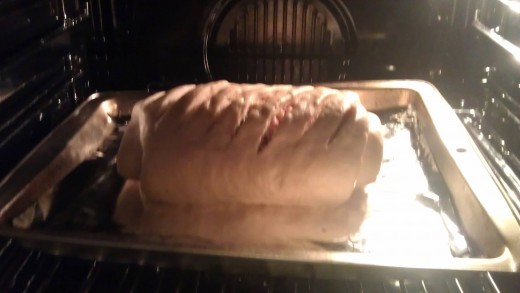
Almost Ready
Cooking Time
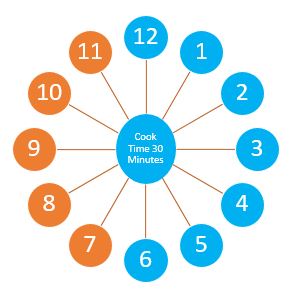
Step 5: Time to Cook
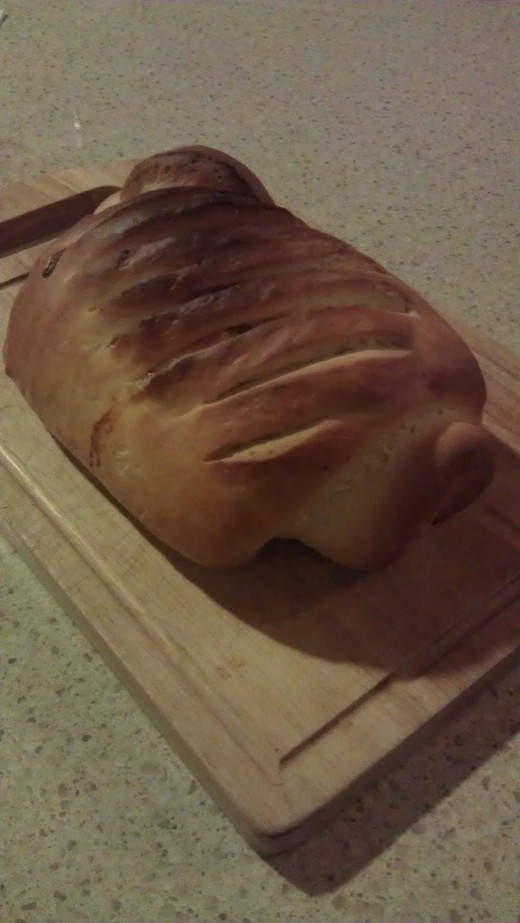
Just before you place the dough in the oven, brush it with one tablespoon of milk. This gives the bread a golden colour and a little bit of crunch. Cook for around half an hour (30 minutes) at 210 degrees Celsius and 420 degrees Fahrenheit. The result should look something like this (refer to image beneath).
Out of the Oven and Ready to Eat
Numerical Reference of Ingredients
The Yeast
| The Dough
| The Filling
| Preparing to Cook
|
|---|---|---|---|
1) 1 Packet of Dried Yeast
| 4) 4 Cups Plain Flour
| 7) 1 Cup Bacon
| 13) Prepared Dough
|
2) 1 Teaspoon Sugar
| 5) 1 Teaspoon Salt
| 8) 1 Cup Grated Cheese
| 14) Prepared Filling
|
3) 1/2 Cups Warm Water
| 6) 1/2 Cup Warm Water
| 9) 1 Tablespoon Minced Garlic
| 11) 1 Tablespoon Milk
|
12) Prepared Yeast
| 10) 1/2 Cup Shallots
| ||
= (12) Prepared Filling
| = (13) Prepared Dough
| = (14) Prepared Filling
| = (15) Ready to Cook
|
Method: Quick Reference
- Step 1: Preparing the Yeast (1 + 2 + 3 = 12)
- Step 2: Preparing the Dough (4 + 5 + 6 + 12 = 13)
- Step 3: Preparing the Filling (7 + 8 + 9 + 10 = 14)
- Step 4: Preparing to Cook (13 + 14 + 11 = 15)
- Step 5: Time to Cook (Cook 15 in oven for 30 minutes)
Closing Comments
I hope this has inspired you to give this recipe a try. In my experience, the garlic can be a bit potent when it first comes out of the oven but that usually subsides by the following day. It is a recipe that gets better over time. However, can’t be stored for more than a few days. However, this is not usually an issue as it does not last past the day it is made. I hope you have fun making it and enjoy eating it.