Coffee Can Ice Cream: An Easy and Delicious Craft

Home made iced cream - easy and delicious
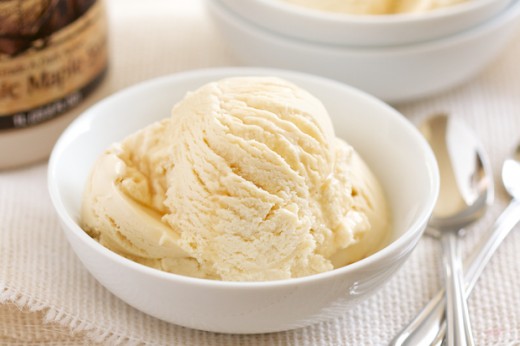
I Scream for Ice Cream
This is a great activity if you have a small group and are in the mood for ice cream and want to have some fun. It is recommended that this be done outside - in an open area, preferably smooth and flat. You can also do this inside, but I would recommend setting down a tarp and having access to a sink so you can drain your coffee cans when the ice melts...or an open door so you can water your lawn or garden.
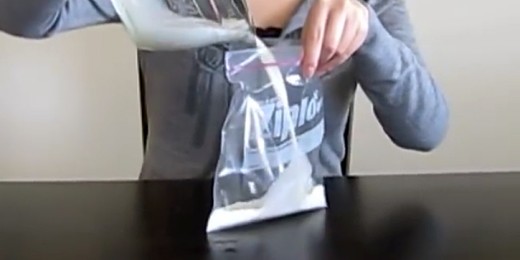
As for the small plastic bags - you might want to use the zipper ones that seal tightly. You will place the main ice cream ingredients in the bags and then place the filled bags into the coffee cans with ice in them.
Rock salt isn't a necessary ingredient, but recommended because it will help keep the ice colder longer. Once you have sealed the cans with the ice and bags in them, the participants can roll the cans back and forth. If you have kids, you can make a game out of it and might want to have some music. Adults can do this too of course.
Some persons may want to use gloves because the cans become very cold. Periodically, you will have to empty the melted ice out of the cans and add new cubes. This is why it is better done outdoors.
You will want to be very careful as well because with water around, the floor can get slippery and you don't want anyone to get hurt.
I hope the directions for this are easy to follow. Please offer any comments or questions you may have.
Ingredients - The Stuff You Will Need
For each batch:
1 Large Coffee Can with Lid
1 Smaller Coffee Can with Lid
One plastic bag - (zip lock style)
Ice - quite a bit
Rock Salt (optional but recommended)
1 Cup of Milk
1 cup of Half and Half
1/4 Sugar (might want to go less if you wish)
1/2 Teaspoon of Vanilla Extract
Flavored syrup (if wanted)
Other additions (candies, nuts, fruits - for flavor)
Can in Can

You can use a can in a can or a bag in a can
It really is up to you if you want to choose the can in the can option
or put the bag in the can
The bag is more convenient if you don't have cans around and it might be easier to get the ice cream out.
Plus it just seems more sanitary.
But it is up to you
Get Your Ingredients ready first
Click thumbnail to view full-size


First Steps
1) Pour the milk, half-and-half, sugar, vanilla (and other ingredients) into a plastic bag or small can.
2) Seal the bag or small can and place it in the larger one.

")
")
Next
3) Add the ice and rock salt.
The rock salt is recommended because it helps keep the ice cooler for a longer period of time. Your ice will last longer.
4) Place a cover on the larger can.
5) Roll the can back and forth across the floor with your partners.
Your Ice Cream Will Be Ready Soon
Click thumbnail to view full-size

The Middle Steps
6) Check the can every ten minutes or so. Pour out any excess water.
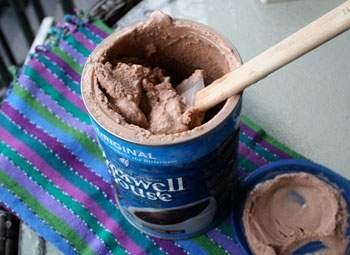
7) Check the bag and mix it or check the smaller can and stir ingredients.
8) Replace the bag or smaller can. Add more ice and salt. Cover.
9) Repeat for 20 - 30 minutes)
Get Ready to enjoy
Click thumbnail to view full-size


The Final Step
10) Scoop it into a dish or a cone.
11) If desired add toppings.
12) Enjoy!!!
Just one question
Did you enjoy this craft?
Related

Ice Cream Substitutes: Gelato, Sorbet and Other Alternatives to Ice Cream

18 Cute and Clever Tin Can Crafts

Five Fabulous Ice Cream Spots in Geneva Lake Wisconsin Area | Fun Ice Cream Facts - Cheap Vacation Ideas - Day Trip

Commercial Ice Cream Ingredients Will Make You Scream!

Homemade Chocolate Hazelnut Gelato in an Ice Cream Maker