ArtsAutosBooksBusinessEducationEntertainmentFamilyFashionFoodGamesGenderHealthHolidaysHomeHubPagesPersonal FinancePetsPoliticsReligionSportsTechnologyTravel

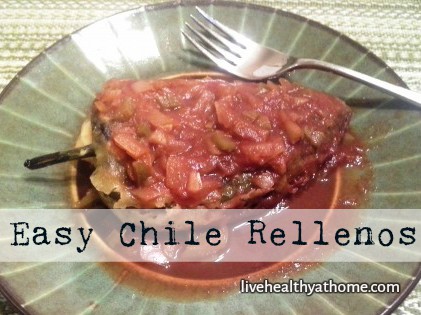
Easier Than You'd Think Chile Rellenos

Updated on April 21, 2018
VVanNess profile image

Victoria is a stay-at-home mom, author, educator, and blogger at Healthy at Home. She currently lives in Colorado with her family.

5 stars from 1 rating of Chile Rellenos

So I wanted to try something new last night.

We get most of our fruits and vegetables from a local program called Bountiful Baskets. We get a whole laundry basket full of fresh fruits and veggies from local farmers for very little money (in fact, only a small "donation").

We then end up with all kinds of interesting items in our refrigerator which we use for great meals like our Easy Peasy Chicken Vegetable Stirfry.

Well, one of the items we've been getting in our basket lately is huge poblano peppers, and I haven't exactly known what to do with them. Although everyone keeps suggesting that I try out a dish called Chile Rellenos.

I finally thought I would try it out. It was just too tempting when I learned that this dish was simply poblano peppers stuffed with tons of cheese and smothered in red sauce. Yum! (See my recipe for Homemade Red Enchilada Sauce.)

It did take more time than I'm used to devoting to dinner (notice I didn't call it Easy Peasy or Quick and Easy Chile Rellenos), but it was definitely worth it.

Next time, I might try to figure out how to bake them instead of frying them. Let's see how I did it this time!

Step One: Gather your ingredients
Step One: Gather your ingredients | Source
Step Two: Lay your chiles in the oven without a pan on low broil
Step Two: Lay your chiles in the oven without a pan on low broil | Source
Step Three: You want the skin on your chiles to scorch, turn black and blister so you can easily remove it
Step Three: You want the skin on your chiles to scorch, turn black and blister so you can easily remove it | Source
Step Four: In a semi-shallow dish on the side, crack an egg
Step Four: In a semi-shallow dish on the side, crack an egg | Source
Step Five: Add your milk
Step Five: Add your milk | Source
Step Six: Add your flour
Step Six: Add your flour | Source

Cook Time

Prep time: 15 min
Cook time: 20 min
Ready in: 35 min
Yields: Serves 4 people 1 large chile relleno

Ingredients

  • 4 large poblano peppers
  • 2 cups (or 8 slices) cheese, (we used shredded mozzarella)
  • 1 cup milk
  • 1 cup + 1/2 cup flour
  • 1 large egg
  • 1 teaspoon baking powder
  • 1 teaspoon baking soda
  • Enough oil to fry your peppers in
  • 1 recipe for Easy Peasy Red Enchilada Sauce

Instructions

  1. Start by setting out all of your ingredients so that you have them on hand when you need them
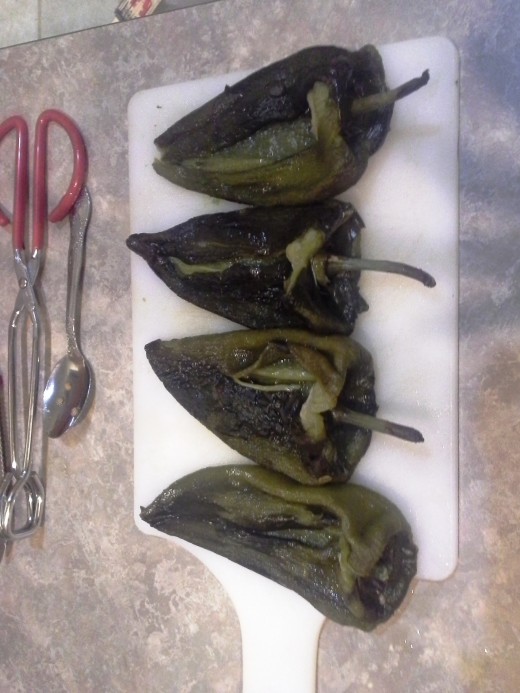
  2. Set your oven to a low broil and lay your peppers directly onto the shelf in your oven without a cookie sheet or pan.
  3. You want to scorch the skin on each of your peppers until it turns black and blisters all the way around.
  4. While your peppers are cooking, in a shallow pie dish, crack an egg and mix it up well. This is going to be where you batter your chiles.
  5. Next add your milk and stir.
  6. Add your flour, but be careful when mixing in, otherwise flour will go everywhere.
  7. Finally, add in your baking soda and baking powder.
  8. Mix everything together really well.
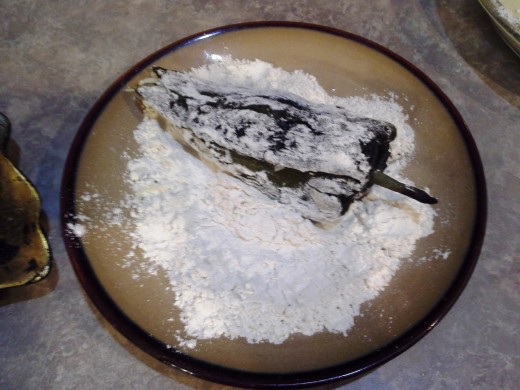
  9. In another small plate, add your remaining 1/2 cup of flour for pre-coating your chiles before battering them.
  10. Set both your flour plate and your batter dish over by your skillet so that they are ready when you are prepared to cook your chiles.
  11. Set out your station for skinning, seeding, and stuffing your chiles.
  12. You'll need a cutting board and knife, a spoon for de-seeding your peppers, and your shredded cheese.
  13. Pour one inch of oil into a skillet and heat to medium.
  14. Lay a couple of paper towels on a plate on the other side of your skillet to drain and dry your peppers after frying.
  15. One at a time, remove your peppers from the oven and pull the skin off of them.
  16. It may not be as easy as it sounds, but just be careful and be patient.
  17. Once your peppers are skinned, use your spoon to pull the seed pockets from underneath the stem out of each of your peppers.
  18. Now, one at a time, stuff each of your peppers with cheese. I used about a 1/2 of a cup of cheese for each pepper.
  19. Fold over the skin of your peppers to try and hold in the cheese as best as possible.
  20. Roll each pepper in your flour, one at a time.
  21. Then roll each in your batter.
  22. My pan only held two peppers at a time, so I saved the last two until the first ones were done.
  23. Before plopping each pepper gently into the pan, I dusted each side with flour again, to make them crispy.
  24. I also tried to set the open side of the pepper into the oil first to seal it shut, otherwise it starts opening on it's own and is difficult to flip when ready.
  25. Do this with each pepper.
  26. They should only take about a minute or two on each side to completely cook.
  27. When browned and fully cooked on each side, remove them and set the on your prepared paper towel to dry and cool.
  28. While cooking, prepare your red sauce (See my recipe for Easy Peasy Homemade Red Enchilada Sauce).
  29. When all of your chile are ready, smear some of your red sauce on a dinner plate.
  30. Set one of your chile rellenos on top of your red sauce and then top with more red sauce.
  31. Enjoy!! Yummy! Yummy!
Click thumbnail to view full-size
Step Seven: Mix everything well (Be careful or the flour will go everywhere)Step Eight: Add your baking powder and baking sodaStep Nine: Mix everything wellStep Ten: Pour your remaining 1/2 cup of flour onto a plate for coatingStep Eleven: Set your plates out assembly line style to be ready for fryingStep Twelve: Prepare your cutting board for peeling and stuffingStep Thirteen: Add about an inch of oil to a skillet for fryingStep Fourteen: Heat to medium heatStep Fifteen: Prepare a plate with a paper towel on the side for drying after fryingStep Sixteen: Remove the first pepper from the ovenStep Seventeen: Let it cool a bit so you don't get burned and then begin peeling off the outer skinStep Eighteen: Feel free to pull them out one at a time or all at once, but let cool firstStep Nineteen: Once cooled, peel the skin off of each oneStep Twenty: Gently remove the seeds from the insides of each oneStep Twenty-one: Fill each with cheese (I chose shredded mozzarella)Step Twenty-two: Try your best to fold over your chiles to seal the cheese inStep Twenty-three: Carefully roll each chile in flour on both sidesStep Twenty-four: Then roll each chile in your wet batterStep Twenty-five: Transfer your battered chile into your hot oil (Be careful! We covered it immediately because it was sputtering everywhere.)Step Twenty-six: Do this carefully with each of your chilesStep Twenty-seven: Let them cook for just a few minutes until one side is browned, and then flip themStep Twenty-eight: Let them cook for a few minutes longer and then remove them from the oil to drain and dry on the paper towel you set upStep Twenty-nine: On the side, follow directions for my Easy Peasy Red Enchilada Sauce; Spoon a little of this onto your plate before you lay down your chileStep Thirty: Lay down one of your chilesStep Thirty-one: Spoon a little more red sauce on topStep Thirty-two: Enjoy!!Yum!
Step Seven: Mix everything well (Be careful or the flour will go everywhere)
Step Seven: Mix everything well (Be careful or the flour will go everywhere) | Source
Step Eight: Add your baking powder and baking soda
Step Eight: Add your baking powder and baking soda | Source
Step Nine: Mix everything well
Step Nine: Mix everything well | Source
Step Ten: Pour your remaining 1/2 cup of flour onto a plate for coating
Step Ten: Pour your remaining 1/2 cup of flour onto a plate for coating | Source
Step Eleven: Set your plates out assembly line style to be ready for frying
Step Eleven: Set your plates out assembly line style to be ready for frying | Source
Step Twelve: Prepare your cutting board for peeling and stuffing
Step Twelve: Prepare your cutting board for peeling and stuffing | Source
Step Thirteen: Add about an inch of oil to a skillet for frying
Step Thirteen: Add about an inch of oil to a skillet for frying | Source
Step Fourteen: Heat to medium heat
Step Fourteen: Heat to medium heat | Source
Step Fifteen: Prepare a plate with a paper towel on the side for drying after frying
Step Fifteen: Prepare a plate with a paper towel on the side for drying after frying | Source
Step Sixteen: Remove the first pepper from the oven
Step Sixteen: Remove the first pepper from the oven | Source
Step Seventeen: Let it cool a bit so you don't get burned and then begin peeling off the outer skin
Step Seventeen: Let it cool a bit so you don't get burned and then begin peeling off the outer skin | Source
Step Eighteen: Feel free to pull them out one at a time or all at once, but let cool first
Step Eighteen: Feel free to pull them out one at a time or all at once, but let cool first | Source
Step Nineteen: Once cooled, peel the skin off of each one
Step Nineteen: Once cooled, peel the skin off of each one | Source
Step Twenty: Gently remove the seeds from the insides of each one
Step Twenty: Gently remove the seeds from the insides of each one | Source
Source
Step Twenty-one: Fill each with cheese (I chose shredded mozzarella)
Step Twenty-one: Fill each with cheese (I chose shredded mozzarella) | Source
Step Twenty-two: Try your best to fold over your chiles to seal the cheese in
Step Twenty-two: Try your best to fold over your chiles to seal the cheese in | Source
Step Twenty-three: Carefully roll each chile in flour on both sides
Step Twenty-three: Carefully roll each chile in flour on both sides | Source
Source
Step Twenty-four: Then roll each chile in your wet batter
Step Twenty-four: Then roll each chile in your wet batter | Source
Step Twenty-five: Transfer your battered chile into your hot oil (Be careful! We covered it immediately because it was sputtering everywhere.)
Step Twenty-five: Transfer your battered chile into your hot oil (Be careful! We covered it immediately because it was sputtering everywhere.) | Source
Step Twenty-six: Do this carefully with each of your chiles
Step Twenty-six: Do this carefully with each of your chiles | Source
Step Twenty-seven: Let them cook for just a few minutes until one side is browned, and then flip them
Step Twenty-seven: Let them cook for just a few minutes until one side is browned, and then flip them | Source
Step Twenty-eight: Let them cook for a few minutes longer and then remove them from the oil to drain and dry on the paper towel you set up
Step Twenty-eight: Let them cook for a few minutes longer and then remove them from the oil to drain and dry on the paper towel you set up | Source
Step Twenty-nine: On the side, follow directions for my Easy Peasy Red Enchilada Sauce; Spoon a little of this onto your plate before you lay down your chile
Step Twenty-nine: On the side, follow directions for my Easy Peasy Red Enchilada Sauce; Spoon a little of this onto your plate before you lay down your chile | Source
Step Thirty: Lay down one of your chiles
Step Thirty: Lay down one of your chiles | Source
Step Thirty-one: Spoon a little more red sauce on top
Step Thirty-one: Spoon a little more red sauce on top | Source
Step Thirty-two: Enjoy!!
Step Thirty-two: Enjoy!! | Source
Yum!
Yum! | Source

Nutritional Information

Nutrition Facts
Serving size: 1 large poblano pepper and red sauce
Calories 370
Calories from Fat189
% Daily Value *
Fat 21 g32%
Carbohydrates 26 g9%
Fiber 2 g8%
Protein 19 g38%
Cholesterol 185 mg62%
Sodium 500 mg21%
* The Percent Daily Values are based on a 2,000 calorie diet, so your values may change depending on your calorie needs. The values here may not be 100% accurate because the recipes have not been professionally evaluated nor have they been evaluated by the U.S. FDA.
The Sign of a Good Meal
The Sign of a Good Meal | Source

Personal Review

These turned out delicious, but I do actually have a few suggestions for improving it.

After reading through many other chile relleno recipes online, I got some really great ideas.

One author suggested that the seeds might be easier to remove from the peppers if done before roasting, and would destroy the peppers less. I felt like I was butchering my peppers when I did it after roasting and skinning them.

The batter also seemed really thick to me. It was nice and crunchy and tasted great, but it was pretty thick.

In another recipe, I noticed that the author only used eggs for their batter instead of milk, flour, baking soda, and baking powder.

They separated the yolks from the whites first. Then beat the whites until they were thick and had stiff peaks. The author then folded the yolks gently back into the whites and used this for their batter.

I hope this works out for you!

Quick Poll

Do you think you'd be willing to give this dish a shot?

See results

© 2014 Victoria Van Ness

working

This website uses cookies

As a user in the EEA, your approval is needed on a few things. To provide a better website experience, hubpages.com uses cookies (and other similar technologies) and may collect, process, and share personal data. Please choose which areas of our service you consent to our doing so.

For more information on managing or withdrawing consents and how we handle data, visit our Privacy Policy at: https://corp.maven.io/privacy-policy

Show Details
Necessary
HubPages Device IDThis is used to identify particular browsers or devices when the access the service, and is used for security reasons.
LoginThis is necessary to sign in to the HubPages Service.
Google RecaptchaThis is used to prevent bots and spam. (Privacy Policy)
AkismetThis is used to detect comment spam. (Privacy Policy)
HubPages Google AnalyticsThis is used to provide data on traffic to our website, all personally identifyable data is anonymized. (Privacy Policy)
HubPages Traffic PixelThis is used to collect data on traffic to articles and other pages on our site. Unless you are signed in to a HubPages account, all personally identifiable information is anonymized.
Amazon Web ServicesThis is a cloud services platform that we used to host our service. (Privacy Policy)
CloudflareThis is a cloud CDN service that we use to efficiently deliver files required for our service to operate such as javascript, cascading style sheets, images, and videos. (Privacy Policy)
Google Hosted LibrariesJavascript software libraries such as jQuery are loaded at endpoints on the googleapis.com or gstatic.com domains, for performance and efficiency reasons. (Privacy Policy)
Features
Google Custom SearchThis is feature allows you to search the site. (Privacy Policy)
Google MapsSome articles have Google Maps embedded in them. (Privacy Policy)
Google ChartsThis is used to display charts and graphs on articles and the author center. (Privacy Policy)
Google AdSense Host APIThis service allows you to sign up for or associate a Google AdSense account with HubPages, so that you can earn money from ads on your articles. No data is shared unless you engage with this feature. (Privacy Policy)
Google YouTubeSome articles have YouTube videos embedded in them. (Privacy Policy)
VimeoSome articles have Vimeo videos embedded in them. (Privacy Policy)
PaypalThis is used for a registered author who enrolls in the HubPages Earnings program and requests to be paid via PayPal. No data is shared with Paypal unless you engage with this feature. (Privacy Policy)
Facebook LoginYou can use this to streamline signing up for, or signing in to your Hubpages account. No data is shared with Facebook unless you engage with this feature. (Privacy Policy)
MavenThis supports the Maven widget and search functionality. (Privacy Policy)
Marketing
Google AdSenseThis is an ad network. (Privacy Policy)
Google DoubleClickGoogle provides ad serving technology and runs an ad network. (Privacy Policy)
Index ExchangeThis is an ad network. (Privacy Policy)
SovrnThis is an ad network. (Privacy Policy)
Facebook AdsThis is an ad network. (Privacy Policy)
Amazon Unified Ad MarketplaceThis is an ad network. (Privacy Policy)
AppNexusThis is an ad network. (Privacy Policy)
OpenxThis is an ad network. (Privacy Policy)
Rubicon ProjectThis is an ad network. (Privacy Policy)
TripleLiftThis is an ad network. (Privacy Policy)
Say MediaWe partner with Say Media to deliver ad campaigns on our sites. (Privacy Policy)
Remarketing PixelsWe may use remarketing pixels from advertising networks such as Google AdWords, Bing Ads, and Facebook in order to advertise the HubPages Service to people that have visited our sites.
Conversion Tracking PixelsWe may use conversion tracking pixels from advertising networks such as Google AdWords, Bing Ads, and Facebook in order to identify when an advertisement has successfully resulted in the desired action, such as signing up for the HubPages Service or publishing an article on the HubPages Service.
Statistics
Author Google AnalyticsThis is used to provide traffic data and reports to the authors of articles on the HubPages Service. (Privacy Policy)
ComscoreComScore is a media measurement and analytics company providing marketing data and analytics to enterprises, media and advertising agencies, and publishers. Non-consent will result in ComScore only processing obfuscated personal data. (Privacy Policy)
Amazon Tracking PixelSome articles display amazon products as part of the Amazon Affiliate program, this pixel provides traffic statistics for those products (Privacy Policy)
ClickscoThis is a data management platform studying reader behavior (Privacy Policy)