How to Clarify Butter - Recipe with Pictures!


What is Clarified Butter?
'Clarified butter' might sound complicated but it's really only butter minus the milk solids. It's a handy thing to have around the house for a variety of things - frying, baking, and greasing pans, for example.
Clarified butter is also known as ghee and widely used in Indian cuisine. It's wonderful for frying thngs in, especially, because unlike regular butter it won't spit as much and it also won't burn, because there are no milk solids. Once you start using it you'll find a million uses!
It's super-easy to make your own clarified butter in just a few simple steps, and couple of things you've got around the kitchen, and it only takes 10 minutes! Let's get started.
Clarified Butter Ingredients
- Butter
- Water
How Long Does it Take to Make Clarified Butter?
You can clarify as much butter as you want at a time - and it won't go off in the fridge, practically for all eternity, because it's pure fat. If the recipe you're using calls for a certain amount of clarified butter, allow for about a 10% loss by weight to account for the milk solids. You can always save the leftovers for other applications, so it's better to make more than you need than less.
Clarified Butter Instructions
Set Up:
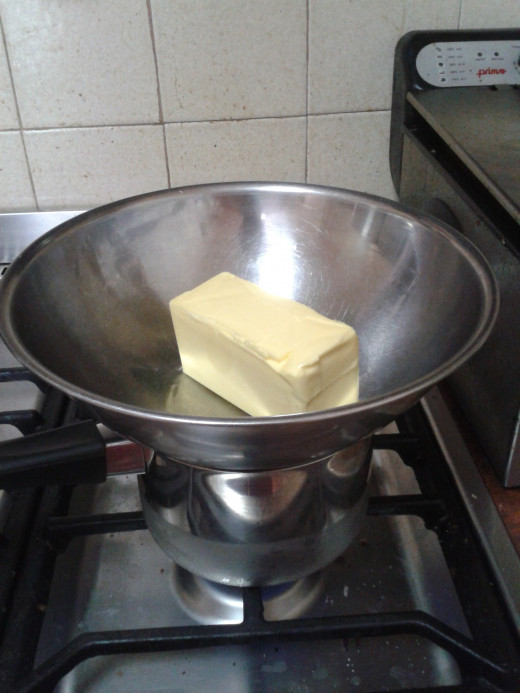
You'll need a saucepan filled an inch or so with water and a metal or glass bowl that's big enough to sit over it to make a bain marie. Put the butter in the bowl and set the bowl over the saucepan. Set the stove top to low-medium heat (to prevent burning your butter) and leave it.
You're already half-way done!
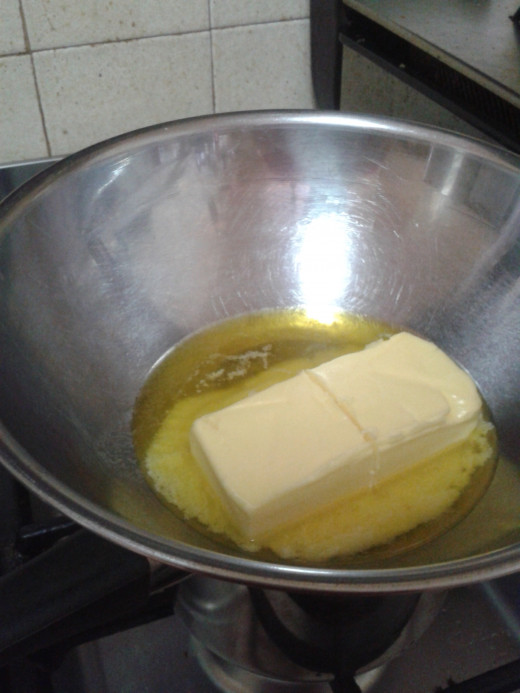
Your butter will start to melt because of the heat of the steam coming from the water in the pot below. You can already see in the picture to the right how the clear butter fat is separating from the milk solids.
Leave your butter to melt completely - you don't have to watch it, but check it now and again to make sure it's not boiling. There's not much risk of that, as long as it's on a low heat, but you don't want it to happen. Do not stir or otherwise disturb the butter as you'll have to wait for the milk solids to settle again if you do.
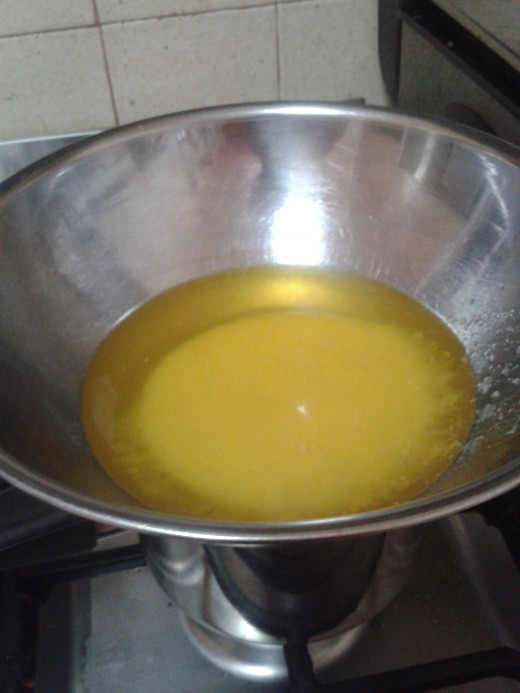
Once your butter is completely melted like in the picture on the right, it's ready to be poured off into a container.
To pour off clarified butter, take the bowl away from the stove and pour butter in a thin stream into a container or another bowl. Be careful not to get any of the white sediment into the second bowl or container - those are the milk solids, which we're trying to remove.
Once you're done either use your butter for whatever you need it for or put it in the fridge for later use.
What do You Think of this Clarified Butter Recipe
Why Would You Clarify Butter?
The purpose of clarifying butter is to remove the milk solids and leave only the pure butter fat. This is handy in cooking and baking for a number of reasons:
- Frying or roasting with clarified butter allows for a cleaner taste and more even browning, as the milk solids in butter burn quickly when exposed to heat, but the pure clarified butter won't.
- Clarifying butter takes away the saltiness and the slightly bitter taste you can get from butter, because all the impurities are removed on the process.
- Clarified butter is free of milk proteins and can be helpful if you're trying to cut those out but still want to achieve the superior taste and finish you get from cooking with butter.
© 2013 Cecil Wilde