How to Make a Pie Crust Without the "Flour" Mess! A New Technique...

INTRODUCTION
There are many recipes for pie crusts; however, this one is unique in that it is my own creation and technique for a quick, no mess, delicious homemade pie crust.

Gather your utensils and supplies you will need...
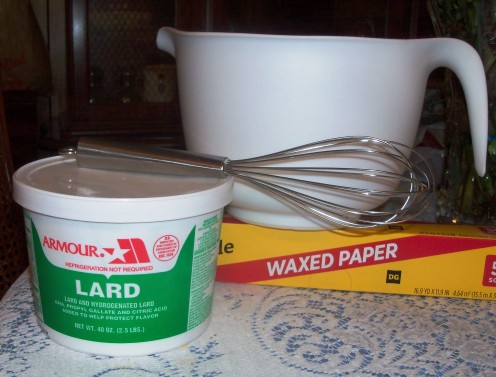
There are a few items you will need to make your pie crust.
- a rolling pin
- wax paper
- very lightly greased (with lard) pie pan(s)
- fork and knife to ventilate crust before baking
- large mixing bowl
- measuring cups/spoons
- spatula
- a whisk
- flour
- salt
- lard
- water
Try Amazon.com for your baking needs...

The Main Recipe
This recipe is for 2 - 10-inch pie crusts. I have many recipes for pie crusts, but this one is my favorite...it is taken from Betty Crocker's Cookbook copyrighted in 1969 so it has been around a long time. I watched both my grandmothers make pies when I was growing up, and this is the closest thing to their recipes I have found...I wish so much I had their recipes to pass on, but I have misplaced them, so this is the next-best thing!
- 2 and 2/3 cups of plain flour (DO NOT use self-rising flour!)
- 1 teaspoon salt
- 3/4 cup plus 2 tablespoons of Lard (this must be lard and not shortening
- 7 to 8 tablespoons of cold water
Measure flour and salt into a large mixing bowl. Use a whisk to stir and blend the salt and flour together. Cut in the lard and mix thoroughly. I do this with my hand, as the lard mixes better when you squish it between your fingers. Just make sure you have clean hands. I continue to mix it until the flour looks like meal. Add 7 tablespoons of cold water and work it into a ball, adding the last tablespoon only if it is needed to shape it into a good non-sticky ball of dough. When you have the dough well mixed, divide it into two equal parts. Each part will make a pie crust.
Rolling out the dough...
Now you are ready to roll out the dough to make your pie crusts. This is the part where you will be amazed at how easy it is. It is so mess-free and quick. You will want to make all your crusts, because they taste so much better than ready-made at your grocery store.
It is so easy and mess-free...
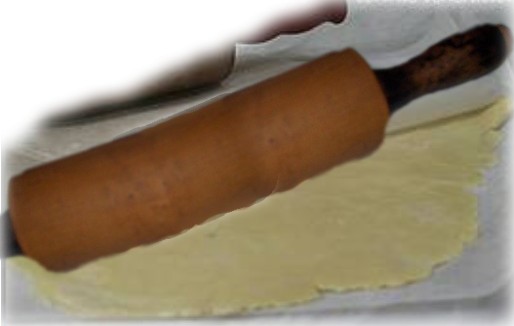
Take one piece of wax paper about 12-15 inches long and place it on your clean counter top. Just lightly dust it will flour (a very thin dusting) (or just lightly dust the dough on the bottom and top), and place one-half of the dough mixture in the middle of the wax paper and add another exact length piece of wax paper over the dough...
You are now ready to roll out your pie crust. Use you rolling pin and start in the middle of the dough and roll up and down, and then side to side. Repeat this until you have the size pie crust you want.
There is no need to put flour on your rolling pin...the wax paper will not stick to it, nor does the dough stick to the wax paper...there is no flour mess!!! Just pick up both pieces of wax paper when you have finished rolling the dough and peel off the paper one sheet at a time, and you will have a perfect, no-mess pie crust every time!!!
Final Steps...
Place the pie crust in the lightly greased pie pan, and take a fork and make holes all over the bottom and sides of the crust to vent it. If you skip this step, the crust will bubble up and not be smooth...the air must escape while cooking, and these holes will make it cook evenly.
Place you filling in the pie crust and repeat rolling out the remaining crust as stated above and place on top of the pie.
Seal your pie...
When you place the top crust on your pie, it will overlap the edges. Don't cut the pie crust once you have covered it...simply take and roll up the edges, so there is no waste of the dough. It makes the pie more appealing to the eye when it has a pretty crust, and rolling it is so much quicker and easier than trying to cut it and make it look perfect.
Bake in a 425 degree preheated oven...
Always cover the edges of your pie with aluminum foil, or you can pick up the regular pie protectors at your store. If you do not cover the edges of your pie the crust will burn very quickly and very badly and your pie crust will be ruined.
Bake at 425 degrees for 40-50 minutes if you have pie filling...if just an empty shell bake at 475 degrees for 8-10 minutes...and ENJOY!
More of Amazon.com...

A quick apple pie filling...
This too, is from my old Betty Crocker cookbook. I have tweaked her recipe a bit, and I have found it to be the best apple pie you would ever want to make...
This is for a 10-inch two crust (covered) pie...
1 cup sugar
1/3 cup plain flour
1 teaspoon nutmeg
1/2 teaspoon cinnamon
a dash of salt
8 cups thinly sliced apples (granny smith) these apples make the best pies!
3 tablespoons of butter (not margarine)
Peel and slice the apples. Place them in a large mixing bowl. (The bowl needs to be big enough to stir in the additional ingredients). In a separate small bowl use a whisk to mix the sugar, flour, nutmeg, cinnamon, and salt all together until well blended. Then sprinkle this mixture over the apples and mix thoroughly coating all the apples with this mixture...DO NOT do this step ahead of time...only coat the apples when ready to put them into your pie crust, as it will liquefy when set aside too long, and all the apples will not be covered...
Use the spatula to add the coated apples into the pie shell immediately after stirring making sure it is evenly distributed in the unbaked pie crust/shell. Dot the butter around the top of the apples evenly. DO NOT USE MELTED BUTTER! - it can be softened to room temperature, but it is not necessary. Place the top crust on the pie after dotting the butter evenly on top of the apples, and roll up the edges and follow directions as described above.


")


 Recipe")