Angie Jardine's best all-in-one chocolate cake recipe.


... and not just chocolate cake.
There are a few of my secret tips in this recipe which will obviously not be a secret as soon as I've shared them with you, but I think it's worth that to bring this old family recipe to a wider audience. And I have to admit that this cake would not be made if I had to do all that beating and folding-in business so a food processor is my tool of choice, but if you don't have one a traditional electric mixer will do. Although I am making a chocolate cake the secret transfers well to any cake.
First, assemble your ingredients.
Always use the best ingredients you can find, and that means free-range eggs collected at first light when the dew is still on the grass. Only joking. Seriously, free-range eggs are best if you can get them, best for the recipe and best for the chickens welfare and always make sure they are at room temperature.
Now, select three medium-sized ones and use them as the weight to weigh the dry ingredients, that way the balance of the cake is more accurate. This is an old Yorkshire Wold's woman's trick learnt from my grandmother, who was ... surprise, surprise ... an old woman from the Yorkshire Wolds in the UK.
If you haven't got the sort of balance scales that have weights at one end and a bowl at the other, you can first weigh the eggs and then make sure that all the other ingredients weigh exactly what the three eggs weigh altogether. It usually works out at about 6-ish ounces (170 grams) of each ingredient,
- self-raising flour - with one teaspoon of baking powder added
- margarine (I use Stork Soft)
- sugar.
Although most recipes stipulate caster sugar I always use granulated sugar as I believe it makes a more open texture but this is just my personal preference. These quantities produce enough mixture for 2 x 8" (20cm) sandwich tins, which should be greased and lined. You'll notice I haven't mentioned chocolate yet, but I'm getting to that.
Sling everything in the food processor (or food mixer).
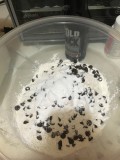
Put all the ingredients into the processor, flour (sieved together with the baking powder), sugar, fat and eggs; put the lid on and wizz it all up together. Now to add the chocolate. I'm too tight-fisted to go in for expensive stuff so I use a heaped tablespoon full of cocoa powder and ... here's the second tip ... don't put it in dry.
Mix it to a smooth paste with a little lukewarm water or milk and add a dash of vanilla essence if you like. Add that to the mixed ingredients and wizz it again, blending it all together until everything is evenly incorporated. You may have to stop it and scrape the sides down to achieve this. Do not over mix.
Test for a nice soft consistency by taking a spoonful of mixture and allowing it to drop off the spoon which it should do easily. If it doesn't do this, carefully add a touch of milk. Do this in small increments until the mix drops off the spoon quite quickly.
Getting this right is, I think, a matter of practise. This is a good thing as it means lots of practice chocolate cakes. If the mix is too dry the cake will be one of those stodgy efforts much beloved by great-aunts. If it is too wet then the cake will be sticky and sad, and so will you.
Divide the mixture between the sandwich tins, level the tops and then make a slight hollow in the centre of each one so that your cakes rise but are still as flat as possible. This makes for a good shape when they are sandwiched together. Bake in the centre of the oven preheated to gas mark 3, 170℃, 325℉ for 30 to 35 minutes and make sure that you do not open the door for anything until you are sure the cake has formed properly, just over halfway through the cooking period. If your cakes have to be on different shelves as mine are, you can swap them round at this point.


To decorate or not to decorate?
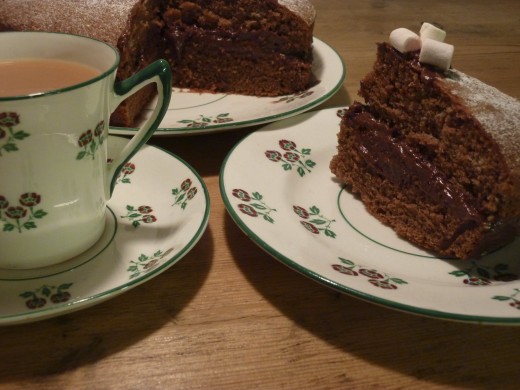
Once they are cooked allow them to cool thoroughly before sandwiching them together with butter icing (butter cream). Turn one of the cakes over so that its top is on the bottom, spread this half with icing and place the other cake on top the right way up. Now, I must admit that I make butter icing by taste so I have no quantities. I just put a blob - probably about 2-3 ish ounces (75-ish grams) of Stork or some soft good quality margarine into a bowl and sieve in a pile of icing sugar combined with a couple of teaspoons of cocoa powder. The sieving is important as there are always lumps in icing sugar, no matter how carefully you store it. Blend these together until smooth. I always do this by hand as the quantity is too small for the processor. You can also add a small amount of vanilla essence (carefully) at this stage if you wish. Now for another of my secrets, once the icing is mixed I add just the tiniest splash of warm water. I have found this makes the icing a lighter, less cloying, consistency. But of course you would make your own icing to your preference.
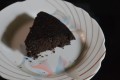
As I like moist, light cakes that don't have lots of icing I usually leave the tops of my chocolate cakes naked but for a light scattering of sieved icing sugar. The most I put on is a small knob of butter icing in the middle studded with those tiny marshmallows you get to put in hot chocolate drinks but again this is a matter of taste. Many people will also put a thin layer of butter icing on the top or even chocolate water icing which will harden to a glossy coating.The only limit is your own imagination.
Finally, serve it the same day and keep what's left in a cake tin for the next day ... if it gets that far. Enjoy ...


")