- HubPages»
- Food and Cooking»
- Cooking Ingredients»
- Fruit Ingredients
Minnesota Stump Gardening: Building that Strawberry Bed - Part 1

Facts
As I type this, I have discovered that I'm somewhat exhausted. Not to mention, before I went outside to move the stumps around, I had eaten some rhubarb bread with honey and cinnamon, chili powder and sugar on them.
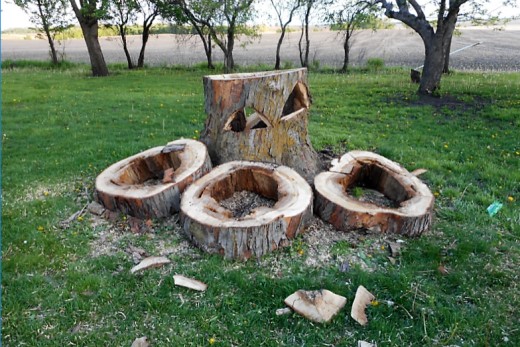
So, my stomach is now complaining. Ugh. The stump rings were heavy and I had to pull them up on edge and roll them across the yard. Our yard is by no means level, plus we have our sewage mound in my path. These stumps weigh a lot. Probably more than myself. They are at least ten to twelve inches thick and ten foot around. I know, because I measured them for creating the fabric bags to go inside them.
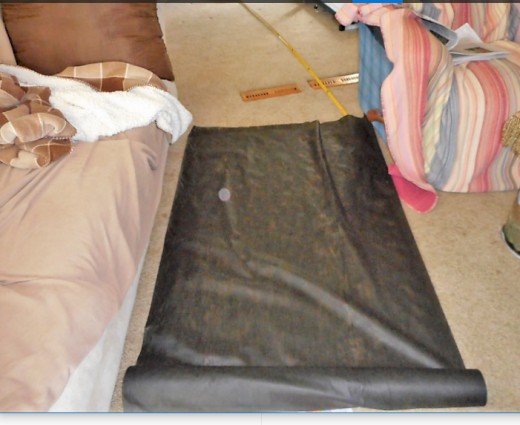
My one creative thought was using my upholstery knowledge to make fabric covers out of the weed fabric that you get at Fleet Farm in rolls.
My husband took the chainsaw and sliced beveled holes in the sides of the stump and beveled the top of the stump. Then, he had taken an idea from a suggestion that I had about having stumps around the front of the original stump, and had cut rings out of the rest of the stump that was across the yard by the wood shed and log splitter.

Making a Bag
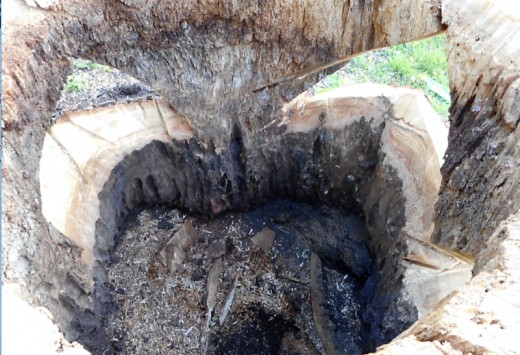
I measured around the stump and discovered it was almost 11 feet around and four foot deep and four foot wide.
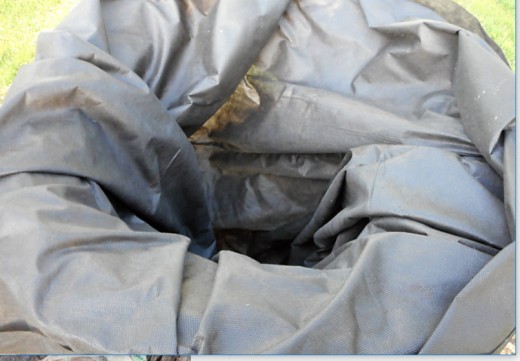
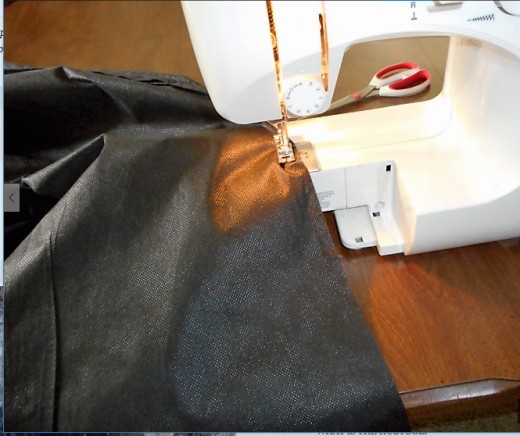
To make my life easier, I cut two eleven foot pieces of my three foot white fabric and sewed the two together down the edge of the two sides and made one piece that measured six foot by eleven foot. One huge rectangle with a seam running down the middle.
Then, I joined the six foot ends together. So, now I had a large six foot long tube. I decided to sew the end shut, and started sewing across the eleven foot (now five and a half foot wide) piece. I got about twenty inches in, and decided the split the difference with the end that was left. I folded the difference in half, and continued sewing the next twenty inches. Then, I turned the material and sewed the remaining twenty inches closed. All three came to a point in the center of the bottom of my fabric sack.
Short Bags for the Short Stumps
I cut another piece of fabric eleven feet long and folded it the short way, until it was about six inches across. Then, I cut three twelve inch pieces. I then, cut a three by three foot piece for each strip.
I joined the 12 inch ends together, so I started with a loop again. This time the loop was only 12 inches wide. I took that three foot piece of fabric and started sewing it to the edge of the loop. It was a slight bit longer than the square, so I eased the last four inches to fit.
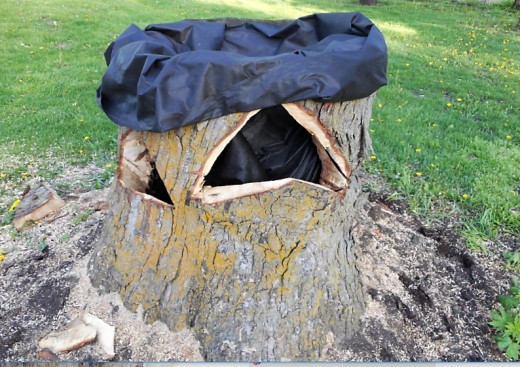
I reasoned that no one, except you, is going to know my secret, unless they dig the dirt out of the stump, and really, who is going to do that. (??)
Dirt and Manure
Now that I have my stumps dragged over and placed and my fabric bags ready to be inserted, I now need dirt, manure and strawberries.
Well. My neighbor has horses and he has piles of dry manure that he absolutely was tickled pink to donate to my cause. Cool!
In the event that my husband was busy, he showed me a spot on our acreage, where there was a bounty of rich dirt that I could dig and move by wheel barrow to the stumps. We have a pile of gravel for the driveway that I can put in the bottom of the bag.
I mean. This is like a giant planter, so I am going to assume that like a flower pot, I need some rocks in the bottom for appropriate drainage.
Strawberry Plants
The greenhouses have strawberry plants on sale. I have seen them for $2 each. I have seen 4/$7.99 which is still less than two dollars each.
I need four plants per hole, so that is 16 plants for the sides. It would be a good idea to put another bunch on the top of the stump, and four or so for each short stump. So, 32 plants for this project. But, how cool if it works out.


