The Perfect Christmas Gift For That Special Teacher - Peppermint Chocolate Cupcakes - Recipe & Tag Instructions Included

A Special Gift For That Special Teacher
Having worked as a Primary Teacher (and a Kindergarten Teacher's Aide and Preschool Teacher before that), one of the most beautiful and satisfying times on the School calendar is Christmas. It is a time of mixed emotions as you say goodbye to a class you have come to know and love, and wish them well for their journey ahead. Every group of children that pass through a grade is unique and special, with different learning needs and interests. They touch your heart no matter how challenging a year may have been, and often at the end of the year the children love to give their special teacher a special Christmas gift to say goodbye.
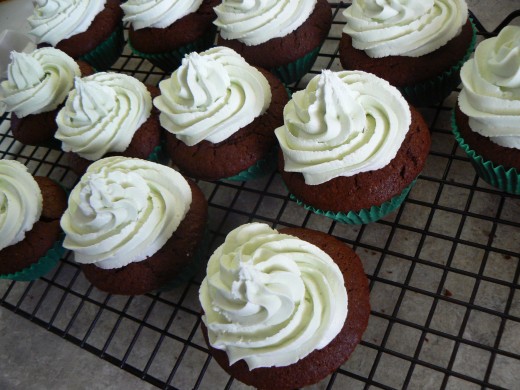
Having received various types of gifts at the end of a school year, the ones that stood out to me were the ones made with love and thought behind them. This year, we (as parents of a 5 and 3 year old), chose to make special Peppermint Chocolate Cupcakes for our children's Preschool teachers (well, confession... my husband made them - being the brilliant cook that he is - I just supervised and decided what they should look like!).
Peppermint Chocolate Cupcake Recipe
So here is my wonderful husband's very own special Peppermint Chocolate Cupcake Recipe. You should feel very blessed he has allowed me share it with the Hubpages community!
INGREDIENTS & METHOD (Cupcake Mix):
250g softened butter
1 teaspoon of vanilla extract
1 1/4 cups caster sugar
4 eggs
1 3/4 cups of self raising flour, sifted
1 cup desiccated coconut
1/2 cup baking cocoa
1 cup milk
1. Preheat oven to 160 degrees celsius (320 degrees fahrenheit)
2. Beat butter, sugar and vanilla in a bowl with an electric mixer until light and creamy.
3. Add eggs, one by one, and beat again.
4. Add the sifted flour, coconut, cocoa and milk and beat until combined well.
5. Spoon the mixture into medium-large patty pans in a muffin tin (recipe should make approximately 24 cupcakes).
6. Cook for approximately 25-30 minutes (test with skewer if uncertain).
7. Allow to cool before applying icing.
INGREDIENTS & METHOD (ICING):
100g butter, softened
100g vegetable shortening, softened
1 teaspoon of peppermint flavouring
600g icing sugar, sifted
2 tablespoons of milk
natural green food colouring
Silver Cachous
1. In large mixing bowl, mix together the vegetable shortening and butter with an electric mixer until smooth and creamy. (TIP: If the mixture is not becoming creamy, place the mixing bowl into a larger bowl that has warm water in the bottom and continue beating until creamy).
2. Add peppermint.
3. Gradually add sugar. Continue to beat until well mixed. The icing will appear dry.
4. Add milk.
5. Add natural colour as desired.
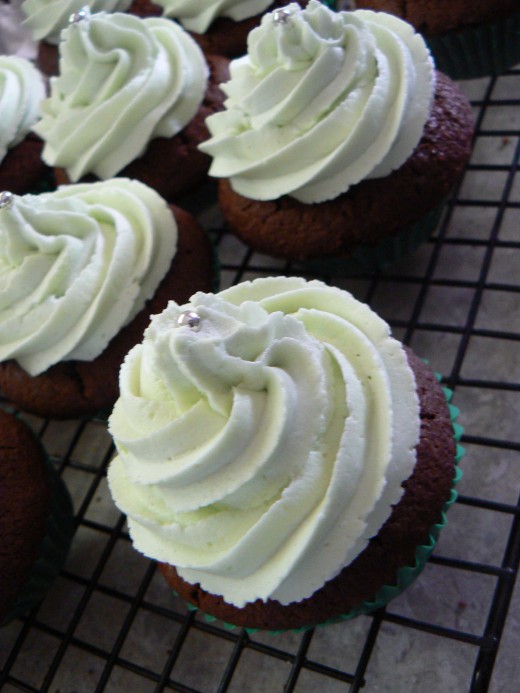
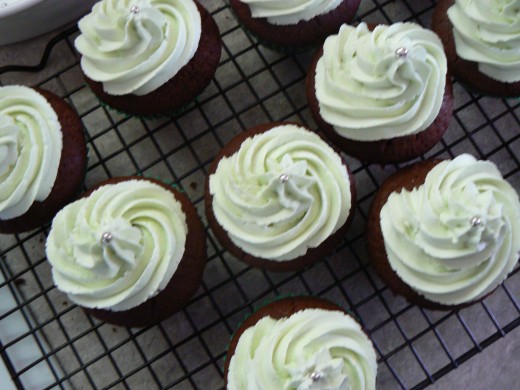
6. Use a piping bag (you can buy or make one) to ice cupcakes in a spiral fashion leaving a point on top.
7. Add one, or a few, Silver Cachous (edible silver decorating balls) to the top.
Packaging & Christmas Greeting Tags
MATERIALS:
paper trimmer or scissors
thread or ribbon
brads (paper fasteners)
hole punch
small cellophane bags or a small cake boxes with clear cellophane
computer and printer to design and print off greeting
INSTRUCTIONS:
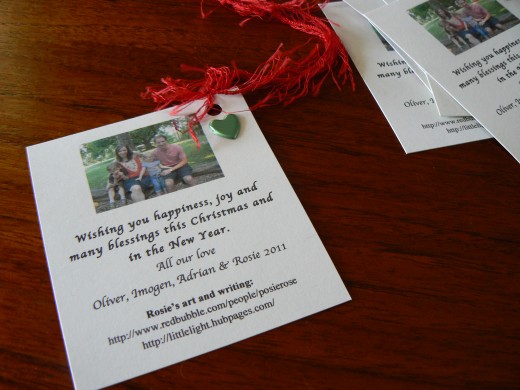
1. Design your tag. I normally use a word document with 2 columns and aim to have 6 greetings per A4 page. I like to have a personal photograph at the top then a unique Christmas greeting to make it more personal rather than just the standard 'Merry Christmas' that you see on so many cards at Christmas time.
2. Print off your tags. I like to use a 12x12 inch Scrapbooking paper cut down to A4. You can even use a double sided paper as long as one side is light enough to print on. My favourite scrapbooking papers are from BasicGrey who generally bring out a new Christmas range every year.
3. Cut out your tags with a paper trimmer or scissors. Place a hole punch in the top (in the middle or either corner depending upon where your picture or text starts).
4. Add a unique brad or paper fastener near the hole. You can get beautiful brads from craft stores and there is always lots of Christmas styles to choose from such as stars, hearts and bells all in various golds, silvers, greens and reds.
5. Thread the ribbon or fibre through the hole ensuring you have enough length to tie a good size bow.
6. Place your cupcake into cellophane bag carefully with some tongs. Ideally, it would be easier to place the cupcake into a small cake box and then tie clear cellophane around it. As we only had cellophane bags at the time, we made do - but it was a bit of a challenge placing the cupcakes into the bag without letting to the icing touch the sides. The tongs made it much easier, however next time we will be purchasing some small cake boxes.
7. Place a hole in the corner of your cellophane bag and thread your tag through. If you are using a cake box, then you can tie the cellophane at the top with your tag. Make sure you have something stable to transport them in (especially if you have 12 to deliver like we did) to your Preschool or School).

The Results
Well, our Preschool teachers loved them. My husband had already earned himself a bit of a reputation at the Preschool as an excellent cook with both the kid's birthday cakes being a huge hit with the teachers earlier in the year.
When he dropped our kids off to Preschool the day after delivering the Christmas cupcakes, he once again was showered with adoration and praise. To quote one lovely teacher:
"I took my cupcake home and after dinner I brought it out in front of my family and said, 'Well... I've got my dessert.' to which my daughter replied, 'Is that real?'. After taking a bite, I responded, 'Yes' I said... 'and it tastes as good as it looks!'"
Cupcake Recipes On Hubpages
If you want some other delicious cupcake recipes then there are plenty to choose from here on Hubpages:
Strawberry Mint Cupcake Recipe
Chocolate Fondue Recipe and Cream Cheese Filled Cupcake Recipe


")


