Easy & Delicious Holiday Chocolate Truffles: Step by Step

Tempting Truffles!
Chocolate Truffles
These decadent little delicacies are sure to delight! Rich and chocolaty they are a most popular palate pleaser…perfect for any party and sure to get you rave reviews. This recipe combines succulence with simplicity! The recipe yields 30-35 truffles, depending on the size you make. Just 4 steps to Easy Chocolate Truffles!
In this article I will explain how to make truffles. I have chosen this recipe and used it myself year after year because it is:
1) The easiest recipe for truffles I have ever found
2) The most versatile recipe, allowing you to be creative in your topping choices!
Step 1: Ingredients for the Easy Truffles
How to make truffles:
This simple chocolate truffle recipe has just 3 ingredients:
1) 1 package of cream cheese (8 ounces) - slightly softened
2) 2-1/2 boxes of Baker's semi-sweet chocolate squares (20 squares total)
3) Toppings: colorful or chocolate sprinkles, crushed or chopped almonds, pecans, or walnuts, coconut - pretty much anything you like!
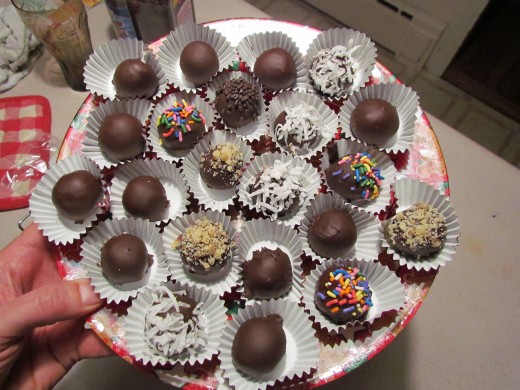
mixing the truffle base
Step 2: Prepare the Truffles
Begin by slowly melting 8 chocolate squares either in a microwave, or on low heat on the stove. Stir regularly until completely melted. Add the melted chocolate to a mixing bowl along with the package of softened cream cheese.
Mix together thoroughly until smooth and perfectly consistent throughout. An electric beater does all the work. See, I told you these were easy chocolate truffles! Cover with wrap and place in the refrigerator until firm (about an hour).
You're doing well! Once you know how to make truffles you will impress all your friends and family with this easy and delicious truffle recipe!
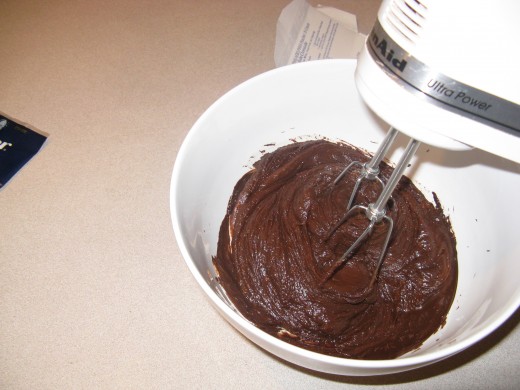
Rolled Truffles
Step 3: Roll the Truffles
Okay, now that the truffle mixture has gotten firm, scoop out a small amount (a mellon baller works well) and roll into a ball between the palms of your (clean) hands. Yep, its a little bit messy...but STILL very easy!
TIP: Cold hands work best. Dip them in a bowl of ice water, dry them, then roll your balls. Repeat the hand "chilling" as necessary. The closer they are to perfect balls...the better.
Also, remember, the final size will be larger because we still have to dip them in melted chocolate shortly...so don't make them too big.
Place the formed truffle balls onto a cookie sheet lined with wax paper. When finished, put the tray into the refrigerator while you prepare the next step.
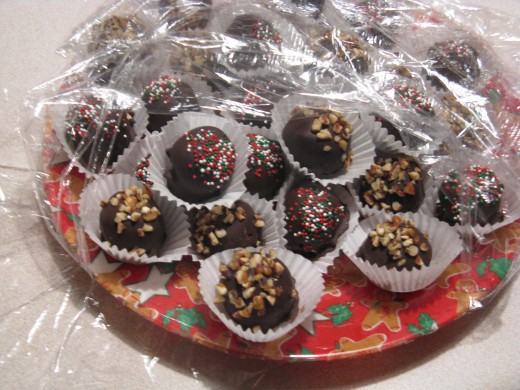
Truffle Treasures!

Step 4: Prepare the Truffle Dip!
Melt 12 more chocolate squares (stir until completely melted). Prepare your toppings now by putting them into smaller bowls suitable for sprinkling. Take your truffles out of the refrigerator. Dip them one at a time into the melted chocolate with a fork. Use a second fork to help remove some of the dripping chocolate. Sprinkle with your choice of topping and then return the truffle to the waxed paper cookie sheet. If you can hold a fork and sprinkle some nuts you can make these truffles! I promised you these were easy chocolate truffles! Oh...and wait until you taste them! Delicious!
TIP: Some people prefer to dip an ice cream scoop in the melted chocolate, pour off the excess, then roll the tuffle around in the coated "scoop" portion of the ice cream scooper. This works also, but applies a thinner layer of chocolate. Personally...I prefer to dip!
Let them cool in the refrigerator, then place them in candy papers for that finishing touch! Enjoy!!!
Finished Truffles
Truffle Trivia:
Did you know?
- Truffle comes from a Latin word meaning a "lump". Not too flattering huh?
- Also, we call them "truffles" because of their similarity in appearance to the edible fruiting body of a fungus which is also called a "truffle"! Hmmm...maybe I shouldn't have told you that.