Tips for Posting Recipes Online


Posting a Recipe Online
When posting a recipe to the Internet, many people don't think about details like copyright, photos, or clarity. It's too easy to cut-n-paste, but that's not the right thing to do. Does the recipe you are posting really belong to you? Can the reader easily follow the recipe's instructions? Can it be made clearer? Would photos enhance the recipe?
These are concerns to consider when putting a recipe on the Internet. Below are my tips for adjusting the recipe, adding your own touches and really making it your own.
Dealing with Copyright
The general gist of the copyright office information on recipes is that a list of ingredients is not something you can copyright. The part that makes a recipe unique is the way it is explained or described or illustrated.
How to boil an egg has the basic ingredient of an egg. That doesn't vary from one recipe to the next. The way you word your description for how long to boil it, the kind of boil (rolling boil, simmer, etc.), the kind of pan to use or other details are what make the recipe yours. Use your own words and take some photographs to post a recipe online.
Do You Post Recipes Online?
Vote in the poll
Enhancing Your Recipe for Posting
If you're posting a recipe on your blog, don't just put the ingredients and minimal instructions that you normally see on a recipe card.
You have enough space and tools to really showcase that recipe. Try these enhancements:
- Show each step (take a photo showing each step in progress)
- Tell the background on the recipe (does it have a history, is it a family favorite, is it served for a special event)
- Recommend your favorite brand that works best for the recipe
- Show off the finished product
- Have the recipe ingredients and brief instructions in an easily-printed format.
Add a Photo Showing Your Recipe Being Served

How to Take Food Photos to Go with Recipes
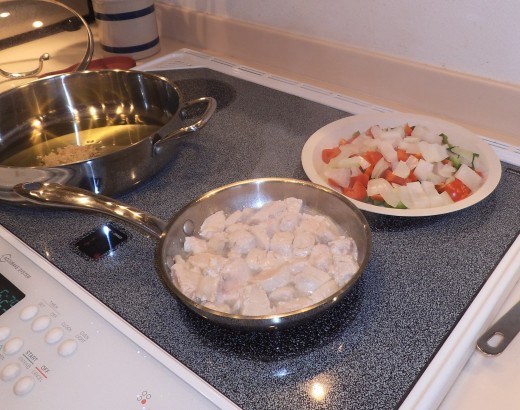
If you're publishing a recipe online, enhance it with photos. Ideally, you keep your digital camera or phone nearby at all times. While you're cooking, pause between each stage of the recipe to take photos. Here's how to do it.
- Use good lighting when photographing ingredients and the finished product. It doesn't require an elaborate lighting set-up. I use my kitchen counter with the overhead light on and the under counter light on. Avoid using the flash which gives a washed-out look to the pictures.
- Get close to the food and use the close-up mode. On my camera, the close-up mode is represented by the icon of a flower. I like to take some of the pictures at a slight angle so everything isn't square to the camera. It looks more interesting to me.
- Position the food so there isn't a lot of background clutter. Your canisters, blender and other odds and ends just distract from the food.
- If you missed getting a step photographed, sometimes you can recreate it later. Alternately, you can show a product or a tool used in that step of the recipe.
- It is possible to show cutting, stirring or other actions with one hand, while you snap a photo with the other hand. Not easy, but possible. If you can find someone else to stir or chop, then it's much easier to photograph the stages.
- An alternate way is to show the tool and the ingredients together without the action. It gives a more static picture for that step of the recipe but still gives the reader the general idea.
- Show the ingredients, the preparation of the raw food, the cooking stage, the finished product and the serving of the food.
Tips & Warnings
Don't eat the food all up before getting a picture.
For really hot food (something boiling on the stovetop), get in quickly and snap the photo before the lens steams up.
Examples of Food Photos
Click thumbnail to view full-size


Do You Post Photos with Your Recipes Online?
Vote in the poll
Reminders for Adding Photos to a Recipe Post
Perhaps you want to feature your taco salad on your blog for Cinco de Mayo. Take photos as you prepare the meal. You will want photos showing the steps and ingredients. Get a good photo of the finished food which you will want to attractively display on a plate or table setting.
Things to be aware of:
- have good lighting
- avoid cluttered backgrounds
- hold the camera steady
- Use a mini-tripod with flexible legs for really professional shots
- take multiple shots of each step so you can choose the best ones
- get in close
- crop if necessary to make the food the main item in the picture
For more tips on photographing food, check out this awesome blog on food photography. It includes tips, tricks, and techniques.
There are several books that you'll find helpful if you want to become an expert on food photography. You can order these from your public library or from Amazon.
- Digital Food Photography
- Food Photography And Styling
My Photo Showing Paella Preparations
Checklist for Adding Detail to a Recipe Posted Online
You don't want to just add "blah, blah, blah" to expand on a basic recipe in an online article. Make every word useful to the reader. See the examples below.
- Check each step. How could it be clearer? Pretend the reader is a beginning cook and add information for them. If the recipe says "stir in the dry ingredients," you can add the ingredients (flour, sugar, baking soda, salt) and even the amounts. Sure, that information is listed in the initial list of ingredients, but save the reader the trouble of checking back and forth.
- Analyze the actions in the recipe. How can they be better explained? When it says "stir in the dry ingredients," you can add details on how long, with what utensil, and what the result should be. Example: Stir with a whisk, just enough to mix the dry ingredients.
- When the recipe says "add XYZ," expand it to tell the reader where they can get the ingredient if it's unusual. You can offer a substitute ingredient or mention a preferred brand that you think works best. Example: Add the raisins. I use the light-colored raisins, but the dark ones are fine too. You can also substitute dates, chopped finely.
- If your introduction merely says "Here's an easy recipe for XYZ," then you are skimping the reader. This is the place to tell the origin of the recipe, why they will want to make it and any background information you know. Example: My mom is a master soup maker and I learned this recipe from her. I've changed it a little, by adding shrimp. It really warms you on a raw, chill day. That's why chowder is a favorite across New England.
- Add a step at the end to tell how many the recipe serves, tips for serving it and how to store any leftovers. Example: This chowder recipe feeds my family of four for three hearty meals. I put it in a big soup tureen to take to the table. It stores for up to four days and the flavors blend so it's even better than the first time.
I Make Recipe Cards to Go with My Food Blog Posts

This content is accurate and true to the best of the author’s knowledge and is not meant to substitute for formal and individualized advice from a qualified professional.
© 2009 Virginia Allain


