- HubPages»
- Games, Toys, and Hobbies»
- Toys for Kids»
- Building & Construction Toys
Building Custom K'Nex Pieces
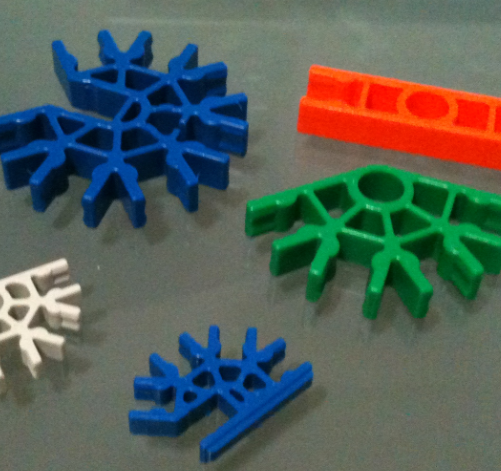
K'Nex are a plastic modeling system, originally developed and marketed for kids. Since then, the product line has moved toward more generality, and now offers micro-sized pieces. These smaller pieces, taking up only a quarter of the area of the original size, allows designers to build more intricate and functional models and machines in a smaller volume. Reasonably sophisticated designs have been realized by both children and professionals, including mechanical computers, and projectile firing weapons. The universality of K'Nex inspires people of all ages to use their imagination and offers a convenient way to build their creations.
The standard connector piece of K'Nex allows plastic rods to be connected at 45 degree angles, enabling at most, 8 rods to radiate from one central connector. Despite the simplicity, truly anything can theoretically be built using only official K'Nex parts. Although against K'Nex purists' ideology, better efficiency can be achieved using connectors with more flexible angles. For example, if a connector had 12 notches, each rod would be separated by only 30 degrees, and triangular shapes would more readily be possible. This article details an attempt to produce such a 12 sided K'Nex piece to simplify complex designs by reducing part count and space required to achieve certain connections.
Step One
I reverse engineered a typical round K'Nex connector piece. This is the type of piece that has 8 connection spots all the way around. Using a micrometer I measure sides, angles, and the hole diameter, to produce a digital replica in AutoCad.
Step Two
I isolated the basic repetitive rotation around the center hole of the K'Nex piece leaving only a single 45 degree arc of the original connector - enough to snap one K'Nex rod. At this point, I wonder, "why did I draw the whole piece in the first place!?" Keep in mind that a K'Nex connector with 12 connection points must have a larger diameter than the 8-connector.
Step Three
Choose a new radius for the 12-sided connector. This can be performed by trial and error or trigonometrical calculation. I opted for the simple route and made 3 attempts, and it looked perfect so I kept it. Once the radius is determined, use AutoCAD's rotate function and rotate the isolated pattern around the radial point, 360 degrees, 12 times. If the measurements are made properly, each rotated copy of the original single connector will align to form the new 12-sided K'Nex piece.

Step Four
Save the AutoCAD drawing as a *.DXF, which is essentially a vector file type compatible with many programs. Open the dxf file in a "dxf to g-code" converter. I use SheetCam, but it's not free. Open the g-code in a milling machine control program, like MACH3. You'll need a milling machine, which will be be the hardest part. If you're lucky you might be able to find a used on on E-Bay. Once all of the equipment is ready to go, the 12-sided K-Nex piece can be milled out of a sheet of plastic and ready to be used in new designs.
