Creating Fantasy Maps with GIMP: Worldbuilding Part 2, Creating Histories▼

In Worldbuilding Part 1, we created the map. In Part 2 we will be adding to the map history in a way that is easy for you to expand on as needed. You don't want to delve too deep into details at this point.
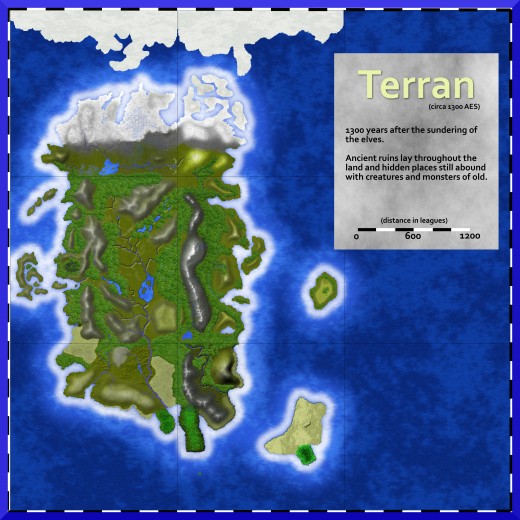
The first thing I added to the map was a scale so your players know how far it is from one place to another. I added the scale in a Text box that also gave me room for a bit of description timestamp. Placing the map in an era forced me to think about what may have happened before. So as a very general timestamp; I created 3 eras.
- Before humans
- Human introduction
- After the rise of the human empires.
So with that simple association if I get any questions about when something happened I have a time reference of one of three ages.
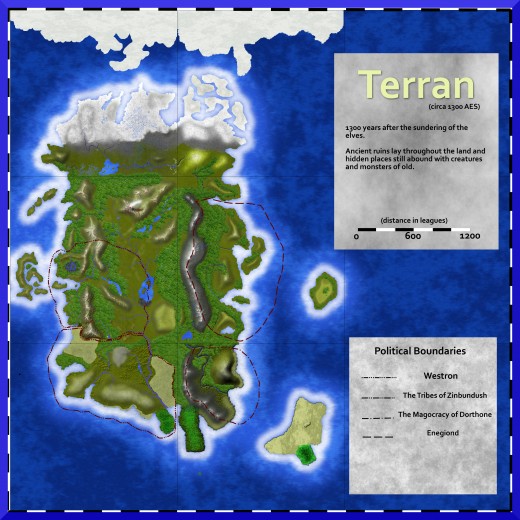
I have added four human political areas to start there will probably be more but with these four you can create any number of modules.
So barbarians can come from the Tribes of Zinbundush and any nobles would come from the long established kingdoms of Enegiand.
Westron, where the campaign starts is the youngest area, so it is still developing. It is the frontier with settlers and explorers and lots of unexplored areas. Adventuring groups would find lots to do in this area.
The Kingdoms of Enegiond are well established and already have long histories but also most of the old world ruins have been destroyed or integrated.
If your group needs to quest for information dealing with magic or such then traveling to the southeast of the continent within the Magocracy of Dorthone would be the most likely avenue of research.
There are more human archetypes but with these four you can improvise details as required.
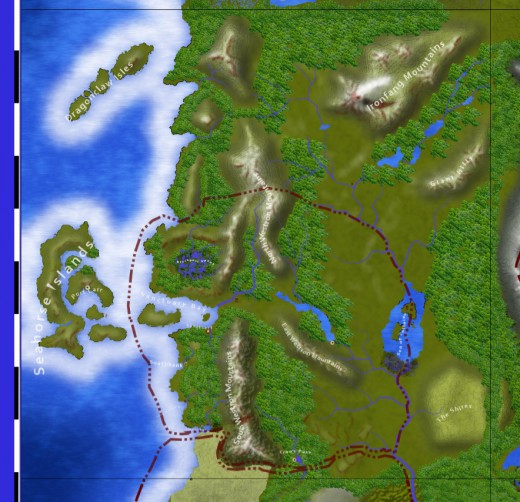
Now you can add general place names like the Seahorse Islands, the IronFang mountains, Sea of Zoltine. Giant Hills. Be creative with your place names. some could be obvious what you'd find there (ie: Giant Hills) or cryptic like the Sea of Zoltaine. Who or what is Zoltaine?
You can learn to place text along a path in Creating Fantasy Maps with GIMP-Labeling. With this information, you can run text along the river or across the contours of the mountains. Make the text semi-transparent and it blends with the map.
Now we have the bones of the worldbuilding information. From here we go in-depth into the areas we need for the characters. Now you have a general idea where things are and will be. You only need to expand on areas that directly influence your campaign.
Make notes with this information at hand so when your characters need an ancient artifact or need to travel to the lair of some forgotten ancient creature you can mark it on the map for future reference.
With worldbuilding you don't have to have it all created at once, you just build as you go.
I carry a hardback bound notebook with me to add notes when I have a few minutes. I jot down ideas for an adventure or a magic item. I get the grid paper pages so I can draw maps as well.
I really like the Moleskine classic notebook as it is large enough to take a good amount of notes without excessive page turning, yet small enough to carry in my back pocket comfortably. The hardcover holds up well; much better than the spiral bound notebooks I used to carry. The extra price for the hardcover model is well worth it.
© 2017 Frost Birch
")


")
