ArtsAutosBooksBusinessEducationEntertainmentFamilyFashionFoodGamesGenderHealthHolidaysHomeHubPagesPersonal FinancePetsPoliticsReligionSportsTechnologyTravel

Home Made Circuit Boards.
Updated on May 29, 2015
neildabb profile image

Neil got interested in amateur (ham) radio in high school. He currently holds a General Class license.

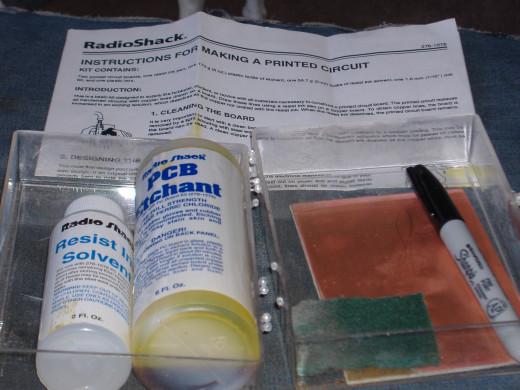
The kit that makes it all possible, this one happens to come from Radio Shack.
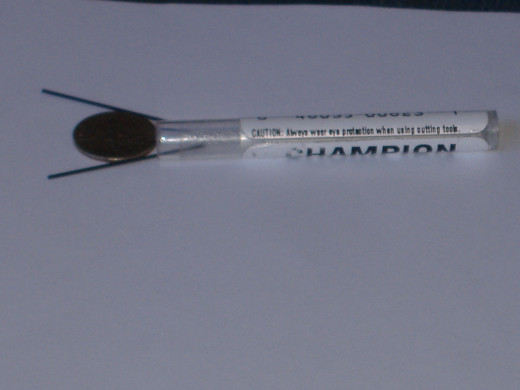
That's a penny next to the two 1/32 inch drill bits.  and they do break easily!
That's a penny next to the two 1/32 inch drill bits. and they do break easily!
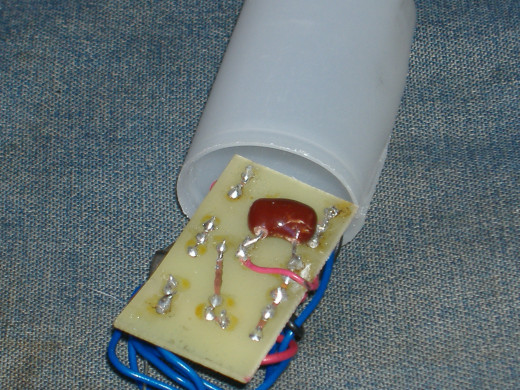
My first finished project.  Note the part that I had to solder on the back, but the unit works.
My first finished project. Note the part that I had to solder on the back, but the unit works.

One alternative to the chemical etching process described here is using a Dremel (or other routing tool) to grind away the copper coating on an un-etched circuit board. This produces a board that may not be as pretty or as compact as those created by the etching process (and similar safety precautions will need to be taken when using this process), but if it is done carefully, it can produce a fully functional circuit board.

As a ham radio operator involved in making some of my own equipment, it is often really nice to have access to custom made circuit boards, but until a few years ago that wasn’t an option. When I was in high school the process of creating a printed circuit board appeared well beyond the scope of a home brew project. My high school teacher had the materials and know how, but at the time they appeared to be out of my reach. Then I found and bought a circuit board kit from Radio Shack, and discovered it's not as difficult as I thought it was. The hardest part is designing the board, or converting the schematic you've drawn (or found in a local book) to a circuit board. If you are lucky, the source of your project will provide a pattern. If not, there are free software programs that can help, just download your favorite and try it. If you choose to strike out on your own, draw lots of pictures till you find the pattern that you like.
From this point on there is one major issue to look at, Safety! During most of the rest of the process of making a circuit board safety glasses should be worn! It’s no fun making things if you can’t see them.
Once the board is designed, cut the copper coated board to size. This can easily be done with a scroll saw or hacksaw. Then using the etch resistant marker in the kit (it's really just a Sharpie pen) trace the design on to the board or follow the directions given in the software package if you’re using one. At this point if you have designed your own board, it would be a good idea to double check and make sure your schematic and board match up. It is difficult to add parts after the board has been etched (I had to do that on my first try to it isn’t fun).
Once your design is drawn on the board and you have double checked the design, break out the rubber gloves and safety glasses, and prepare for the etching process. Follow ALL safety instructions on the etching solution bottle(especially the part about wearing safety glasses!)! A few words of advice, leaving the board in the solution for longer than the recommended time can lead to problems with traces being etched away. If you have large sections of copper that have not been etched away, a Q-tip can be used to scrub the etching solution on that copper and remove those specific areas with out over etching the rest of the board. Once all of the unwanted copper is etched away, wash the board thoroughly with lots and lots of water and make sure all of the traces are intact. Make sure you properly dispose of the used etching solution.
Once the board is clean and dry drill the holes for the wires. (If you are making a surface mount board you may skip this step.) A 1/32 inch drill bit is best for this. Any bigger will make soldering much more difficult. CAUTION: 1/32 inch drill bits break easily! Wear eye protection while drilling holes!
Once all the holes are drilled, you may want to take a fine tipped marker to mark the location of your components. Make absolutely sure you have the right component in the right place before labeling the board (ink on a circuit board is very hard to erase)! If you choose not to label the board, that works as well, but assembling the board becomes more difficult.
And with that you have a completed circuit board, ready to have parts attached, and you made it yourself!

qed.

working

This website uses cookies

As a user in the EEA, your approval is needed on a few things. To provide a better website experience, hubpages.com uses cookies (and other similar technologies) and may collect, process, and share personal data. Please choose which areas of our service you consent to our doing so.

For more information on managing or withdrawing consents and how we handle data, visit our Privacy Policy at: https://corp.maven.io/privacy-policy

Show Details
Necessary
HubPages Device IDThis is used to identify particular browsers or devices when the access the service, and is used for security reasons.
LoginThis is necessary to sign in to the HubPages Service.
Google RecaptchaThis is used to prevent bots and spam. (Privacy Policy)
AkismetThis is used to detect comment spam. (Privacy Policy)
HubPages Google AnalyticsThis is used to provide data on traffic to our website, all personally identifyable data is anonymized. (Privacy Policy)
HubPages Traffic PixelThis is used to collect data on traffic to articles and other pages on our site. Unless you are signed in to a HubPages account, all personally identifiable information is anonymized.
Amazon Web ServicesThis is a cloud services platform that we used to host our service. (Privacy Policy)
CloudflareThis is a cloud CDN service that we use to efficiently deliver files required for our service to operate such as javascript, cascading style sheets, images, and videos. (Privacy Policy)
Google Hosted LibrariesJavascript software libraries such as jQuery are loaded at endpoints on the googleapis.com or gstatic.com domains, for performance and efficiency reasons. (Privacy Policy)
Features
Google Custom SearchThis is feature allows you to search the site. (Privacy Policy)
Google MapsSome articles have Google Maps embedded in them. (Privacy Policy)
Google ChartsThis is used to display charts and graphs on articles and the author center. (Privacy Policy)
Google AdSense Host APIThis service allows you to sign up for or associate a Google AdSense account with HubPages, so that you can earn money from ads on your articles. No data is shared unless you engage with this feature. (Privacy Policy)
Google YouTubeSome articles have YouTube videos embedded in them. (Privacy Policy)
VimeoSome articles have Vimeo videos embedded in them. (Privacy Policy)
PaypalThis is used for a registered author who enrolls in the HubPages Earnings program and requests to be paid via PayPal. No data is shared with Paypal unless you engage with this feature. (Privacy Policy)
Facebook LoginYou can use this to streamline signing up for, or signing in to your Hubpages account. No data is shared with Facebook unless you engage with this feature. (Privacy Policy)
MavenThis supports the Maven widget and search functionality. (Privacy Policy)
Marketing
Google AdSenseThis is an ad network. (Privacy Policy)
Google DoubleClickGoogle provides ad serving technology and runs an ad network. (Privacy Policy)
Index ExchangeThis is an ad network. (Privacy Policy)
SovrnThis is an ad network. (Privacy Policy)
Facebook AdsThis is an ad network. (Privacy Policy)
Amazon Unified Ad MarketplaceThis is an ad network. (Privacy Policy)
AppNexusThis is an ad network. (Privacy Policy)
OpenxThis is an ad network. (Privacy Policy)
Rubicon ProjectThis is an ad network. (Privacy Policy)
TripleLiftThis is an ad network. (Privacy Policy)
Say MediaWe partner with Say Media to deliver ad campaigns on our sites. (Privacy Policy)
Remarketing PixelsWe may use remarketing pixels from advertising networks such as Google AdWords, Bing Ads, and Facebook in order to advertise the HubPages Service to people that have visited our sites.
Conversion Tracking PixelsWe may use conversion tracking pixels from advertising networks such as Google AdWords, Bing Ads, and Facebook in order to identify when an advertisement has successfully resulted in the desired action, such as signing up for the HubPages Service or publishing an article on the HubPages Service.
Statistics
Author Google AnalyticsThis is used to provide traffic data and reports to the authors of articles on the HubPages Service. (Privacy Policy)
ComscoreComScore is a media measurement and analytics company providing marketing data and analytics to enterprises, media and advertising agencies, and publishers. Non-consent will result in ComScore only processing obfuscated personal data. (Privacy Policy)
Amazon Tracking PixelSome articles display amazon products as part of the Amazon Affiliate program, this pixel provides traffic statistics for those products (Privacy Policy)
ClickscoThis is a data management platform studying reader behavior (Privacy Policy)