Dark Souls II Walkthrough, Part Eight: No-man's Wharf


Yarrrr, welcome to the place few ever dare to tread. A steep, arrow-and-scimitar infested region that's crawling with unpleasants, No-man's Wharf is one of the last place you'd ever want to visit on the seaside. Yet you'll have to make the trip here, as it offers passage to a distant place that... well, you also wouldn't really wanna go, but that's Dark Souls for you...
No-man's Wharf
- A dark path lies near the Bonfire. Go down it and you'll shortly see the masts of a ship.
- You'll soon enter an open area, and an archer will be shooting flaming arrows at you from afar. Pull back, as you're about to be attacked from behind by a soldier.
- Cross the boardwalk beside the nearest upended boat, towards the archer. A sword-wielder will pop down and come at you. Back up and engage him on solid ground, then charge forward and take out the archer. Be warned - these walkways are thin.
- In the corner to your right is a house, and a jerk atop it likes to hurl pottery at you. This seems harmless, but said pottery is filled with oil - and if a fire-tipped arrow hits you after you've been splashed, you're pretty much dead. If you can, take him out with a ranged attack. If melee is your only option, dip inside the house he's standing on. You'll draw two melee combatants out. Kill them, then climb the stairs and go after the guy on the roof. Beside him is a Soul of a Proud Knight, stuck in a corpse, and on the second floor of the house is a chest containing a Titanite Shard.
- Return to where you killed the archer earlier. You can wade into the water here via a wooden staircase to reach a body. It holds a Large Soul of a Lost Undead and a Lifegem. Return to dry land.
- Approach the two shacks ahead. A pair of soldiers will emerge, accompanied by a third with twin swords - who also likes to hurl pottery. Sigh. Draw them away across the piers and take them out one-at-a-time. Inside the left house is a corpse carrying three Dark Pine Resins; there's nothing in the right.
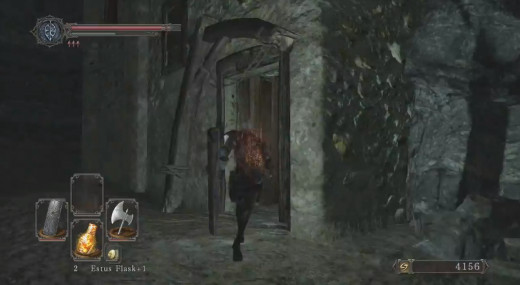
- Ignore the stairs between the houses and check to the right. There's a busted wall here, out of which will come a gangly-armed horror. It's fairly resilient, but it's wide enough that you can easily knock it off of the walkways and hit it at a range. Check the house it exited to find ten iron Arrows.
- Head up the stairs. Halfway up you'll see a street to your right and a house to your left. Start with the right. Ahead is a swift hound-like creature, all bite but no resilience. Beat it down before the soldier nearby can run in. There are two archers above you; pull the ground fight away from them.
- Run into the house. There will be two guards here, napping at the table. Take out one of them before they can wake up, then go after the other. Be careful, as one guard upstairs will come down to help. Check the bottom floor for a chest containing a variety of Bandit gear.
- Up to the roof. The archers will be waiting, and they'll have melee gear ready if you didn't take them out earlier. I highly recommend taking them out from the ground - fighting up here without falling off is haaaaard. Check the chest on the second floor of the house for a Repair Powder and a Titanite Shard.
- Now that you're not being harassed, you can look at the eerie face across from the house. This is another Pharros' Lockstone spot, and if you unlock it you'll light a huge chandelier above your head. This seems useless, but it's very much not.
- Return to the stairs and check out the house. On the second floor of the house you'll find another dual-wielding fiend; dispatch at your leisure. Through the door up here you'll find two more of these guys, one of them partially hidden in a guard niche, and a third will probably dash up the stairs to intercept you. Use the doorway to fight them one-by-one.
- Back onto the street. There are two busted homes ahead. The first has nothing, but the second is populated by a swift hound-like creature. Get in and dispatch it before continuing down the street.
- Climb the next set of stairs on your left. You'll be up on the bluffs now. As you make your way forward you'll have to dispatch three of the gangly creatures before you can proceed, so be ready to fight. Go slowly so you can attract them one-at-a-time. Three at once is a bit much. After getting rid of them, check the cliff's edge to your right for a corpse carrying a Large Soul of a Lost Undead and an Emit Force. Note that if you have the chandelier activated, the gangly things will flee to a nearby house.
- There are two houses ahead. Check the house to your left first, the one that looks a whole lot spookier. If the chandelier is active, you'll find all of the gangly things trying to cram inside. If it isn't, you'll find two on the main floor and two on the top floor. Be warned - it looks like they can't come through the door on the bottom floor, but they'll simply crash through the wall instead. Be careful entering this room, as the two upstairs will fall through a hole in the floor.
- Assuming you plow through all of those gangly jerks, you'll find a beer-swiggin' merchant named Gavlan on the top floor. He largely deals in poisonous items. He's also a rarity 'round here, as he'll actually buy your stuff. All that junk you've been hoarding up? Sell it!
- Also up here with Gavlan are two chests. The right chest contains a trap, so be ready to roll away from it. It contains two Silver Talismans. The one on the left contains a Greatsword.
- Head to the lit house. In the first door on your left is a guard. Take him out and go up the stairs. There's a second guard up here, and you can easily take him out while you're still on the stairs.
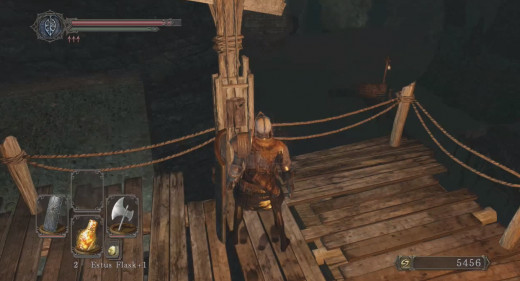
- Climb to a balcony. There's a bell up here. Pull it and you'll bring a ghostly ship into port. Spooooooky. Hop down from this balcony ahead to find a corpse with two Lifegems and a Homeward Bone, then hop off of the rooftop to the next roof down, under the scaffolding. You'll find a door waiting.
- There are stairs inside. Halfway down the stairs you'll find a corpse holding ten Fire Arrows, and at the bottom you'll find a room occupied by two more gangly horrors. Dispatch them and pop open the door down here.
- Back outside. Go down the edge of the cliff towards the orange lights. Enter the house ahead, kill the guard on the second floor, and check the door on the top. Inside you'll find a gate that leads back to the house with the archers. Yank on the pulley beside it to pop it open, creating a shorter path back here should you die. Allow me to emphasize the importance of this path, as there are no Bonfires besides the entrance. If you don't get this shortcut now you'll have to replay the whole level over each time you die.
- Check out the base of the house you came out of earlier. There's a door here, with two soldiers inside, both asleep. Kill 'em off and search inside for a chest containing an Estus Flask Shard. Also in here, behind some urns, is a corpse carrying seven Throwing Knives and a Flame Butterfly. These urns contain a potent poison, so smash them from a distance.
- Head down towards the beach. There's a break in the wall with more horrors waiting, but if the light is up they won't bother you. There's nothing in their hidey-hole, so don't feel obliged to kill 'em.
- Head down the docks. Check the corpse draped over the ruined boat on your right for a Human Effigey and two Lifegems. A floating corpse in this water pit will come to life if you walk near, so get the drop on it first.
- If you approach the ship you just made dock you'll summon in two warriors, so be wary of approaching too closely. Ignore it for now and head right along the docks, minding your footing. At the end you'll find an old man named Carhillion who will make you his 'pupil'. He's a sorcery vendor, and can sell you all manner of spells and fancy equipment. Sweet.
- You ultimately have little choice. Approach and board the ship with the ghostly blue lights. There are archers on both sides of the deck, and two other warriors will dash up to soak you in oil and otherwise spill your guts. Move around the deck, dispatching everyone, keeping the mast between yourself and the archer you opted not to pursue.
- Head belowdecks. You'll find stairs... water... and the dreaded mist door. Yep, no Bonfires to be had. Go through, if you dare...


Flexile Sentry
Surprisingly enough, this may be one of the easiest bosses in the game - though it's incredibly tense. The Flexile Sentry has some fairly basic attacks, most of which consist of rushing up to you and swiping at you with its twin swords. As the battle wears on it will add the occasional thrust and spinning chops, but most of them are medium-range and easy to avoid...
... thanks, largely, to the mast. It runs through this room in the middle, and is easily your best friend. Pull out a ranged weapon and circle in tandem with the Sentry, waiting for it to dart forward and slash at you. Once it does, take a shot, two if you're feeling confident, and retreat to the other side of the pole. Repeat until it's dead. If you're really good you can keep close to the mast, let Flexile Sentry run up to you, and back off. Its attack should get stopped by the mast. Like I said, tense, but not that bad if you're patient.
- Beating the Flexile Sentry will earn you the Flexile Sentry Soul. After it's dead, go through the door in the rear of its room and climb the ladder you find. There's a chest in this room; check it for a Pyromancy Flame and a Fireball. Examine the large astrolabe at the side of the room to trigger a cut scene that will (literally) ferry you outta here. Make sure you pop the chest first, or you'll get booted off the boat and have to make a return trip.
- You'll arrive at an exceedingly-tiny port. Run into the nearby cave and hop onto the elevator provided. It will shuttle you up to a brand-new area, The Lost Bastille, which is surely full of cheery inmates and happy guards. Or not. Check the left side of the entry hall for the next Bonfire, inside a busted-up cell, then prepare for some more gloomy explorations in the dark. Yay!


")