Dark Souls II Walkthrough, Part Forty-Two: Aldia's Keep - Guardian Dragon


The Throne Defender and the Throne Watcher are gone, leaving behind an empty Throne of Want that's surrounded by statue giants. Are they an omen? A sign of what's to come? Or, perhaps, a sign of what you need to do next? Perhaps so - yet you have no business with giants just yet. No, your next task lays behind another of the massive black doors that dot the bedeviled land of Drangleic...
Shaded Woods
- Leap back to the Shaded Woods. You specifically want the Ruined Fork Road Bonfire. Once there, take the central path out of the ruins.
- There's a giant black door ahead, and it, too, demands the appearance of the King's Ring. Slip it on to pop the door open. Inside...
Aldia's Keep
- Well fancy that, a new area. Let's have a look around. Start by clearing out the immediate area. Look to the left of the road, to a small, sparse copse in front of a shack. The shack itself is watched over by five pestilent rats. Kill them off before they can ambush you. These things are very dangerous if they're allowed to attack you freely; try to draw them away from their pack before slashing back.
- Check the trees of the copse before approaching the shack. One of them hides a corpse in its surrounding grasses. It holds a Soul of a Nameless Soldier and a Petrified Dragon Bone. Another corpse sitting nearer the shack in plain sight have ten Poison Throwing Knives, and yet another, hidden between two trees next to the shack, carries three Alluring Skulls.
- There's a black metal box beside the left corner of the keep. It is a mimic, and will eat your head. Kill it and it will drop a Dark Mask and a Sunset Staff.
- Last, the shack. A Bonfire! Foregarden! Light it up and return to the path. Before approach the Keep's entrance, check the right side of the stone stairs to find a corpse that carries a Fire Seed.
- Approach the front door. On the way up is a small fountain. Drop down into it from above to find a corpse that carries a Radiant Lifegem. Then check to the left of the entrance, behind a cluster of columns, for a Twilight Herb.

- Enter the Keep. A short way in an invader will pop up, a standard melee fighters. Take him down.
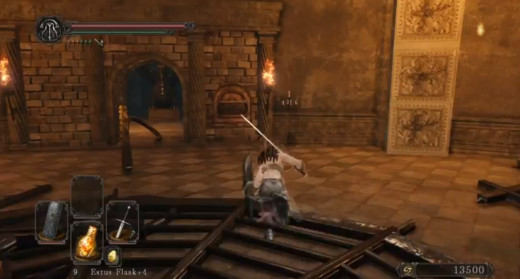
- There's a gyrating cart in the next hall. Ignore it. You can't open it, and you don't want to. The same goes for the cart in the next room up, which also contains a massive set of dragon bones. The dragon bones will come to life and attack when you enter; either dash forward beneath it comes to life or back into the previous corridor. It'll disappear after one attack. Check the corpse on the ground floor for a Fading Soul.
- This hallway is flanked by two sets of stairs; between them is a doorway leading to adjacent hallways. If you go to the left you'll find a switch with numerous warning signs, telling you not to pull it. If you go to the right you'll find a man, ensnared by a force wall, who asks you to kill for him. This is Navlaan, and he wants a number of assassinations. We'll come back to him in a later article, as his requests entail killing a number of NPCs. Do not pull the switch! This will free Navlaan, negating the quest and opening the path to a ton of invasions from the guy. (Though he's also a merchant.)
- Climb the right set of stairs from the main floor and check the thin hallway to your right at the top. There's a small, fleeing lizard creature ahead, though unlike the others you've fought it has a red jewel and doesn't drop anything. Beyond it is a chest that contains a Great Magic Barrier.
- Head back to the stairs and check the corridor beneath them. You'll find a short hall of mirrors. Three of the five mirrors (the two on the ends and the one facing the others) contain phantoms that will emerge and attack if you get close. These guys are pretty tough; try to kill them one-at-a-time if you plan on going through here. You'll find a corpse down here carrying a Northern Ritual Band +2 and a Petrified Dragon Bone.
- Check the left side of the stairs. You can go straight up the middle and use a Fragrant Branch of Yore to heal a petrified beast, but this is a waste. Look for a set of side stairs to take you up instead.
- At the top you'll find a large basilisk in a cage. It's placcid at first, though attacking it will drive it into a rage. Kill or ignore as you see fit. Be warned - it's very fast. In front of its cage is a corpse that carries Crimson Water.
- Behind the basilisk is a lit door. Before going through, check the long stretch to the right. At the far end is a chest. It contains two Bonfire Ascetics.
- Go through the central door. Beyond is a statue of a dragon and a closed door. Pull the ring hanging from the dragon's mouth to open the door. This will also close the door behind you, so retreat is no longer an easy option.
- There's a hallway ahead. To your immediate right upon entering is a Pharros' Lockstone face. You can insert a Lockstone to light up the area, but doing this isn't much to your advantage, as there are enemies behind the paintings in this hall. Ignore it.
- Wander down the hall and check the table to the left of the large cage holding the cyclopian creature above the path. A corpse beneath the table holds a Radiant Lifegem.
- Just down the wall from the table is a door. Enter it to find a lab of sorts. There's a set of stairs in here that lead down to a cage; inside are two quadrupedal creatures and equipment that will chew up your acid. Pop it open if you're feeling risky, kill the creatures, and check the corpses in the acid. You'll find a Large Soul of a Nameless Soldier, two Corrosive Urns, a Soul Geyser, a Petrified Dragon Bone, and an Aldia Key. On the way back up the stairs, check the right wall for a hidden door. Inside is a Bonfire to light up.
- Back to the hallway. There are more caged creatures ahead, and if you head to the far end one of the huge cyclopses will pop through the far wall and pursue you. It's best not to lead this thing too far - it will smash cages on the way, and they will not be repaired on a second go.
- To the left of the hole in the wall is a door leading to another small laboratory area, this with a hole down to the acid cage. In here is an attendant working at a desk. Attack and lead it away from the hole. It's not terribly tough, but it's depressingly easy to accidentally fall through the hole. (You can also ignore this room entirely, if you wish.)
- Enter the hole at the end of the hall. There are two doors in here, one ahead and one to the right. Go right first and you'll find a long room, filled with cages and populated by two more attendants and a huge, poison-spewing bug. Lead the attendants away from the bug before going on the offensive. Check the room for a Soul of a Proud Knight, held by a corpse at the far end. If you have the Aldia Key, you can use it to enter this room from the other end and skip past the next big surprise.
- Back to the main path. Approach the next door ahead and, surprise, another cyclops beast will bust through. Kill it off and continue through the next hole. There's a mist door dead ahead! Check the corpse to your right for a Simpleton's Spice and a Twilight Herb, then proceed to the mist.
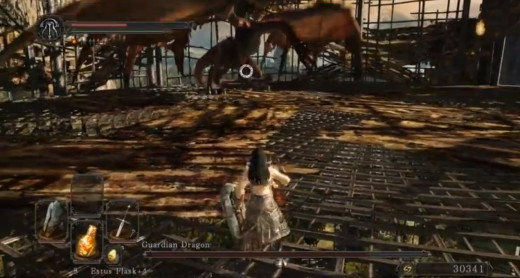
Guardian Dragon
Yikes, a dragon? That sounds pretty hardcore, but the Guardian Dragon is quite easy, regardless of the weapon you use. It sports the following moves:
- Two breath attacks. Either the Guardian Dragon will breath a massive, conical gout of fire, or it will launch a stream of fire and slowly pan its head from right to left. Both are fairly slow attacks, and you'll see them coming when it breathes in. Occasionally the Guardian Dragon will breathe fire while in the air.
- A swiping attack. The Guardian Dragon will use mouth or claws to rake you. Get beneath it to avoid this.
- A stomping attack. If you're right below or beneath the Guardian Dragon, it will attempt to crush you. This is similar to fighting a Giant, and can be avoided by walking back and to the right as the foot goes up.
- A tail sweeping attack. Get behind the Guardian Dragon and it will try to knock you around. Get beneath it and this attack will miss every time.
- A tail slapping attack. The Dragon will flop its tail up and down if you're beneath it. Stay under its body, not the tail, and you'll be safe. Otherwise, roll to the left or right.
The very thing that makes the Guardian Dragon imposing, its size, is exactly what you need to use to your advantage. Stay below the Dragon at all times, targeting its foot. None of its attacks will hit you. If it sweeps into the air, quickly run over and wait below until it drops back down. Smack it until it dies. The only really dangerous thing here is being caught by fire, as you may get obliterated by a persistent stunlock. Staying beneath the Dragon negates the harmful effects of the fire.
- You'll receive the Guardian Dragon's Soul after the fight. Continue through its lair and out the back to find a lift; hop on, and enjoy the view outside the Keep.
- At the top you'll find the amazing Dragon Aerie. Beside a bridge here waits the Emerald Herald, and she'll give you an Aged Wing. Drop off the cliff next to her and cross the bridge; ahead is the next Bonfire, Dragon Aerie.


")


