Dark Souls II Walkthrough, Part Thirty-Eight: Shrine of Amana - Tower of Prayer


Drangleic Castle wasn't the last area in Dark Souls II...? Apparently not. Deep below the wretched palace lies a place much more holy, much more vast, and, in a way, much more dangerous. Be prepared for the fight of your life when you enter the Shrine of Amana, because even though it starts off a little easy, it quickly becomes one of the most difficult sections of the game.
(Unless, of course, you like arrows.)
Shrine of Amana
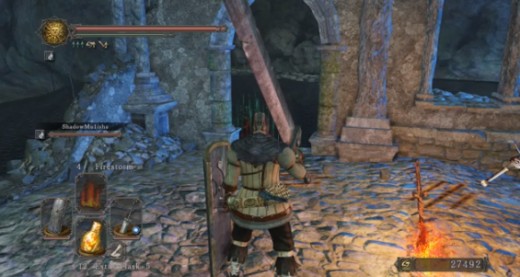
- Go down the stairs near the Tower of Prayer Bonfire after lighting it up. On the next floor of the ruined Tower of Prayer is a door. Go through and follow the path beyond to its end. There's a small cluster of crates and boxes. Destroy them and you'll find a poison insect hidden amongst them. Kill it, then check the chest here for two Wilted Black Herbs and a Skeptic's Spice.
- Head back to the tower. There's a corpse caught in the branches on your right; as far as I know you can't get at it from here. Continue down the stairs in the tower.
- There's a big heap of rubble at the bottom. Look behind it to find a Large Soul of a Nameless Soldier. Go out the hole in the side of the tower.
- There's a thin path through water ahead, and as you walk across it a knight will charge out and attack you. Take him out. To your right you'll see something bobbing in the water; this is a fiend lurking just under the surface. It will emerge from the water if you pass. Kill it before it can. There are two more ahead, one on the right and one on the left.
- Enter the house ahead. The girl who was singing is inside. Talk to her enough times and she'll give you a Smooth & Silky Stone. If you pass through this house you can reach the other side via a side door. Go around the house on either side instead and you'll have to face a creature lurking in the water.
- There are a number of knights on the path ahead. Keep an eye to right and left to locate water creepers before they can ambush you, then approach the first knight. Pull him back so you don't engage any lurkers in the water as well. Continue this process with each subsequent knight, carefully watching the water to make sure you're not hit by anything other than knights. Check the three corpses on the largest island to find two Souls of a Lost Undead, a Skeptic's Spice, three Torches, and a Large Soul of a Proud Knight.
- Approach the torch ahead and enter the cavern. Along the path you'll find a poison insect. To the left of it, in a semi-hidden cavern, are four water-lurkers. Draw them out one at a time with ranged attacks rather than attacking all four at once. These lurkers guard a chest that contains a Twinkling Titanite and three Smooth & Silky Stones.
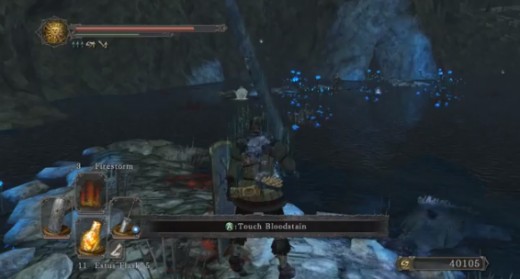
- There's mist ahead. Don't hesitate to go through, as it doesn't lead to a boss. That said, be ready to dodge, as a magic user faaaar in the distance will fire homing shots at you as you cross towards the ruins ahead. Ignore her for the moment and cross towards the doorway in the ruins to your right. It leads to the Crumbled Ruins Bonfire. A lurker will lunge at you as you approach; get onto dry land before engaging it.
- Leave the building after the Bonfire is lit, but go out the right side. There's a lurker to kill here, true, but you can sneak up on the magic users from here - as well as the second one that's sort of in hiding. Use the columns in this area to avoid their shots if they detect you early.
- Check the left side of this wide area. Along with some lurkers you'll find an underwater Pharros' Lockstone face. Use it to unveil a small cavern. Check inside for a chest that holds a Helix Halberd.
- Follow the central path towards the torch in the distance. Be careful when you enter the water, as a lurker will lunge up to grab you from behind. Tempt him out of hiding before you move too far ahead.
- Approach the lit ruins. Move around the left side of them and you'll see a magic user on a small island. Kill her off, then retreat back into the ruins as another magic user far to the right attacks. A corpse in the ruins carries a Fire Seed.
- Get onto the next island up. There's a lurker in the water to your left. Be ready to dodge incoming shots from the magic user. If you need to rest, position yourself so her shots hit the columns in the distance.
- There's a path between the columns leading to the magic user. If possible, kill her from afar - there's a lurker in the water to the left of you upon approach, and a heavy rhino creature will join the fray if you get too close.
- Enter the door in the lit building ahead. In the second room you'll find a corpse holding a Large Soul of a Proud Knight and an Old Radiant Lifegem.
- Go through the door in this second, circular room. There's a knight on an island to your left, and beyond him another magic user. Lure the knight into the island to avoid being pelted from afar.
- There's a line of arches beyond the building. One serves as home of the closest magic user, and another waits beyond. Use the pillars supporting the arches to avoid their shots, quickly kill the first magic user, and wait for a lurker to appear and attack. Then tackle the second, waiting on a nearby island.
- There's a wide space ahead, and lots of enemies to fight. There are two knights before the mist gate in the distance, a healer, and a mage. There's also another mage lingering on an island to the left. Your best course is to use a ranged weapon to draw the two knights away from their escorts and over to you. Once they're gone, take out the two mages with long-distance strikes. There's one lurker in the water on the way to the second mage, so be cautious on your approach. Check up a ramp to the left of the mist gate to find three Alluring Skulls, and look along the edge to the right to find a Soul of a Hero and a Divine Blessing.
- Go through the fog. There's a cluster of poisonous insects ahead. Kill them off and look to the left. Bonfire! Light up Rhoy's Resting Place.