Dark Souls II Walkthrough, Part Thirty-Six: Drangleic Castle - The Dragonriders


This is it. You've travelled a dozen lands, you've braved a billion shadows, you've slain four vicious creatures with the grandest of souls. The path to Drangleic Castle, the center of power in the region, is now open. It's time to take the final dusty road and see what grim horrors await at the end...
Shaded Wood
- Pop back to Ruined Fork Road, the second Bonfire in Shaded Wood. Take the left passage out of here, towards the area where you can fight the Flexile Sentry a second time. Along here you'll find the Shrine of Winter...
- ... and it will pop open as you approach. Go through and down the winding path out back.
- There's a crossroads ahead. Take a right and it will lead you back to the ruined arch the Flexile Sentry was guarding. A corpse here carries a Repair and a Large Soul of a Lost Undead.
- Take the left. There's a Divine Blessing on a corpse a short ways down this path, and past it a white knight. Kill him and he'll drop a Heide Lance.
- Continue down. There's a corpse on your right carrying a Large Soul of a Nameless Soldier and a Human Effigy.
- There's a long tunnel ahead, and past it a rain-soaked stairway. Be ready to fight as you climb the steps - there's a small barricade ahead with a spearman and two crossbowmen. Try to lure the melee fighter away before charging the arrow-slingers.
- There's a huge rock further up the path. Look behind it for two Holy Water Urns.
- A few steps further...

Castle Drangleic
- At long last, the castle itself is in reach. Directly ahead is a small set of steps; at the top is one of those wriggling crystal lizards. Kill it before it can flee and it will drop three Titanite Chunks and a Titanite Slab.
- The Emerald Herald waits on the bridge. She's not much help.
- Climb the great steps. You'll go unaccosted until you see two huge statues flanking the path; you'll quickly come under attack by bowmen. Run forward and the statues will turn into elephantine guards in better armour than normal. Draw them down onto the stairs, away from the arrows, and use their horizontal slices from their higher elevation to your advantage.
- Approach the front doors and take out the two guards. If you're lucky, their deaths will light the two stone statues out front, which will then open the castle for you. Kill them nice and close to the statues to feed the necessary souls. If you're unlucky, soldiers will continue to appear from the sides of the castle until you open it up. Pull back to the statues and attack from there to draw your enemies into the proper positions.
- After the guards are done appearing, look around the right side of the castle to find a chest. It contains a Great Combustion and a Fire Seed.
- Step inside. Go up the staircases within to the central platform. Here you'll find the ghostly remains of Wellager, the castle's chancellor. He'll tell a long story of how this place came to be. See it through and he'll have some things to sell you. He also teaches the This One's Me gesture. Behind Wellager is the throne room, though there's naught to see inside.
- There are two side passages in this large hall. Both are watched over by heavily-armoured soldiers, and both are connected under the central stairs. Go down the right passage and you'll find a back hall; through this path you'll come out behind three soldiers to the left, and you can easily ambush or bypass them. The room they watch over is empty.
- In the small right antechamber are two more footsoldiers and a ladder. Kill the occupants and descend. Run through the next room, full of statues, to find a door; through it is a crossroads. Go through the next set of doors straight ahead to find the first Bonfire in this place, King's Gate.
Drangleic Castle - King's Gate
- After activating the Bonfire, head back out into the hallway. You can't open the door to your left, so go through the hall to your right.
- Beyond is a large, seemingly empty hall with lines of statues on its sides. If approached, these statues will pop to life and attack. Do not run around the room willy-nilly, or you'll be quickly overwhelmed. The only two statues you need to destroy to open the door into the next area are to your immediate right. Leave the rest of the room alone unless you want the extra souls. Be wary of the range of their spears.
- Through the passage that opens is a large storeroom. Dead ahead is a cluster of furniture, and in it a chest. It contains 15 Dark Arrows. Ahead are stairs; to the right of them is a corpse that carries a Soul of a Hero, three Old Radiant Lifegems, and a Monastery Charm.
- Keep climbing. You'll emerge near a pool of fetid yellow. There's a single item in the pool; it's an Elizabeth Mushroom. Do not go for it. This sludge will break your items and cost you a fortune in repair costs. Run up the stairs and out the next door you see before you get shot by overhead bowmen.
- The next room is filled with creepy masks. These things will shoot darts at you as you pass. You can roll to avoid these, but don't linger too long, as they'll reset after a time. The corpse in here carries a Large Soul of a Brave Warrior and a Twinkling Titanite.
- The next room up the stairs has three heavily-armoured soldiers in it. Draw them down the stairs to gradually beat them; fighting all three at once is suicidal. There's a giant painting in this room, but approaching it is to curse yourself. Go through the doorway. Follow the winding stairs and you'll come to a roost with two crossbowmen. Kill them as they pull out swords.
- Before continuing up the stairs, look to the left of the top of the staircase you climbed to get here. There's a ladder leading to a lower ledge. You'll see another ladder ahead; before using it, look to the nearby wall and search for a secret door. It'll pop open and reveal a Bonfire, Forgotten Chamber. After lighting the Bonfire and killing the bowman that appears outside, descend the ladder, kill the next bowman down, and check the chest down here for a Hunter's Blackbow and 20 iron Arrows.
- Climb back up and re-kill the bowmen above. In the next chamber up the way you'll find Nashandra, the queen of Drangleic. Speak to her until she resists continued conversation. You can exit her chamber to the right.
- Mist door ahead. Oh dear.
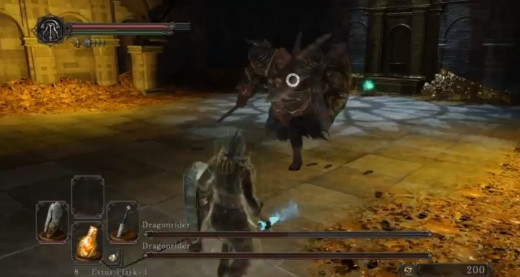
The Dragonriders
Hey, remember this guy? Now there are two of them! What fun! This battle is either a piece of cake or nightmarish, depending on your build and how you go about it; regardless, I suggest having a ranged weapon ready as soon as you enter the room. It will make your fight much easier.
The red Dragonrider, the one on the ground, is pretty much identical to the original. Hits the same, has the same moves, is just as lumbering and predictable. The black one, by contrast, sits above and to the left of the melee, using a huge bow to fire arrows down at you. These arrows are both distracting and painful, and make fighting the red Dragonrider a great deal harder. Eventually the black Dragonrider will join the red one and either continue firing arrows on the ground or pull out a halberd and shield like his bro.
The bow is not the only difference here, however. The black Dragonrider looks the same, but he takes a lot more damage from your hits. Consequently, your best bet is to use a ranged weapon as soon as you enter the room to shoot him. He'll almost immediately drop down. Avoid the red Dragonrider's attacks and target the black guy, beating on him mercilessly up close or from afar until he bites the dust. Then go after the red Dragonrider until he, too, goes down. This is a troublesome battle at first, but so long as you can dispatch the black Dragonrider within the first minute or so it's very easy to manage.
- After beating the Dragonriders you'll receive another Soul of a Dragonrider. You'll also open a passage to the right. Inside is Benhart, who will teach you the Joy gesture, and the Central Castle Drangleic Bonfire.