Dark Souls II Walkthrough, Part Thirty-Three: Grave of Saints - Royal Rat Vanguard


There's no mincing words. Majula has a big hole in it. It's a hole of mystery, a hole of promise, a hole that could lead to brand new words - or just a hole you could fall down and die. A bit of both. Yet into the hole you must go, in the end, as the final Primal Bonfire lays somewhere in its depths...
There are two ways to get to the bottom of the hole. First, the painful way.
Majula
- Collect a minimum of 13,400 souls. Killing bosses is an easy enough way to get this done.
- Go to Sweet Shalquoir, the cat vendor in Majula. Purchase the Silvercat Ring from her for, yep, 13,400 souls. Equip it in one of your ring slots.
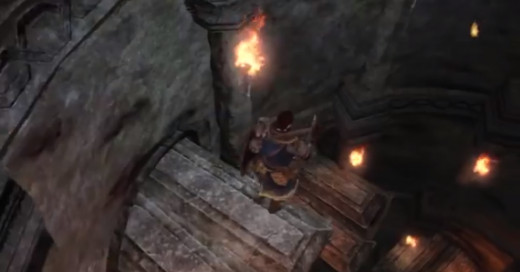
- Approach the massive hole in the middle of Majula, just outside the shop. Tilt your camera so you can see the nearest board down the hole, then drop down onto it. Even with the ilvercat Ring equipped you'll need around 900 HP to survive the fall. The corpse on this first board holds a Radiant Lifegem.
- Keep dropping from board to board, aiming carefully. You'll find a Pharros' Lockstone on another corpse along the way. There's a thin board that looks like it would support you partway down; don't try for it, or you'll fall right through and die. You're aiming for the plank against the wall that's further down, and about as painful a leap as the first one. Keep going down to find three Poison Mosses.
- The furthest plank down has a Ring of the Evil Eye +1. Below this is a tunnel you can leap down to; heal up and take the plunge.
Alternatively...
- Complete a large portion of Earthen Peak. Along the way you'll find a man named Gilligan, who specializes in ladders. Speak to him enough times that he decides to depart to Majula. This article covers finding Gilligan.
- Look beside the giant hole in Majula. Gilligan is here, and in addition to his usual services, he can set up a ladder into the hole for you. You can pay as little as 500 souls to 12,000 max; the amount you pay determines the size of the ladder he sets up. The longest ladder will get you down far enough to reach a locked door, as well as most of the way down to the lowest tunnel. You can set up all three ladders, if you wish.
There are two passages in here. The first, a bit further up, will lead you to the Grave of Saints. The lower leads to The Gutter. As it's reached first, we'll deal with Grave of Saints in this article.
Grave of Saints
- Just inside the entrance of Grave of Saints is a Bonfire, Harval's Resting Place. Spark it up so you won't have to jump down the hole again.
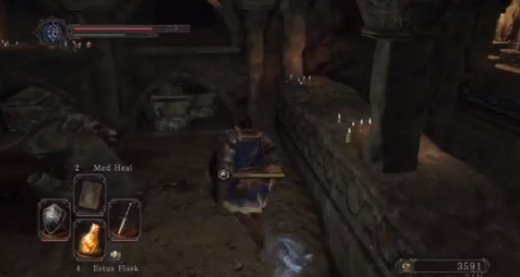
- In the passage ahead you'll come across two ghouls that will ignore you completely... at least until you've passed. Kill them both while they're in sight. This will also ease you from having to kill them in the next large chamber, where several oversized rats wait. Look for a corpse in this room for a Large Soul of a Nameless Soldier.
- Go through the adjacent, torchlit passage. Ahead is a long right-to-left passage; to the right are three charging rats. Kill them off. There's a ghoul to your left, as well, and you may as well kill him now. On a bier beside the ghoul is a corpse that holds three Small Smooth & Silky Stones.
- This area in general has a large number of Pharros' Lockstone faces. I recommend saving your Lockstones for now. Instead, follow the long right passage until you find a ladder.
- You'll be hit by an invader at the top and to the right in the next passage. There are also rats to your left. Go back down the ladder and coax the invader to follow to avoid being overwhelmed.
- Head left. At the end of the passage you'll find a small room full of biers, with a larger bier in the far end. Beside it is a corpse holding three Homeward Bones. There are rats through a passage beneath the bier, but they won't bother you until you leave the room.
- Head all the way right. There's another Bonfire here, Grave Entrance. Be careful lighting it - two rats will sneak up and chomp you.
- Ahead is a misty gate. Uh oh!
Royal Rat Vanguard
This is a strange fight, and it's quite deceptive until you learn the trick behind it. The battle takes place in a small room that's filled with rat statues, and, true to the artistry of the place, you will soon be swarmed with rats. They'll stalk after you relentlessly, nipping and biting and inflicting poison. Equip something that resists poison and keep moving around the room, killing whenever you get a chance. You need to kill around ten rats before the boss gauge will appear.
Now the tricky part. This battle appears to rely on whittling down the mass of rats until you've killed enough of them. Not so. The Royal Rat Vanguard is a single enemy, distinct from the others by its black back fringe and small tuft of hair on its head. It will appear near the entrance once the health gauge appears, and when targeted will not have its own gauge over its head. You must kill this rat to end the battle, whereupon the other rats will retreat. It's tougher than the rest, though four or five hits should take it down.
There's no great trick to this battle other than careful movement through the room. Keep a close eye on the progress of the rats so they don't box you in, and use the statues to block them from ganging up on you. Once the Vanguard appears, hunt it down and beat on it until the battle ends. Heal as needed. Area of effect moves are great at rat control, but be warned - they will always come back.
- For driving off the pests you'll receive a Royal Rat Vanguard Soul and a Rat Tail. Continue through this room and into the next chamber.
- Here, sitting atop a great pile of bones, is a rat. It will not attack, and you can speak to it. Reveal the Rat Tail you just received and you can join the Rat King covenant.
- There's another passage here, leading to a skeleton above a broken floor. Roll through and you'll fall down into a room you visited earlier. There's a skeleton down here carrying a Pharros' Lockstone. Keep dropping through the next hole, falling as carefully as you can manage, and eventually you'll land on a thin bridge. There's a skeleton nearby that holds a Bleed Stone. From here you can leap down to a wooden bridge, leading to the next area down: The Gutter. Sounds like a fun time.