Dark Souls II Walkthrough, Part Twenty-Six: Forest of Fallen Giants - Fire Lizards


It's probably been a while since your last visit, but the Forest of Fallen Giants is always a place to keep in the back of your mind. Not only does it hold hints that it will be important to Dark Souls II's overarching plot, it contains a few areas that are just too difficult to access from the beginning of the game. One of these sections is the den of the fire lizards, a place you've no doubt discovered while venturing down from the castle's ramparts.
There are two ways to access this small, but incredibly deadly, area. One you can get at from the beginning of the game onward; the other will require you to make your way to the Iron Keep first, which is much later in the game. Both are perilous, and both are described below. (Though I really, really do not recommend coming here any earlier than after the Iron Keep.)
The First Path
- Leave the room with the Cardinal Tower Bonfire. Back on the ramparts, walk ahead and look for a chunk missing in the wall. You can drop down here onto some wood platforms. Note that you will take damage doing this.
- There's another drop ahead, and this over a soldier. You'd think this a prime spot to get a falling slice in on the guy, but it's wiser to roll off the jump, land, and spin around for a normal fight. A second soldier is down here, and he'll charge at your back otherwise.
- Follow the wooden planks ahead, past the ladder. You can leap from the planks to the masonry beyond and find a corpse. It holds a Human Effigy.
- Continue past the corpse to find a ramp down one level. Here you can kill a soldier. Continue down ramps until you arrive at the green branches of a tree; carefully walk along them to find a Soul of a Nameless Soldier and a Torch. Be warned, as the Hollows patrolling below will probably see you can climb the tree to get at you.
- Make your way to the ground and kill anything you find. There are plenty of shamblers, but they're nicely-spaced and shouldn't present much hassle. Make your way back to the fiery barricade at the base of the fortress to find a Lifegem waiting.
- Set into the ground opposite the walls of this fortress is a cave that's well-lit with fire. To the left of it is another, less-conspicuous cave; inside this is a corpse with a Hollow Soldier Helm.
- Approach the fiery cave. A pair of Hollows will hop down from overhead, back outside; rush out to the field and dispatch them.
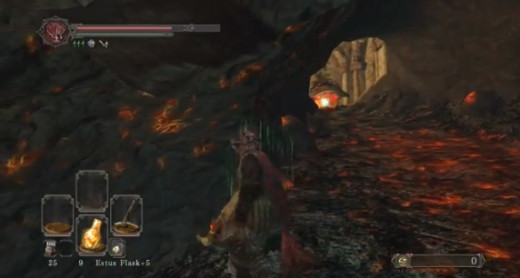
- Ahead is something rather upset that launches three fireballs at a time. Slink into tha cave and you can reach the corpse ahead that carries a Soul of a Proud Knight without being hurt.
- Now for the test. There's a door ahead and to your left. Wait for the monster beyond to halt its attack, then leap forward and slide in. There's a chest inside containing a Fire Longsword.
- Now for the monster ahead. It can be beaten, but you'll need a ranged weapon to do the job. Move out of the door once it's done firing, target it, and loose whatever weapon or spell you have on hand. Zip back behind the door, wait for it to stop firing, and repeat. Continue until it dies. This next area is difficult, so if you came here early, consider turning back.
- Take a running leap at the hole the thing was shooting through. It may not seem like you can get through, but trust me, you can. Give it a few tries, aiming for the center of the rock pile.
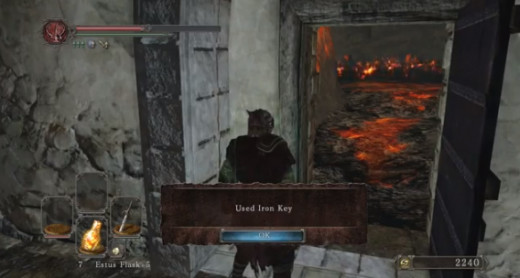
The Iron Key
- The alternative, and easier method for getting in here, is to get the Iron Key. The Key is found in front of a flaming bull statue in the Iron Keep, a short ways from the entrance. This article describes how you can safely collect the Key. You can then use this Key on the locked door near the Last Giant's room.
- Regardless of the route you take, you'll be inside a fire cave. There's another of the fire lizards in this vast cavern, and unlike the first it will perform leaping bellyflop attacks that are swift, painful, and very difficult to block. Spread out and stay away from the thing while engaging it from a range, or, if you're fretful, lure it to the hole / door, dive back through, and shoot it from here. If you came through the door you'll also have to deal with the lizard by the hole, which is very painful if you aren't fighting from the door.
- Explore the place after the lizards are gone. There are two skeletons in here; one holds two Cracked Red Eye Orbs, the other a Rebel Greatshield. You'll also find a sweeping path that leads upward, back into the castle.
- Up the path is another flame-slingin' lizard, and this one offers a great deal less cover. Either rush up beside it when it's done firing to engage it in melee combat (not recommended) or hang back behind the scant cover afforded by the cavern wall and shoot it from afar. Bowmen will have an easier time than magic slingers with this one, as locking on to the thing while maintaining your cover is tricky. (But doable.)
- Almost done. There's one more fire lizard in the chamber beyond the one you just killed, to the left of the exit. It will do like the majority of the others, launching fire balls from a stationary position. This one can be very tricky to target. Wait for it to stop launching fire, strafe up into the chamber, approach about five paces towards it, target, and roll back over the edge. You should have just enough time to get back before the fireballs hit. Then you can shoot from a distance in relatively safety. You can also kill this lizard from far above with a good bow, though magic users won't have the same luxury.
- The space is safe! Kinda! Explore this heretofore unchecked chamber thoroughly to find a Hawk Ring, a Firedrake Stone, and a Flame Quartz Ring +1. Be careful in the doing, though, as there are numerous holes in the floor that will drop you to an instant death. Ouch. Tilt the camera a little so you can see these through the room's orange haze.