Dark Souls II Walkthrough, Part Twenty-Three: Iron Keep - Smelter Demon


Yikes. From poison to flame. At the tip-top of Earthen Peak you come to the Iron Keep, a place of lava and metal, and its residents are martial, fierce, and entirely unfriendly to your cause. Can you survive this treacherous trek through heat and fire to face the Keep's master...?
Iron Keep - Threshold Bridge
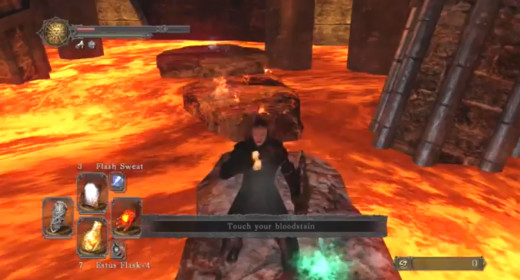
- After popping the Bonfire to life, look beneath the stairs. There's an item back here, though if you step on the lava you will die almost immediately. Fire resistance will allow you to last longer, but all you'll find back here is a Human Effigy. There are other patches of lava to cross in this place; I don't find any of them to be terribly worth it.
- Speaking of which, there's another on the right side of the bridge. Go through the hole and down to the rocks below. You can now hop from rock to rock to reach a corpse carrying a Bonfire Ascetic in the distance... though two of these rocks are covered in lava. Joy.
- Cross the bridge. Once you pass through the enormous archway ahead, a pair of sword fighters will rush you. They're extremely fast, and should be treated with extreme caution. They'll back off if you get back on the other side of the bridge, should you need to retreat.
- Pop open the front doors. Ahead is a fire-breathing statue, and beside it a melee fighter. There's another one behind the first pillar to your right as well. Engage them in the door if you can.
- Go through the door to your right first. There's a hallway ahead and another doorway to your left. Up the stairs in this doorway is yet another knight. Wipe him out. Check the room he was in to find a Pharros' Lockstone on a body that's hanging over the first room. Also in here is a secret door, found in a wall near the stairs, that leads to a body holding twenty Fire Arrows. In here is a ballista facing a wall; check the wall it's pointing at to find a secret path. Beyond is a soldier facing the other direction, and there are two more soldiers in the room beyond. You can use the ballista to kill one, then otherwise ambush the other two. Doing this is much easier than trying to enter this room from the castle's small foyer.
- Back down the stairs. Continue down the corridor to the end to find a man named Magerold; he can lower the Intelligence requirements for your spells using the Spices you may have picked up. He also sells more gear and sorcery spells.
- Go through the room that once held three soldiers. You're now in kind of a fiery courtyard. There are arches to the left, though as soon as you approach you'll come under attack by arrows from your right. Run forward, engage the guy who's in obvious sight, and rush back the way you came to avoid getting hit by arrows.
- Make a made dash all the way along the left path once it's cleared. There's an archer on an upper platform ahead; take him out with a ranged weapon if you can, otherwise just get beneath his platform. Another swordsman will likely hop down from above to take you on.
- There's a ladder here, but you'll have to hop down to the bottom to use it. While you're down here, check the end of this small path for a Soul of a Proud Knight and a Repair Powder.
- Climb up the ladder. Up top is a Life Ring +1 and a Twinkling Titanite in a box, as well as the archer from earlier, if you didn't already take him out. There's a swordsmen on a thin path to your left if you have a ranged weapon.
- Return to the upper path and carefully head back to the stairs on your left, leading to the building that appears to be on fire. There's a soldier behind and under these stairs; be wary of him when descending. Be wary, too, if you haven't managed to kill the archer that snipes this entire area. After he's dead, pull the switch beside the building. It will lower a bridge above.
- For the record, don't bother trying to enter the building. You'll get fried.
- There's a soldier on the bridge. Lure it off if you're still being sniped, kill it off, and run across the bridge. If you have a ranged weapon, pause at the top of the bridge and look to the misty door ahead - there's an enemy in front of it you can kill from here, safely protected from the sniper. If you can't hit him, hop down and fight.
- Turn around. There's a gap in the path behind you. Hop over it to find a chest; inside is a Zweihander.
- Turn back and look to your left. You can leap onto a staircase here and find a corpse holding a Dull Ember, handy back in the Lost Bastille. Climb into the building here and you'll find a ladder leading up to the sniper's roost; take him out, then use a Pharros' Lockstone on the face up here to create a pool of water.
- Return to the mist door. If you want the extra challenge, you can go through and face the Smelter Demon, a good choice for ranged fighters but a tough sell if you're carrying a melee weapon. You can summon Lucatiel outside his room if you want to ease the fight a little. We'll discuss this below, at the end of the article.
- Alternatively, you can jump down onto the staircase over the lava to your right and climb to the second floor of the fiery building; whirl the wheel on the door here to quell the flames inside.
- Hop down onto the platform to the right of the building. Pull the lever to straighten out the drawbridge you lowered earlier, then enter the smelting building. There's a corpse inside with two Large Titanite Shards and a Petrified Bone in a corner, and if you climb the ladder inside you'll find a path outside leading to another ladder (and a melee warrior, if you didn't kill him at a range earlier). Behind the ladder is a corpse holding an Old Radiant Lifegem and a Green Blossom.
- Climb the ladder. If you didn't kill it before, there's a soldier to your left. Through the doorway ahead is a large lava arena, and across from you a chain-borne platform watched over by two turtle-like soldiers with huge maces, ones you may have seen back in the Forest of Fallen Giants. Take out the first, leap across the gap in the path ahead, and go after the second. Try to lead these guys onto more stable land if you can.
- You've joined up with the same place you'd pop out by facing the Smelter Demon. Speaking of which...
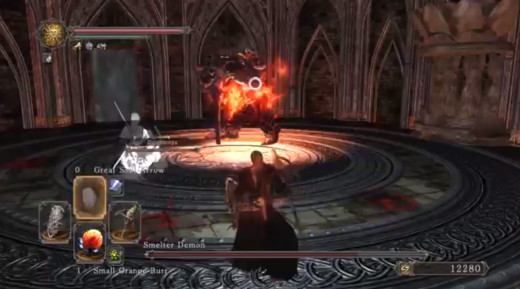
Smelter Demon
Ahh, what fun. The Smelter Demon is sort of a 'standard' melee boss: his attacks consist completely of mighty slashes with his sword, and you'll spend the majority of the fight dodging under his blade while trying to sneak in shots of your own. Problem is, he's got a significantly-longer range on his sword than other bosses, and he doesn't take a whole lot of damage from your attacks. Lightning isn't bad against him, but otherwise your reflexes are the important player in this battle. Halfway through the battle the Smelter Demon sets his sword on fire, which makes attacks against you even more painful - and he seems to become even more durable to boot. Fun.
There's not much more to be said about this battle beyond practice, practice, practice. The Smelter Demon's attacks are strong, but they're also relatively slow. Wait for him to wind up, then either block or roll under his attack before striking back. He'll perform a triple combo at most, so be prepared for an ongoing onslaught, and occasionally he'll leap up to pulverize you from the air. Roll when you know which direction his attack is headed. Summoning Lucatiel before this battle is highly recommended - she'll draw his attention for at least half of the fight before she's beaten. Beating him will earn you the Smelter Demon Soul, and passage through this area. Also? A Bonfire! Now isn't that handy.
Related

SimTower: Architectural Mayhem a Hundred Stories Up

Travel North - 5: West From Bedale - up Through the Middle Dales and Back

How I Survived a Fall Down the Stairs
")
Stairs Etiquette 101 (Yes, There's a Right Way!)
")
How to Build a Grain Bin Ladder Safety Cage (Includes Safety Concerns, Info on Stairs and Vintage Methods)


