Dark Souls II Walkthrough, Part Three: Forest of Fallen Giants - The Crestfallen's Retreat


Woo! You've beaten the tutorial, you've visited Majula, you've collected some items. Now all that remains... is... the rest of the game. This is where Dark Souls II becomes scary, as you have to fight enemies which are brutal, relentless, and strategically-placed in such a way that you'll really have to think to survive. Are you ready for one of the greatest challengers of your gaming life? Sounds like a plan. To the Forest of Fallen Giants!
Forest of Fallen Giants - The Crestfallen's Retreat
- Upon exiting the tunnels that lead back to Majula you'll be confronted by a shambling Hollow soldier. Put him down. Continue up the banks a short distance to find another one. Stay out of the water and you can probably sneak up and shank him from behind without the fight.
- To your right, across the river, is a body. Check it for a Lifegem. Continue down the river on the right a short ways to find the local Bonfire, The Cresfallen's Retreat. Should you die in this area, you'll be zapped back here rather than Majula. You can also use this spot to jump to Majula in an instant, a handy feature should you wish to upgrade your stats or buy new equipment.
- Back to the left bank of the river. Edge forward a short ways and you'll see more soldiers meandering about. Lure them up the bank towards your position - there's an archer in the distance, and it's easier to take out this pair without having to fight him as well.
- After they're gone, move close to the log bridge ahead, luring another fighter out of hiding, and deal with him and the archer accordingly. It's always easier to fight if you draw the melee targets away from the archers. You can also dive forward into the niche where the fighter was hiding to avoid the arrows, but this measure is riskier.
- Dip back into the water and follow the river until it terminates amid the rocks, past the wood bridge. At the end you'll find a body containing a Soul of a Lost Undead. Be warned, as another Hollow will charge up and attack from behind if you go this way.
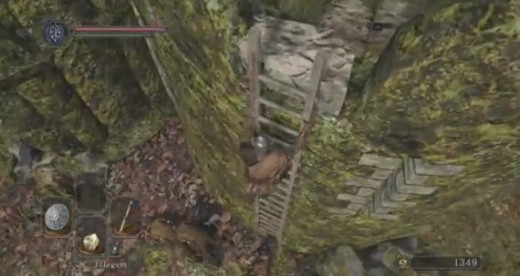
- Get back onto the path and follow it up into the roots of a tree. Climb the ladder inside, but only after healing any ills you may have - there are three melee combatants at the top, as well as an archer on distant ramparts. If you're careful you can get one of the guards before the others see you. Otherwise, keep near the ladder pit and try to draw the soldiers close so you can knock them down. Fight one- or two-at-a-time as often as you can manage. If you luck out and find Throwing Knives on the corpses, or otherwise have a ranged weapon, use them on the archer; if not, try to ignore him. Sticking close to the large, gnarled tree in the middle will block any arrows.
- (Having trouble? Try this. Climb the ladder, but don't get to the top. Just get far enough up that the soldiers see you. They'll come over to attack... and, more often than not, they'll fall into the pit. Brilliant, this lot. They'll climb back up, but you can fight them one-at-a-time this way. You can also go back down to the bottom and fight them here, though there's a greater risk of coming up against more than one.)
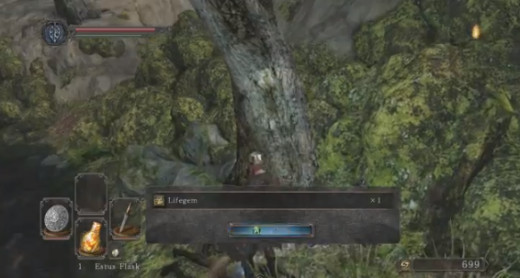
- A large, gnarled tree in the middle of this area is home to a few bodies. One has a Broken Straight Sword; another has a Human Effigy; the last a Lifegem.
- If you're feeling brave, you can attack the knight in white that's hunched by the tree. He'll stand up and have at you. I do not recommend this on your first trip through. Come back after you've strengthened your character by beating the first boss or so and you shouldn't have much trouble. He'll drop the Heide Knight Sword.
- You now have two choices: the misty door to your left or the hole in the wall to your right. We'll start by going through the wall.
- There's a ladder on the other side. Slip through and go up. You'll soon be on the ramparts. Circle the stairs, remaining wary of a pair of soldiers that are waiting a short ways up.
- At the top you can either continue walking along the ramparts or descend onto the proper walkway. Continue along the ramparts a short ways to find a corpse containing a Soul of a Nameless Soldier. If you didn't get the archer before, watch out - he'll be slinging arrows at you.
- Move past the archer's post and leap across a gap in the walkway. You'll find a corpse on the other side, this carrying a Shortsword and a Soul of a Lost Undead. Grab the lot, then leap back across the gap and return to the ground.
- Approach the mist and another soldier will rise and attack you. Nothing big, but potentially a surprise. Wipe it out before going through the mist.
- The mist leads into the bowels of this moss-laden fortress. Ahead the path splits; you can either go left, leading to a corridor, or continue straight and jump into a room with a Hollow. Both lead to the same corridor, and both have surprise - though if you go left you'll only face one soldier, whereas there are two through the hole in the wall. Only go through here if you have a ranged weapon to clean it out first. Either way, be prepared to act quickly, as you'll have an axe aimed at you through both passages. Check behind the debris in the small room for a Wood Bolt.
- At the end of the corridor is another melee fighter. Nothing serious, though this one is a bit more nimble than what you've faced up to this point. Be prepared to face more of the same under worse circumstances.
- There are stairs ahead, and as you climb you'll be pelted with arrows. Rest in the small antechamber near the top if necessary, then use a ranged weapon to take out the creature half-hiding on a log above your head. Be ready to dodge, as it will hurl explosives at you. Continue up the stairs and kill the two melee fighters waiting at the top.
- Now you're on the roof. Ignore the ladder beside you for the moment and approach the rubble at the opposite end. You'll see a body containing a Buckler nearby. Be careful on your approach - an axe-wielder is hiding to your left.
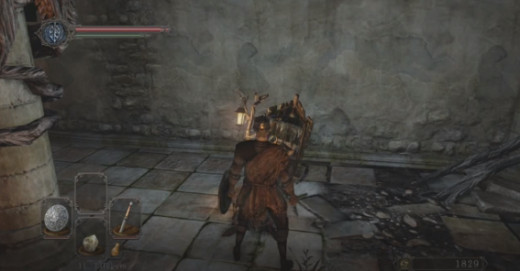
- Head up the ladder. There's a door ahead. Ignore it for the moment and continue past the entrance, to the side of the wall. There's a body with a Witching Urn here. There's also a creature with a long pike that's just waiting for your approach. It has a significant reach, so be wary. Wait for it to swing before moving in to take a few swipes.
- Now you can pop into the door. Inside is a creepy old woman who will sell you items, and, more importantly, there's another Bonfire to light: Cardinal Tower. Woo! You're... not really close to being done with this area, but it's a start!