Estes Proto X- Cheap Quad Copter Under $40!
Estes Proto X Review- Amazingly Small Quad Copter
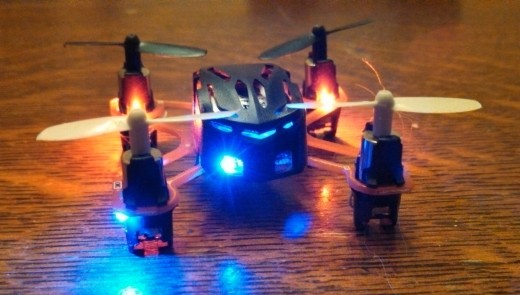
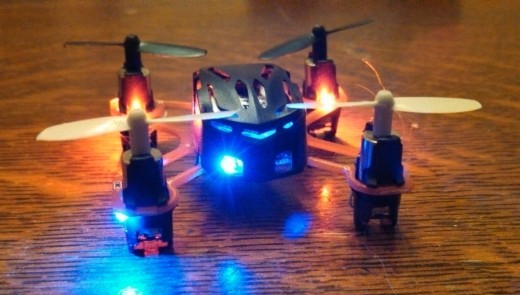
The first thing you'll notice about the Estes Proto X is its tiny size. You can easily fit it in your hand since it only measures 1.8 inches by 1.8 inches. This quad copter has 4 blades and is easy to keep stable in flight due to its on-board gyroscope.
The Estes Proto X kit includes the quad copter, a remote control, a USB cable to charge the quad copter, and a set of spare blades. I found out why you need the spare blades on my first flight. I brushed up against something and bent a blade. It turns out that all 4 blades are different, so you need to find the correct replacement blade.
The Proto X takes 20 to 30 minutes to charge using the USB port of a computer. When fully charged, you get about 5 minutes of flight time. The Proto X can really move. It is so light that it can quickly accelerate in any direction. The control has a stick on the left to control the vertical position (up/down). If you move the left stick side-to-side, it controls the yaw. The right stick controls the forward/backward/left/right flight direction.

A nice feature of the remote control is the digital trim control Setting the trim is an important part of flying the Proto X. If you see that the Proto X is drifting forward and right when the controls are in the neutral position, you can adjust the trim so that it hovers in place, making it much easier to control.
It takes a bit of practice to learn to control the Proto X. I would suggest starting in a large indoor room- I used my garage. You can fly the Proto X outside, but wind can make it difficult to fly. Also, the range of the remote control is fairly limited, so you can't fly it too far away.
I would say the Proto X is a little challenging to control compared with Air Hog helicopters that I have flown. But it sure is fun to fly and I look forward to practicing more.
The Proto X may be small, but is easy to spot while you are flying it. It has about 10 LED lights- blue in front and red in back. It looks like a UFO and almost seems to defy physics with its ability to change direction so quickly.
How Much Does Proto X Cost?
A new Proto X sells for $40. This includes the quad copter, remote control, charging cable, and extra blades.

What is the Flight Time for Proto X?
Proto X can fly about 5 minutes from a single charge.
How Long Does It Take to Charge Proto X?
Using the USB port cable, it takes about 20-30 minutes to fully charge the Proto X.
Proto X Flying Tips
- Let the Proto X get a full charge before flying. The LED light on the USB charge cable will turn off when the Proto X is fully charged.
- Adjust the trim. When you first lift off, try to hold a steady hover and notice which way the Proto X is drifting. Press the trim button on the remote control in the opposite direction to correct the drift. For example, if you notice the Proto X is drifting forward, press the forward/backward trim control in the backward direction. If you notice the Proto X is drifting right, press the left/right trim control in the left direction. You may need to adjust trim after a crash.
- Practice in a large room with few obstacles. A garage or gym is a good place to get familiar with the controls. The Proto X can really move, you'll want some space to see what it can do.
- Get familiar with the yaw control The left stick makes the Proto X rotate to face a different direction. One of the challenges of flying the Proto X is keeping track of which way is forward. The blue lights are on the forward side. You can rotate the Proto X whenever you wish to make it face the direction you want. Just move the left stick left or right to make it rotate.
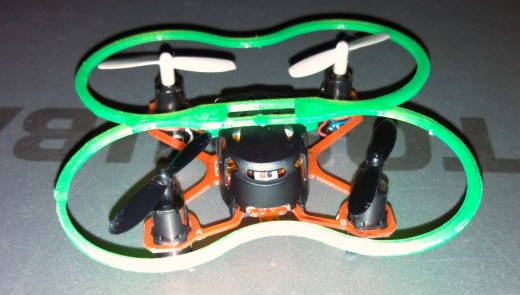
- Protect the blades- add a blade bumper, or move the left stick down to cut power when you are about to come in contact with an obstacle. The blades can be damaged or can fly off and get lost when you impact an obstacle with the blades.
- If Proto X won't fly straight, check to see if one or more of the blades has hair or pet fur tangled up in it. You may need to remove the blades and check for any issues. Also check for bent blades. Sometimes bent blades can be bent back into shape.
- Resetting the horizontal stabilization: If you are having trouble finding a trim setting that gives good control, try resetting the horizontal stabilization. With the Proto X powered on and resting on a level surface, power on the controller and make sure it links to the Proto X. Hold the left stick down and to the right. Move the left stick back and forth (left/right) quickly about 5 times. The blue lights on the Proto X will flash when it has been reset. This may help you be able to control the Proto X and keep it in level flight.
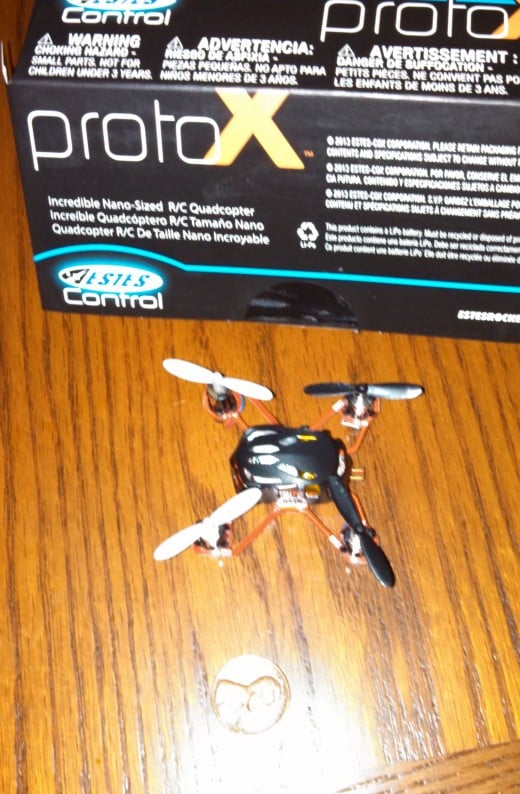
- The propeller blades are labeled "A" or "B". The label is molded into the plastic near the center of the blade- the label is small and difficult to see. When you replace a blade, you must replace it with the correct type- either A or B. The Proto X has a label on the circuit board next to each motor that reads either "A" or "B". If you know to look for the label on the blade and the label next to the motor, you can get the blades installed correctly without trial and error...
- If your Proto X seems to have trouble facing the same direction- in other words it rotates when you are not moving the left stick left or right- remove the blades one at a time and check for small amounts of hair or pet fur that may be slightly reducing the rotation of one of the blades.
- The Proto X is somewhat water resistant! I accidentally crashed my Proto X into a cat water bowl. The Proto X was partially submerged for a few seconds with one of the motors completely underwater. I immediately turned the power off and used a paper towel to carefully remove any water droplets. I let it dry for 24 hours before powering it up again- and it works fine!
Estes Proto X Upgrades
The Proto X includes everything you need to fly (except 2 AAA batteries for the remote control). There are a few things you may want to add to your Proto X as you fly it more.
I went ahead and ordered 2 additional sets of extra blades for about $5 per set from Amazon.
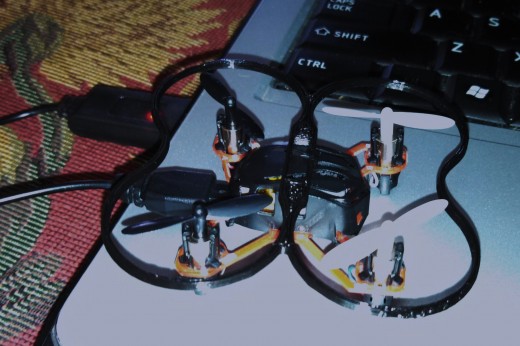
Another upgrade I purchased was a bumper guard for the blades. This blade guard is a very lightweight plastic piece manufactured on a 3D printer. This should help protect the blades. I have managed to bend one blade and lose another already. The Proto X blade guard is available on eBay for about $5. I found a 2-pack for $8.50 and selected the glow-in-the-dark green and the black options.
If you happen to have a 3D printer, you can print your own blade guards using this 3D printer file.
If you don't have your own 3D printer, you can buy these lightweight blade guards on eBay for around $5 each.
A future upgrade I will consider is getting a Hubsan controller to replace the Proto X controller. The Proto X controller is small, which is handy for packing and carring the Proto X, but it is a little difficult to use. The Hubsan controller is compatible with Proto X and has full size knobs and some added features such as programmable rate limiting. The Hubsan control also supports some advanced tricks such as performing flips. At $25, this may be a good way to move into more advanced control of the Proto X.
Why I Like the Estes Proto X
I have used the Proto X every day since I got it. It is so much fun to fly and since it is so small, it can be flown easily indoors. The fact that it is a bit challenging to fly makes it fun for me. I like to practice moving where I want and landing on small objects. I also like "buzzing" my cats! This is even more fun than playing with my cats with a laser pointer.
The Proto X fits in a small box and packs away neatly. It is easy to carry with you to work or on a trip. etc. You can use it indoors and outdoors.
One of my favorite things about the Proto X is its low cost. You can get the complete system for under $40. You can upgrade it, but the upgrades are cheap. You can get into flying a remote control helicopter for very little money.
If you are interested in a slightly larger quad copter with a bit more capability, check out the Hubsan X4 quad copter.
© 2014 Dr Penny Pincher


