How to make your own indoor plant, and enjoy it

home-made water bonsai, anyone?
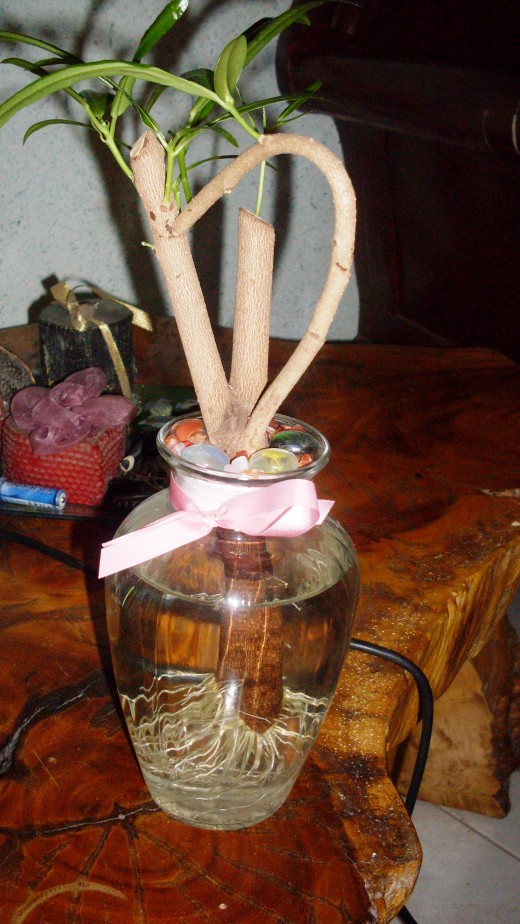
As an ornamental plant lover living in the tropics, I often try things that I heard others did or experiment on some things for the sheer fun of it. Last year one of my friends was talking about a water bonsai that can be propagated easily using common shrubs in the locality without the rigorous processes, long wait and the like, in raising bonsai plant; and this can be done in just a matter of three weeks to a month. So I attended a sort of impromptu seminar on how to do this procedure and it proved to be simple and even entertaining; that is of course if you are fond of gardening or raising ornamental plants. My work paid off when after three weeks – the twigs begun to bud and new white roots are visible at the bottom creating a combination of eerie and beauty as I gaze on a new plant that was physically ‘exploited’ to re-create a derivative of beauty apart from it’s natural setting. To me it looked really nice. With a sense of triumph I fancy re-designing possible twists on its branches and I did. I managed to form a few letters and shapes like a heart, etc. and it was complimented by new leaves from the branches. This also can be a way to recycle branches that are pruned from your ornamental plant. I even was able to sell some of my creations to friends – so there is a possibility for an income stream from this venture – you just need to be imaginative.
Though this experiment was conducted in a tropical locality where the constant temperature is in between 28 to 32 degrees Celsius and the variations are very slight for most of the year. My guess is - this also will be possible to sub-tropics or much cooler areas like southern parts of California. Within our neighbourhood, it was called water bonsai, so I’d rather call it the same. You don’t even need to put it out in the sun occasionally as long as the plant is situated near a window – which is the best place. This can adorn your living room, kitchen or even bedroom as we did ours. The plus factor is – this has least maintenance, very affordable and an 80% rate of success even if you’re a first timer, is you curious now?
What you need:
- A thumb-size of ornamental plant twig, cut about 6 inches long.
- An ordinary clear jar – used coffee or milk bottles will do.
- Styro-foam – from discarded packing of electronic gadgets.
- Sealing material – this can be soft rubber foam from discarded cushions or even rags or any dense fabric will do.
- About 300 ml of alkaline water with pH 7.5 to 9 will do. This can be bought at common food stores or you can make yourself if raw material is available.
- Scouring pad
- Clear glass vase.
- Two toothpicks
- Artistic talent and a little patience
How to make a water bonsai:
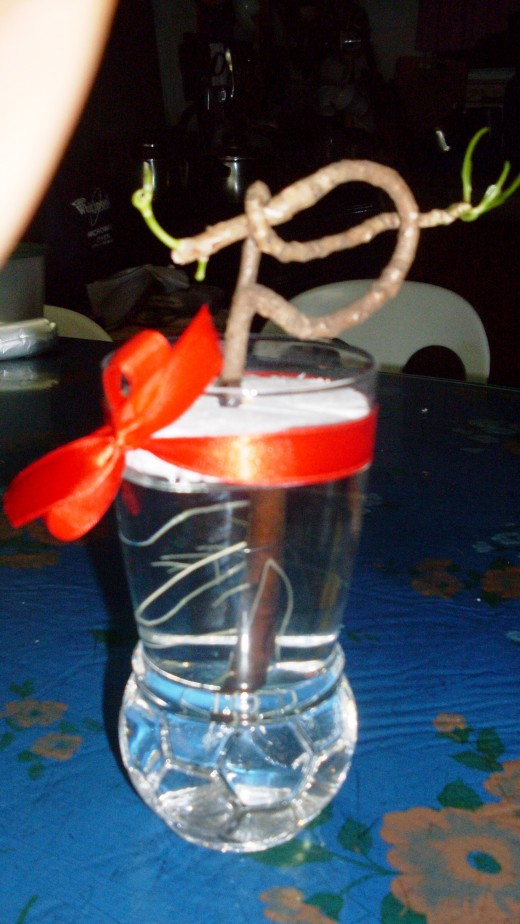
- Cut a thumb-size branch of common tropical ornamental shrub (such as bougainvillea, fortune plant, suntan, hibiscus or gumamela, banyan – also known as ‘balite’, etc.) – but there is local shrub named “san francisco” and its variety is easiest to propagate. Use a pruning shear or sharp knife to cut the stem. The cut should be flat at the upper end and slanted on the lower portion. Reason is – the upper part should bud and can be designed into some other odd shape if possible. The slant cut on the lower portion will allow more roots to shoot out creating a better look. If there are any branches – you may choose to cut them evenly or haphazardly depending on your visual design. If there are smaller branches – you bend these carefully to desired shapes, i.e. heart, half-heart, or even a letter in the alphabet. In designing the branch – you may drill a hole of same size as the tip of the branch to be bent. Then with a sharp knife carefully peel off the bark of the stem-tip to be inserted to the hole you bore in the stem. This way the bark will grow and cover the exposed end-tip of the stem in about three weeks.
- With the use of scouring pad rub carefully the outer bark, about 3 inches long on the lower part of the stem - to eliminate flakes of dead skin from the cut stem. This will prevent contaminating the water after a period of time during budding. Usually if the stem is un-cleaned, the dead outer layers of the bark will fall off thereby polluting the alkaline water and may induce this to become acidic which in turn may stimulate the stem to rot. You would want to avoid that.
- With a soft rubber foam, wrap around the stem half-way of the stem with a width of about ½ to ¾ of an inch. This will serve as seal and holder of the stem during budding stage. You then fill your empty milk bottle ¾ full with alkaline water. Put the lower half portion of the plant stem inside making sure that it will be soaked in the water for all the duration of 3 to 4 weeks (budding period). The rubber foam should make a good seal at the bottle-neck; to hold the plant stem in place and at the same time not allowing small insects to get into the water, especially mosquitoes; thereby preserving clarity of the water which can be re-used later.
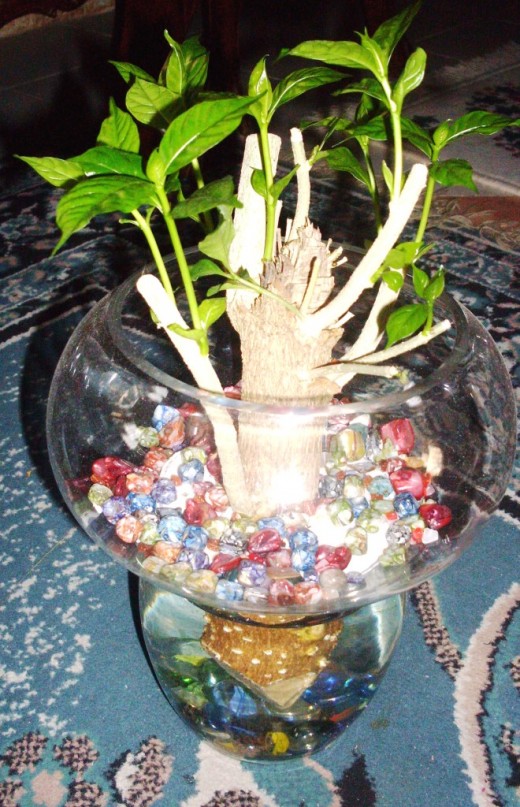
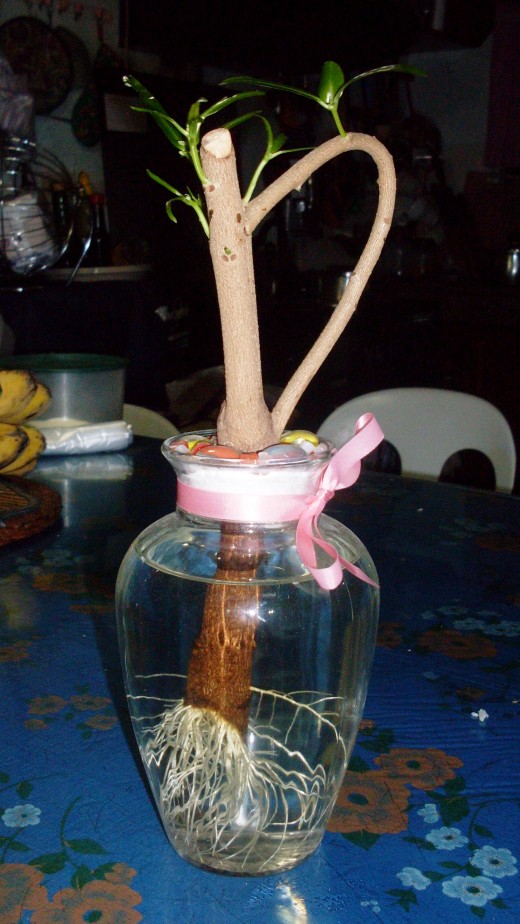
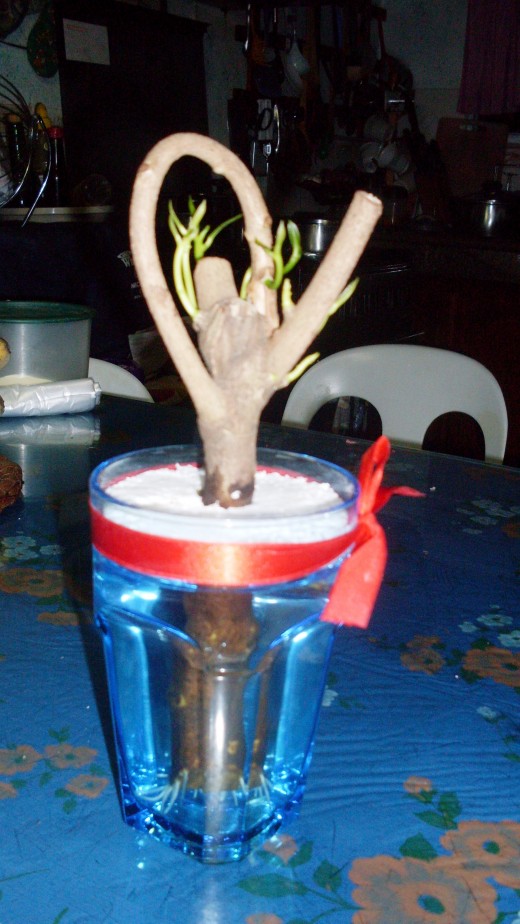
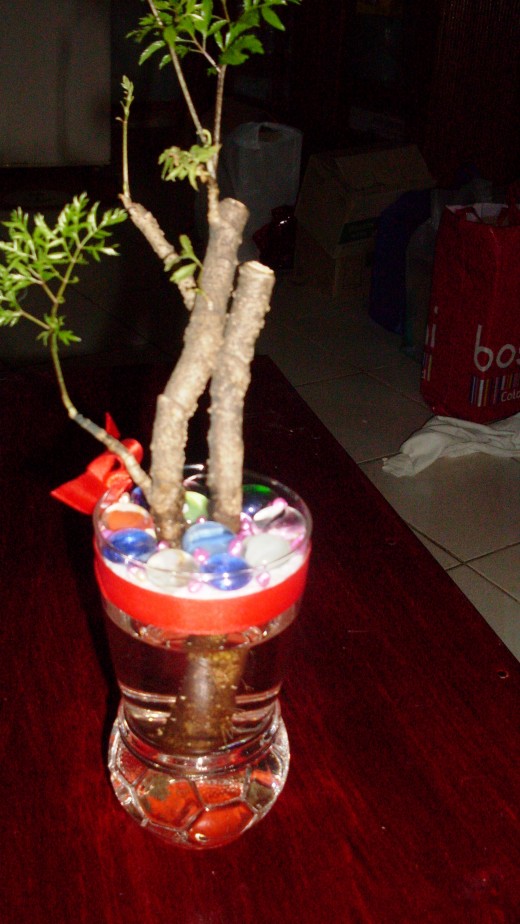
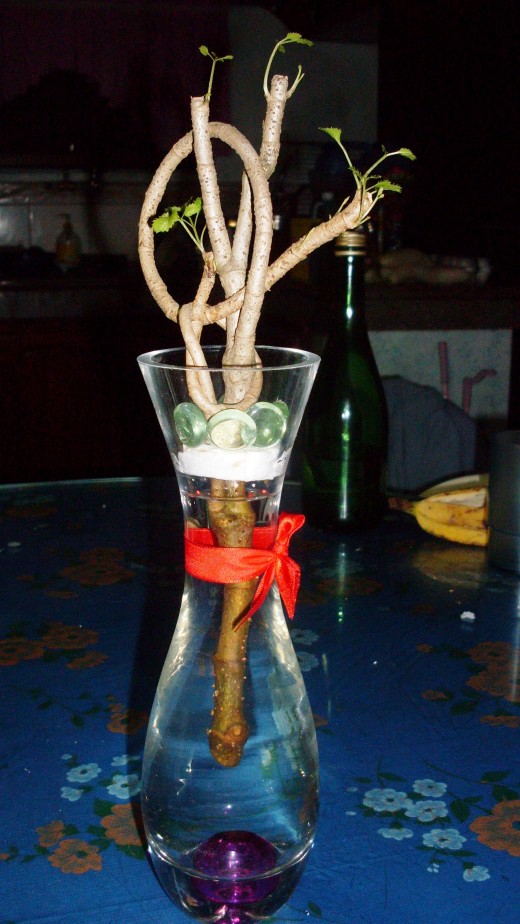
- At about 3 to 4 weeks – you should see signs of life on the branch. Small leaves are coming out and white roots are protruding inside the jar. At this stage you may need to transfer the plant into is permanent vase. A crystal clear vase without opaque side cuts or design is preferable to display the roots inside, and a vase with a neck or at least a slight neck-line.
- Cut a round-shape styro-foam at about ½ inch thick. This is normally rigid and could easily break, care is needed. The circumference should be slightly bigger than the vase neck and it should be a bit conical so as to allow a little tight seal when positioned inside the vase.
- Measure the stem diameter. The hole to me punched in the styro-foam should be the same size as the stem diameter. In the outside rim of the styro-foam – cut small slots around – small enough that ordinary ants can’t squeeze in. This will allow you to re-fill the vase in the coming months. Cut the round foam into half after punching a hole at the centre or you can cut it in half first and then carve a half-hole as you wish. It should end up with similar results.
- At this time carefully extract the plant from the milk bottle, unwrap its rubber foam and position the styro-foam (two halves) to where the rubber foam was wrapped, and with the use of two toothpicks, re-join the two halves to secure the stem at the centre. This will be your suspension media that will seal the vase to maintain water clarity as much as possible.
- Fill the clear vase with alkaline water to its neck. You may re-use the water from the milk bottle you used during propagation. Position the plant to the vase carefully pushing the styro-foam a snug fit on the neck of the vase. Add water as necessary. You may also put some pebble or sea shells on top of the foam to camouflage it.
- Do not expose the plant to direct sunlight. It may affect the alkalinity of the water, and may kill the plant. Do not use mineral water to refill. Refilling can be done when water level is low and that may take every month or two, or when the water becomes hazy.
- Do not use plant fertilizer for it will change the chemistry of the water. It may help but it has not been proven.
As months pass, the leaves may grow longer and you can trim them to your taste. This was called bonsai for the simple reason that this stem cut from the original shrub will never grow again being solely dependent on alkaline water for survival. Aside from its beauty, the plant itself serves as oxygen enhancing media to your living room, which is healthy, and at the same time absorbing some carbon gases inside the house improving ambience. Aside from its ease to produce and propagate, it is also inexpensive because you can use discarded bottles or rubber foam and styro-foam from discarded electronics packaging to start with. You only buy alkaline water and clear vase, and then again these are optional since it can be taken from recycled materials. This can also be developed into income generating venture depending on the location and market. The raw materials are commonly available in most tropics or sub-tropics. As for me, it’s just a hobby and for some time – sold a number and made a little money. It’s also a good inexpensive gift to friends that may adorn offices or living rooms or kitchens. You can innovate, you can experiment, and it won’t hurt your budget even if you fail because it does not cost much to produce – only your little time; there is certainly room for improvement for this product. If your bonsai is cut from a flowering plant, you might get some flowers but will be smaller than the normal one. During propagation time you may cut and design more than one branch to so that you can choose which is best later after budding. I assure you there is pleasure of creating something out of the ordinary trash with just a little tinkering. I do not claim to have extensive knowledge why it works nor do I had further experiments on other plants due to work constraints. I am only sharing a part of my passion for ornamental plants even though I do not have enough knowledge in propagation nor its varieties. I do not even know the names of most of them, I only enjoy the sheer beauty they contribute to my environment.


water bonsai
- Buy and Sell Philippines : Sulit.com.ph
Buy and Sell Philippines - Sulit.com.ph : The Top Free Buy and Sell (Marketplace) in the Philippines - Bing
- Google
- Yahoo!