How to build a cedar strip kayak!

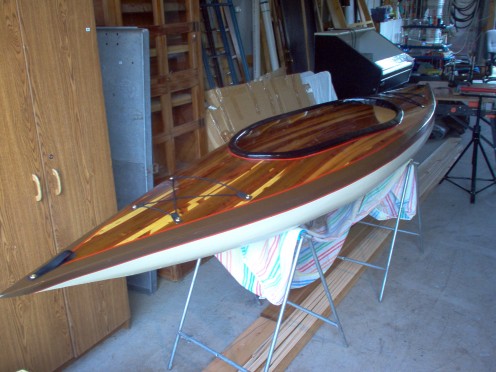
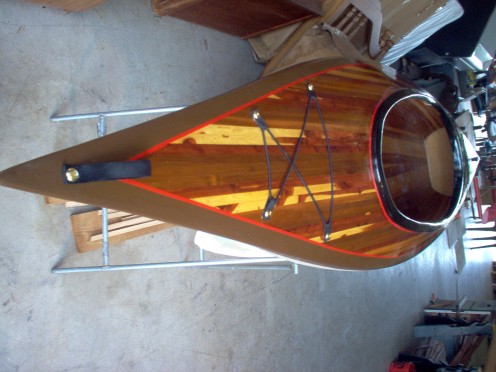
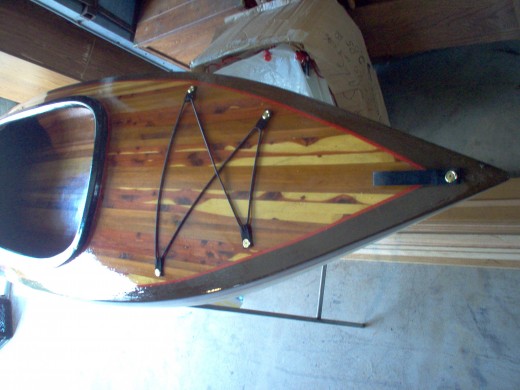
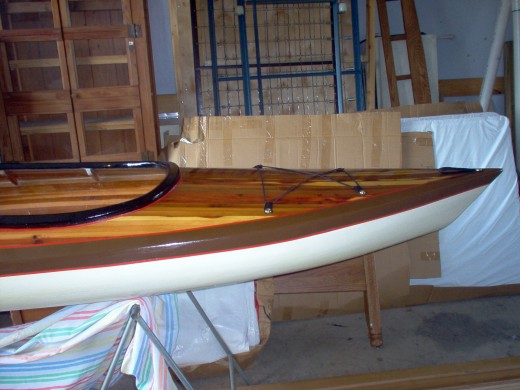
This is the kayak that I built!

Getting started with your very own work of art!
- What do you want to build for example; how long? how big you want your cock pit? Basically you need a plan to start with and the kayak foundry software is a great place to start. To download kayak foundry free click this link http://www.blueheronkayaks.com/kayak/index.html and scroll down till you see kayak foundry, then click on the download link.
- The kayak foundry program is very user friendly, When you have your design finished you can print the patterns for the sections on regular size printer paper. If you are not ready to design your own boat, canoe, sup, or kayak find a set of plans with the forms printed out on paper and instructions.
- Once you have all your patterns printed up you will tape each section together, the instructions on how to do that are in the program. Then cut the pattern out. Tip: To save money on paper and Ink select half sections.
- You will need to get yourself some 1/2" plywood for the forms. Place your patterns on the plywood, place them to minimize wasted plywood. I use spray paint to outling the forms on the plywood. You will want to cut the forms outside the line. Sand the form smooth to the line.
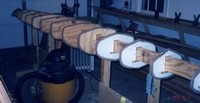
- Install the forms onto a stiff back described in the kayak foundry and make sure that each section is marked with the right positions. You may want to layout the stiff back prior to installing sections, mark the sheer line and center line on the forms(this is important). In the program you will have the option of how far you would like to space your sections, I would space them 12"-16" that will give you a nice shape and cut down on the clamps and strapping.
Your forms should look like this when you are done!
Cutting the wood strips!
- Next step would be to find cedar boards, go to your local lumber yards. Find yourself cedar boards that are longer than your boat appx. 6"-12" (1x6) are cheaper than if you buy 1x12s. You will want to try to pick out boards with the least amount of knots. If you are looking for different colors this is the time to do it. If you decide to use different kinds of wood, keep in mind when you go to sand the boat out the harder wood will not sand down as fast leaving a slight hump. You will need appx. 5-8 (1x6 or 2x4) longer than the length of the boat.
- The next step would be to set up your table saw to cut strips. You will want to cut your strips between 3/16"-1/4" any thicker and you will have a hard time bending the strips on the forms. The majority of the strength is in the fiberglass. Also the thicker the wood the more weight you add. To set the guide on the table saw, set the end of the guide that the wood is exiting slightly wider to help the blade from binding. Cut your strips. (Tips would include using a couple roller stands, two people, safety glasses, short sleaves, shirts tucked in, standing off to the side of the table saw blade because they are known to throw wood, and a push stick to keep hands out of the blade area. I will also use a thin kurf 7 1/4 inch blade to get more strips out of a board.)
- Find a dry flat area to store your strips, I cut all the strips i need before so they have a time to dry. I then have all the different color strips to choose from.
Get started!
- You will need to prepare the form sections with duct tape. Just tape all the edges with duct tape, this will ensure that your kayak will not stick to the form sections.
- With the hull side up this is where you will start.
- Locate the sheer line (the sheer line is the line that separates the top from the hull) you marked on each section, start stapling from one end leaving the strip a little long and work your way to the other end placing the bottom of the strip on the line.
- Now go to the other side of the boat and do the same thing. The only difference is you will have to cut the end of the strip with the coping saw to fit against the other strip at the ends. Glue coresponding strips at the bow and stern of the boat. I like to lace the wood at the bow and stern for strength.
- Before you get to far along, fare (look down the boat at the strips to make sure you have a nice smooth strip with no dips or humps. If you have a problem you may need to adjust the forms or the strip/s.
- Now that the first strips on both sides are where you want them you can start to glue the rest of them. A Tip to make things go smoother would be to make your own clamps, I use 1 1/2, 2, 3 inch pvc pipe. You will cut the pvc pipe on one side I will run it through the table saw. Next I will cut the pipe into approx. 2 1/2" sections. Note: make certain that the table saw blade is set low as to cut only one side of the pipe. Start glueing the edge of the strip on the boat and place your next piece on starting from one end and staple the strip to the form working it around the form clamping as you go snugging it tight up against the other piece. You will work from one side to the other so as to keep the strips even with the strips on the other side of the boat.
- Now that you are moving along you will get to a point where you'll be scratching your head trying to figure out how to get your pieces cut to fit. You will place the strip in place (no glue yet) with the clamps, then with a pencil reach up underneath the boat and scribe a line on the board on both ends and make a line on your strip down on to the next strip. This is so that after you cut both sides of your strip you will know how the strip will go on the boat without question.
- After gluing all the strips and the hull is dry you will be ready for the sanding stage. First you will want to pull all the staples except the sheer line staples. Second I use a cheese grater plane to remove the excess glue from the joints. Then third I start sanding using a long flat hand sander with 50 grit sandpaper from the sheer line toward the center of the board while pushing with the grain. (the object of the sanding is to get rid of all the ridges and glue, and if you have a void that you can't sand out easily fill it in with a wood and sawdust mixture. This does take some practice and patience.
9. Next you want to wet the hull with epoxy to seal the wood. (I use Solarez for the ease of use.)
10. Cover the boat with fiberglass cloth and work it smooth with a soft bristle brush (you may have to cut the cloth at the bow and the stern to get it to form around sharp angles.)
11. Pour Solarez down the middle of the boat in a line and work the resin out with a mini foam roller. With Solarez it will harden with daylight uv-a rays so you want to keep out daylight. At this point all you are going for is to fill the fabric with resin, then smooth the cloth with a plastic bondo spreader starting from the middle and working the excess resin out of the fabric. This will keep the fiberglass from floating and make it lighter and stonger. When finished open the blinds/garage door and let the light in. If you have good sun light it should start to harden within 3-4 min.
12. Apply a third coat of resin to smooth out the bottoms finish with the mini roller.
13. Flip the boat and form over.
14. At the shear line run blue tape on all the top edges so that when you start installing strips on the top it does not get glued together. (you will need to be able to remove the forms.
15. Start laying strips on the top of the boat from the sheer line up. If you get to a point where the strips are not cooperating then start laying strips from the center line toward the sheer line and fill in. (Note: to get your angles or curved cuts place strip in its desired place and trace with a pencil from underneath and cut with jig saw or trim saw, if your cut is off use 50 grit paper or cheese grater to get desired fit.)
16. When finished with the top and it fits good, then you will want to sand the top out.
17. Apply resin to the top, but be sure to protect the bottom from drips with tape.
18. Apply fiberglass cloth to the top and apply resin to fill in the fabric.
19. Remove top, and remove form from hull.
20. Remove glue from inside of hull and top.
21. Sand inside of hull and under top.
22. Coat inside of hull and under top with resin.
23. Lay fiberglass cloth in hull and under top and coat with resin.
24. Glue a 3/4"x1/4" strip all the way around the inside of the shear line with the top of the edge about 1/4" above the shear. Remove tape from top of shear then place top on the hull to check for fit. Sand the edges to fit snug.
25. Glue the top to the hull and run tape all the way round the boat to hold the two pieces together till the glue sets up.
26. The boat on its side sand the joint. Then use fiberglass tape and then resin to join the seam. Do the same for the other side.
27. Now place the boat on the hull.
28. Cut out your skirt rings from 1/4" plywood. Place the template on the top of the boat in the desired position and mark out the inside the template, then cut 1/4" smaller then the trace.
29. Tape around the skirt hole, then Glue your skirt rings together (no glue between the skirt and the boat.) then set them on the boat and clamp down to the boat until dry.
30. When skirt ring is dry, remove it, shape and sand then epoxy.
31. Glue Skirt on the top and clamp.
32. Trim the inside of the skirt and sand smooth.
33. Appy a final coat of resin to the top and the seams.