Mario Kart 8 Walkthrough: Mushroom Cup

Welcome to Mario Kart 8! All players new and returning have to start somewhere, and the Mushroom Cup is just the place. Featuring some relatively basic tracks upon which you can cut your teeth, this starter's cup will provide ample opportunities to improve your driving skills without being too simple or too difficult. It also features a prodigious number of open areas, so expect Red Shells to fly with mad abandon. Have fun!

Mario Kart Stadium
Difficulty: Easy
Length: Short
Terrain: Stable
The first track is generally the easiest in a game of Mario Kart, and Mario Kart Stadium does not buck the trend. A smooth, simple ride through some introductory bends, Mario Kart Stadium is basically a tutorial for new players. That said, its wide spaces also give experienced players many opportunities to muck up one another's game, and so 'easy' can easily turn to 'ridiculous'.
Notable Hazards
Honestly? None. The only real hazards stem from the actions of other racers.
Shortcuts
-There are several speed boosts on the tracks' first major turn. Skid along them for instant acceleration.
- When you first come into view of the track's large u-turn loop, just after swapping your vehicle to anti-grav mode, there will be a ramp on the plot of grass to your left. Use a Mushroom or other speed boost to leap off of it and down the track. Do not use this ramp unless you have a speed boost.
- There's another line of booster pads on the final turn near the end of the track. Use them as you did the first line. These are great for blasting past leaders at the last minute if you're not already in first place.
Analysis?
Overall, an easy enough track. Take narrow corners and don't worry too much about skidding for speed boosts. You'll do better if you stick to straight driving and strategic use of weaponry. You don't even need to bother with the booster pad 'shortcuts' mentioned above if you take tight corners - the results are pretty close to the same.
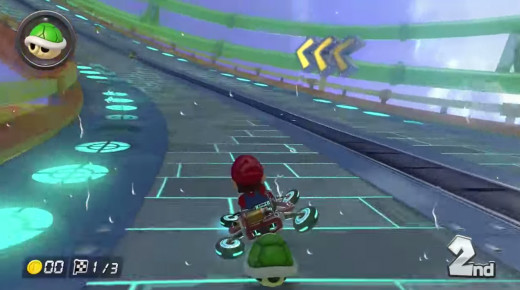
Water Park
Difficulty: Easy
Length: Short
Terrain: Stable
Weee, everybody in the pool! Another relatively straightforward track, Water Park introduces you to the fun of upside-down driving - not that it's much different from normal driving. Featuring more tight turns than Mario Kart Stadium, Water Park is an appreciable step up from the first track, but it's still not that difficult. Skidding is more useful in this place.
Notable Hazards
- The first building in the race can be considered a hazard, as you may not notice the arrows pointing you right in the mad dash towards the entrance. Take a steep right as soon as you get inside.
Shortcuts
- There are a few semi-submersibles running along the large loop halfway through the track. These look like a hazard, but if you hit the tires at the bases of these submersibles you'll receive a little speed boost.
- At the bottom of the large loop you'll come out near several rotating cupcakes, on your left. If you have a Mushroom you can blast through the cupcakes and emerge on the other side with a decent cut to your overall time.
- Near the end of the track you'll blast out of the water and soar towards a ferris wheel. Directly after the ferris wheel is a small building with a few coins on its top. Hitting the top of the building and driving towards the finish line is slightly faster than going around, though only if you have sufficient altitude to hit the top. If not, weave around the thing.
Analysis?
Not too bad. There are few hazards, and only two patches of the course feature really tight turns where you could potentially be thrown off track. Always hit the submersibles on the loop, and whenever possible save a Mushroom for the merry-go-round section. There are plenty of reasonable straightaways on this track, so don't worry about your weapons getting jammed or cut off too much.
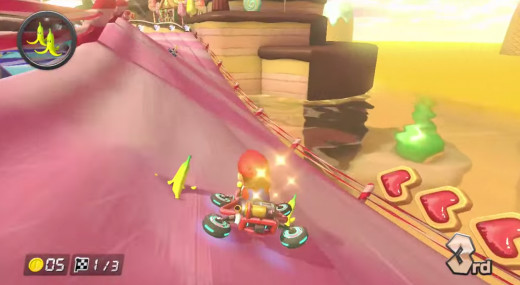
Sweet Sweet Canyon
Difficulty: Medium
Length: Short
Terrain: Hilly
Ahhh, now it's getting tricky. Sweet Sweet Canyon is the first track with some challenging hazards, including the appearance of the game's first Piranha Plants. There are a few tricky turns halfway through the course that will test your turning, and the final stretch is a little too open for comfort.
Notable Hazards
- There are several ice cream caution cones on the other side of the track's big flying moment. They won't hurt you if you run into one, but they are distracting.
- The red-and-pink loops are worthy of mention simply because they have no guardrails at the top. Turn with caution, and do so early.
- There are two Piranha Plants stationed on the last stretch of track before you reach the goal. Swerve away from them. There's plenty of room to turn without approaching the things.
Shortcuts
None, really. Eek.
Analysis?
Sweet Sweet Canyon is all about working the turns. If you can put some distance between yourself and your opponents they'll have a tough time hitting you with anything, thanks to the area's many curves. The midway loop is fantastic for speeding past enemies who take the turn a little too loosely; ride as close to the inside corner as you can, though not so close that you hit the chocolatey rough terrain. Bonus points if you can knock a competitor into range of the otherwise sidelined Piranha Plants.
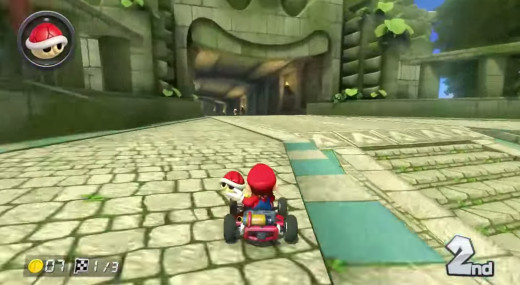
Thwomp Ruins
Difficulty: Medium
Length: Medium
Terrain: Variable
A fitting end to the Mushroom Cup, Thwomp Ruins is appreciably difficult. Though it's not too twisty-turny there's an excess of hairy areas, no thanks in small part to the Thwomps, and most of the shortcuts can be only taken with a small amount of risk.
Notable Hazards
- Predictably, the area is lined with Thwomps. They'll rise into the air, linger there for a few seconds, and drop. Hitting one is bad; getting caught under one is worse.
- A large, stone wheel will roll through the first tunnel on the second and third laps. You can easily avoid it by sliding up onto the right wall.
Shortcuts
- First off, there are maaaaany pits in this area. The outside areas alone are lined with pits. Watch your turns.
- There's a patch of grass on your left as you start the track. Turn onto it with a Mushroom or other speed booster and you'll find a ramp that will launch you into the tunnel that forms the next part of the course.
- You can ride on the walls in two parts in this course: once during the first tunnel (right wall), and again in the area with the large pool in the middle (right and left walls, allowing you to avoid Thwomps on both sides).
- On your second lap you can launch off a set of stairs in the middle of the pool area and soar across the water. Watch out for the Thwomp on the central island.
- Near the end of the track, once you're out of the second tunnel, is a curving turn lined with Thwomps. Look at the pit on your left as you turn and you'll see a small stone ramp. You can drop onto this ramp and avoid the rest of the turn altogether.
Analysis?
Thwomp Ruins will probably destroy you on your first few tries, but once you learn to predict the hazards - primarily those stupid Thwomps, though the wheels are bad too - it's not so bad. The shortcuts can be more trying than the hazards, really, as most of them put you in a dangerous situation in exchange for the potential payoff. I don't recommend the ramp at the end unless you're perfectly aligned, for example, and the ramp by the starter's line is easy to undershoot unless you know exactly where it is. Play with the pros, though, and you'll want to master all of these little shortcuts if you want to place high.