Remote Controlled Mini Helicopter, controlled by iPhone, iPad or iPod - the i-Helicopter makes the best Adult Toy Ever!


The i-Helicopter
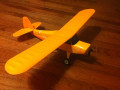
There are lots of radio controlled mini helicopters on the market that are supplied with a separate radio control unit that is battery powered. Mini helicopters are typically around 8 inches (20cm) in length and are designed to be flown indoors.
Now the innovative i-helicopter does away with the need for a separate remote control and the need for batteries as it is controlled by an iphone, ipod or ipad. You can also get versions of the i-helicopter that can be controlled via an android phone or other device.
The helicopter control is achieved using a small transmitter that plugs into the headphone socket on the iphone, ipod or ipad. The remote control interface is provided via a free app that is installed on the i-device.
The i-helicopter and the transmitter are each charged via a usb lead plugged into a PC or other powered device (usb lead supplied). The internal rechargeable batteries mean you never need to purchase batteries for your i-helicopter.
The Remote Controller App also has gyroscope mode that uses the accelerometer in the i-device so instead of using the joystick on the i-device screen you can optionally control the direction of flight by physically moving the i-device rather than an on-screen control.
There are a number of generic designs with the name i-Helicopter. The one I am reviewing here is model number 777-170.
The App for this model is produced by Happy Cow and is available free at the Apple i-store.
The build quality of the i-helicopter is surprisingly good, the chassis being made mainly from lightweight metal (aluminium?) rather than plastic. This is important as, unless you are a better pilot than me, you helicopter will sometimes (often) crash into the ceiling, walls or even the cat!

Advantages of the i-Helicopter
- No batteries
- No bulky controller
- Soft controller offers more flexibility
- Gyro mode
- Trim control
- Controllable lights
- Recharge from USB
Getting Started
In the box you’ll find:
- The i-Helicopter
- Transmitter that plugs into i-device headphone socket
- USB lead for charging
- Spare parts including link connectors, spare tail propellers and spare rotor blades
- Instruction manual
Make sure both helicopter and transmitter are fully charged using the USB lead. Meanwhile, download the app from the itunes app store. Next plug the transmitter into your i-device (the headphone socket).
Open the app and select your model of i-helicopter. You’ll then be prompted to turn on your helicopter using a small slide switch on the side of the fuselage. You should see a small red led lit inside the helicopter near the switch that indicates the helicopter on ‘on’. When you select ‘On’ from the app you should see a steady blue light come on at the transmitter.
The control panel gives you a wide range of facilities including:
- 3 channel selection (so you can have up to 3 helicopters flying in the same room)
- Lights on/off. The i-helicopter has a red/blue flashing taillight and twin forward facing headlights. You can switch them on in order to make sure the transmitter is working.
- Trimmer control – not normally needed as the i-helicopter seems more stable than some other RC helicopters.
- Throttle control
- Direction stick
- Gyro selection. When On, the i-device orientation controls the direction of the helicopter rather than the on-screen direction joystick.
Charging
Transmitter
When you turn the transmitter on from the app then a steady blue light will be light up on the transmitter. If this starts to flash then the transmitter needs recharging. You shouldn't need to recharge the tranmitter as often as the i-helicopter.
i-helicopter
The helicopter will need charging after around 5 minutes of flight. The USB plug won’t be lit when you start charging the helicopter but will light up with a steady red light once charging is complete.


General Flying Tips
The i-helicopter will fly for about 5 minutes on a full charge with the best performance in the first minute or so. Control gradually becomes more difficult as the battery power fades.
You need a space relatively free from objects or stuff dangling from the ceiling. Hazards include big plants, furniture and hanging lights such as chandeliers and of course ceiling fans. Other hazards include family members and pets!
The i-helicopter is relatively stable so you shouldn’t normally need to use the trim control. You can use the trim control to steady your helicopter if it starts to spin either clockwise or anticlockwise.
The main trick when beginning your first flight, is to adjust the throttle so that the helicopter hovers at a fixed height above the ground. Beware that flying it forward or back will also raise or lower the height so you may need to adjust the throttle as you manoeuvre your aircraft.
The gyro function, that uses the accelerometer in your i-device, can make controlling your flight easier. Beware though that tilting the i-device may start the tail rotor spinning even when you have the throttle off. Therefore it is a good idea to turn the gyro function 'off' before retrieving your i-helicopter!
Finally
These devices are tremendous fun and using your i-device to fly it is an added bonus. This product comes highly recommended by me!
So why not take a look online and treat yourself to an i-helicopter? Alternatively this will make a great gift for the child or man (or woman) in your life. My daughter bought me mine and I’m very grateful!
i-Helicopter Flight Video
Related

How to make homemade remote control car plus electric RC cars?

Guide to Remote Control RC Model Helicopters: What Are 2, 3, 3.5, 4, and 6 Channel Helis? What Is a Gyro?

The Best RC Planes for Beginners - Radio Control Airplanes for Beginning Flyers

Clean Energy Charging - Iphone Stealth Environmentalism

How to Properly Set Up the Spektrum DX6i Transmitter with Phoenix Flight Simulator

")
