Building a Crystal Radio


I have always been fascinated by crystal radios, the idea of pulling radio waves from the air with a simple device with no external power, so I decided to build one. Seeing that I have an electronics background I figured that this would be a snap!
Build a Kit First
As I never built a crystal radio in my youth, I decided to built a crystal radio from a kit first. I decided on the Crystal Radio kit produced by Poof-Slinky, available on Amazon for around ten dollars.
Building the Crystal Radio Poof-Slinky Kit
The instructions were straight forward with lots of visual assembly drawings and crystal radio theory. The hardest part was winding the tuning coil which would be difficult for a child to do and even tested this adult's patience! In order to wind the tuning coil it seemed like you needed more hands. I finally discovered that if applied a piece of masking tape every fifty turns I could keep it from unraveling when I took a break. Once the final number of coil turns was made I used a bead of hot glue to keep the windings in place.
Building the Crystal Radio Poof-Slinky Kit (continued)
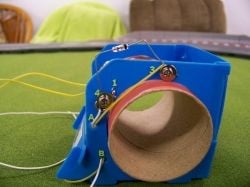
Once the tuning coil was wound, you had to place the coil in the blue plastic case. I found this case to be extremely flimsy and hard to keep together. The next step was to wire the detector diode, which is used in the place of a natural crystal, the ear-phone, and the tuning mechanism in place. The kit used little nuts and bolts to secure these items and it was difficult to keep the parts in place while you were tightening things down.
Time to test the Crystal Radio!
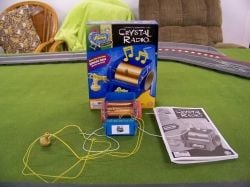
You need a good antenna in order to pick up stations on a crystal radio, in my basement I found the perfect antenna, the copper steam pipes used to heat my "vintage" house. The steam pipes are completely insulated from earth ground which is exactly what you want. I attached the antenna lead of my crystal radio to the steam pipe of my house using an alligator clip and started fiddling with the tuning mechanism. After playing with the tuning mechanism for a half hour I was getting frustrated, I didn't even picking up radio static!
The problem
I examined my crystal radio for any loose connections and compared the wiring to that of the schematic in the instructions, everything look good. After closer inspection I found the problem, the detector diode provided, which is used in the place of a crystal, was that of a garden variety silicon switching diode. The one provided looked like a 1n914. The problem is that a standard silicon diode is not sensitive enough to detect the un-amplified audio signal of a crystal radio.
The solution
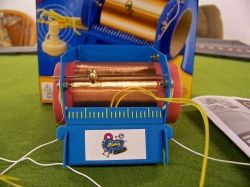
I decided to replace the silicon diode provided with a more sensitive 1n34 germanium diode. Once the detector diode was replaced I re-attached the antenna lead to the steam pipes of my house and was immediately able to hear radio static. After a couple minutes I was able to tune in three radio stations, one from Canada ( I live close to Lake Erie and Canada is right across the "pond"). The crystal radio worked great! The picture on the side shows the replacement 1n34 diode installed. The standard 1n914 diode typically has a red body.
Source for 1N34 Germanium Diodes:
- XTAL Set Society
I purchased my 1N34 Germanium diode used for this project from the XTAL Set Society.

Making the Crystal Radio "pretty"
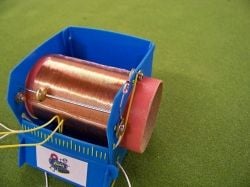
I was never happy with the blue plastic enclosure provided with the Poof-Slinky Crystal Radio Kit so I picked up a wood mounting plaque from our local craft store, sanded it and put a coat of clear urethane on it and mounting the crystal radio hardware. Now my crystal radio looks more vintage and still works like a charm.
Conclusion
It is better to start with a crystal radio kit if you have never built a crystal radio before. You may have to make some modifications to the crystal radio kit like I did before you get it to operate correctly. Most crystal radio kit enclosures are not really nostalgic looking so once you get your radio to work you might want to mount it on a handsome piece of wood to make your crystal radio look more "vintage".