FFXII: How to Beat Yiazmat

Yiazmat: The Neverending Battle
Good grief, won't Yiazmat ever die?!!
After tweaking my gambits and weapons, I seem to be chewing away at YIazmat quickly and efficiently. My characters aren't getting KO'ed too often.
So before I forget what I did, lemme record my gambits, weapons and strategy for killing FFXII's Ultimate Mark, Yiazmat.
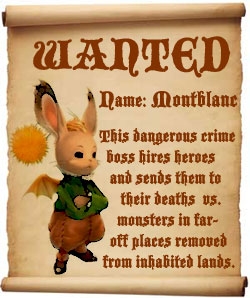
Although I still think tossing Montblanc over the balcony to be torn to pieces by irate members of Clan Centurio might be a quicker and more painless solution than going off to slay a dragon with FIFTY MILLION HIT POINTS. Gah.
Above: Montblanc from Final Fantasy XII. Drat him.
Yiazmat's Relevant Stats
Ouch, Argh, and Are They Kidding?!
- HP: 50,112,254 Immune: All Status Effects
- Elements: Weak to Dark. Absorbs Holy. Half damage for rest.
- Technick Vulnerabilities: Expose, Shear
Abilities
- White Breath- Area of Effect - Ice damage, chance of Stop
- Stone Breath - AoE - chance of Petrify
- Regular attack - physical + chance of Death
- Rake - fast, 2x damage
- Cyclone - Wind damage, chance of Sap
- Deathstrike - Instant Death, single target, 100% unless target has Shell
- Growing Threat - Doubles Level
- Reflectga - Uses on Party
WARNING!
Unlike other monsters, Yiazmat won't recover HP when you leave the area entirely. So you can go back to a crystal and save, head to town to restock supplies, or head to the Whitecap for cards and a beer.
But if you back away from battle into the corridor or don't attack him for about 20 seconds or so, and you haven't moved into a new "zone" on the map (i.e. crossed a line of floating, glowing blue lights), he will start regenerating all his HP very rapidly!
...as I found out the hard way.
Top Tip for Surviving Yiazmat Battle:
Break out the knitting.(Or, in my case, laptop.)
How to Kill Yiazmat in Less Than 3 Days: General Strategies
Keeping Your Characters Alive (Mostly) and Your Sanity Intact
This battle takes forever, so you gotta CONSERVE ALL RESOURCES, especially MP. That means no Espers.
My party is all level 80-81.
Division of Labor:
- Fighter: Vaan/Basch, Weapon: Masamune, Role: Hit hard and often
- Healer: Ashe/Penelo, Weapon: Orochi/Ninja (weapon with Dark), Role: Heal and recharge MP
- Jack of All Trades: Fran/Balthier, Weapon: Tournesol/strongest weapon* Role: Support the others
*Avoid Excalibur; Yiazmat absorbs Holy.
Tactics:
- You'll need a full pack of Chronos Tears, Remedies, Gold Needles, Phoenix Downs.
- Now's the time to use those Elixirs, Hi-Ethers and Megalixirs you were saving for a tough battle.
- Be ready to switch gambits when you run out of one of the above.
- Lower Yiazmat's defenses with Expose for a couple bars at start.
- ALWAYS have someone attacking. Yiazmat doesn't do Deathstrike very often while he's being hit.
- Keep characters bufffed with Shell, Haste, Protect. Add Faith and Bravery when possible, keeping in mind #2.
- Try to stagger buff spells so you're not having to do a bunch at once. When all 3 characters are attacking, that's a breather moment -- cast one buff.
- Ignore the traps. They're just needles, 20-30 HP damange.
- Once Yiazmat turns red and damage is capped at 6999, discontinue Bravery buff.
- If everyone's keeping up, don't worry. But if you start running into trouble, move a fallen character(s) to the back in the Party Menu, turn OFF the Bravery and Faith gambits, bring in replacements, get things under control, have healer use Arise + L1 to target fallen member, bring fallen member back in to be re-buffed. That way backups are always buffed, and you never have two people effectively out of action (one KO, the other reviving the KO).
- If you're in trouble, run back down the stairs and into the next room. Yiazmat will not regenerate HP while you're offscreen. Don't wait in the corridor -- he could COMPLETELY RENEW (I found out the hard way).
See below for my Yiazmat Battle Gambit Set-Up.
Tried and discarded the following tactics/spells/tecknicks:
- Decoy didn't help much. At first I used good ol' Basch as a lure, but MP conservation quickly became my top priority.
- At first I was having everyone cast Bubble and keep Cat-Eared Hood, Genji Gloves and Battle Harness on my healer, jack-of-all-trades, and tank/warrior respectively.
- Darkga did some decent damage at the beginning, but it was taking too many MP.
... and on second thought, it's too late to save your sanity. Why are you wasting time on this battle?
Yiazmat Battle: My Gambits - So You Can Get Some Knitting Done
/ means "switch gambit to fallback" when an item runs out.
For Expose, I chewed through about 2 bars on Yiazmat's HP to the point where my healer seemed to be missing more than hitting, then swapped her to attack. Which she needed, because it was time to start recharging HP using her handy-dandy Warmage license.
NOTE: Just to make sure, I turn off the "Renew" Gambit towards the end. I've read that Yiazmat eventually throws Reflect on the party. Just once...but imagine the horror if you were in the act of casting Renew and it bounced off and healed Yiazmat to 100%.
FIGHTER GAMBIT SETUP
| ||
|---|---|---|
1
| Ally: Status = Stop
| Chronos Tear / Remedy
|
2
| Ally: Status = KO
| Arise
|
3
| Ally: Status = Reflect
| Dispelga
|
4
| Ally: Sap
| Regen
|
5
| Ally: HP < 30%
| Curaja
|
6
| Foe: Status = Protect
| Dispel
|
7
| Self: MP < 10%
| Charge
|
8
| Foe: Lowest HP
| Attack
|
HEALER GAMBIT SETUP
| ||
|---|---|---|
1
| Ally: Status = KO
| Phoenix Down / Raise
|
2
| Ally: Status = Reflect
| Dispel
|
3
| Ally: Status = Stop
| Chronos Tear / Remedy
|
4
| Ally: HP < 40%
| Curaja
|
5
| Ally: Status = Sap
| Regen
|
6
| Ally: HP < 40%
| Renew
|
7
| Ally: Status = Petrify
| Gold Needle / Stona
|
8
| Ally: Any
| Protectga
|
9
| Foe: Status = Protect
| Dispel
|
10
| Self
| Self: Faith
|
11
| Self: MP < 10%
| Hi-Ether / Charge
|
12
| Foe: Lowest HP
| Attack
|
JACK OF ALL TRADES
| ||
|---|---|---|
1
| Ally: Status = KO
| Arise
|
2
| Ally: Status = Stop
| Chronos Tear / Remedy
|
3
| Ally: Status = Reflect
| Dispelga
|
4
| Ally: Any
| Shellga
|
5
| Ally: HP < 30%
| Curaja
|
6
| Ally: any
| Hastega
|
7
| Ally: any
| Bravery
|
8
| Ally: Status = Sap
| Regen
|
9
| Ally: Status = Petrify
| Gold Needle / Stona
|
10
| Foe: Status = Protect
| Dispel
|
11
| Self: MP < 10%
| Charge
|
12
| Foe: lowest HP
| Attack
|
FFXII Trivia: Etymololgy of Yiazmat's Name
According to the Final Fantasy Wikia, "Yiazmat" comes from FFXII directory Yasumi Matsuno's nickname, Yazmat, which is the name of the monster in the Japanese version of the game. The i was probably added to mimic the frequent Final Fantasy boss Tiamat.
That Wikia entry has some interesting rumors on why the director was "awarded" with this particular "Farewell to a Legend." My hunch is that the battle is a metaphor for what he put the development team through.
© 2009 auronlu